Did you find this guide helpful?
Some test text!
Web
Guides
Web / Guides
How to integrate WebViewer into a Mendix PDF Viewer
This guide will help you integrate a free trial of WebViewer into Mendix application on the browser.
Prerequisites
Prior to starting, you should have already installed Node and npm.
Get your Apryse trial key.
Apryse collects some data regarding your usage of the SDK for product improvement.
If you wish to continue without data collection, contact us and we will email you a no-tracking trial key for you to get started.
1. Download WebViewer Mendix Web Widget
Download WebViewer Mendix Web Widget and extract it.
2. Create a new or use an existing Mendix App
Open Mendix Studio Pro and create a new project by selecting File > New Project from the top menu bar, and choose the Blank app.
After creating a new app, or inside of the existing app navigate to the app's directory and create a new folder called CustomWidgets/webViewer and place the extracted contents from WebViewer Mendix Web Widget.
By default, Mendix projects are stored in:
C:\Users\$your_username\Documents\Mendix\In terminal or command line navigate to CustomWidgets/webViewer and run:
npm installAfter the command completes, run:
npm run devThis will make a build of the Mendix Web Widget with the latest version of WebViewer, and it will be complete when you see something like this in your terminal:
[08:57:07] Finished 'bound runWebpack' after 4.09 s
[08:57:07] Starting 'createMpkFile'...
[08:57:07] Finished 'createMpkFile' after 32 ms
[08:57:07] Starting 'copyToDeployment'...
Files generated in dist and ..\..\ folder
[08:57:07] Finished 'copyToDeployment' after 18 ms
Next, we must copy the static assets required for WebViewer to run. The files are located in CustomWidgets/webViewer/node_modules/@pdftron/webviewer/public and must be moved into a location that will be served and publicly accessible. In Mendix, we can place it into theme/resources. Create a new folder called lib and place the contents from node_modules/@pdftron/webviewer/public there.
theme/resources should have a directory structure like so:
/path/to/your/mendix/app/theme/resources
└───lib
    ├───core
    ├───ui
    └───ui-legacy
3. Place WebViewer into a Page
Access the
Domain Modelof the module where the viewer will be integrated, and create a newEntity.Right-click the newly created
Entity, clickAdd > Attribute. Leave everything as is, and ensure itsTypeis set toString.Next, open the page inside of your module.
Add a
Data viewwidget by dragging it from the Toolbox. If you do not have a theToolboxwindow open on the right, the bottom right corner of the window should have theToolboxtab as an option. Double-click the widget, and give it a data source microflow by selectingData source > Type > Microflow.In the microflow field, click the
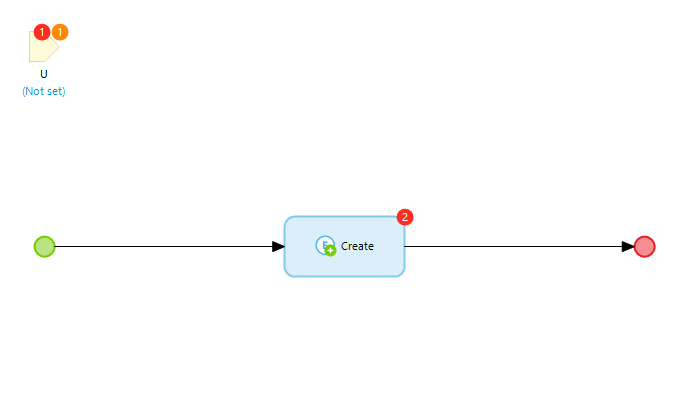
Selectbutton and pressNew.Open newly created microflow, delete the
parameterobject (the object that has hasUand(Not set)underneath) and dragCreate objectfrom the toolbox onto the arrow. Open the object by double-clicking on it and select the entity we created earlier.
Right-click the
Create Entityactivity, then clickSet $NewEntity as Return Value.Go back to the page you placed the
data view, and dragText boxintodata view. Open the textbox's properties, find theData sourcepanel, and change theAttribute(path) to the string attribute you created in Steps 1 and 2.Press F4, or from the top menu bar select
Project > Synchronize Project Directory.Go back to the page you placed the
data view, in theToolbar, underAdd-on widgetsyou should now seeWeb Viewer. Drag into thedata view. Right-click onWeb Viewerwidget and select Attribute by selecting Attribute string you have created.You can now run the app by clicking
Run Locallyat the top.
4. Connect Attribute to WebViewer
The WebViewer now loads inside of your page with the default file. Now let's connect the Attribute parameter to be accessible by the WebViewer. Attribute parameter can be used to pass a URL to open specific document.
Navigate to the WebViewer location inside of
App/CustomWidgets/webViewerand open it in your favourite code editor.Open WebViewer component available in
src/components/PDFViewer.tsx. Inside of it, you can see WebViewer constructor where you can pass various customization options and call APIs on the instance object. The Attribute that you have created in previous steps is passed inprops.value:
useEffect(() => {
    if (instance && props.value !== "") {
        instance.loadDocument(props.value);
    }
}, [props.value]);
In the code snippet, we are listening for any of the changes in props and then calling loadDocument API to load a new document. You can connect it with your existing flows or pass URLs from your file storage. Make sure you have the CORS configured in case you run into any errors.
You can now customize the widget by checking out other guides we have available. Perform your customizations inside of src/components/PDFViewer.tsx. Do not forget to run npm run dev within the Widget's console or terminal and update the files in your App by pressing F4, or from the top menu bar selecting Project > Synchronize Project Directory.
You can now checkout other guides like how to open your own documents or how to disable certain features .
Next step
Get the answers you need: Chat with us