Product:
Sample App - Generating invoices in Appian with WebViewer
This guide will guide you through the process of generating invoices in Appian using WebViewer by making an example application. This application will take some invoice data from an Appian data entity, and generate a PDF invoice using a template. The template will be an Office document with placeholders that will be replaced with the data from your data entity. This guide also assumes you have some basic knowledge of Appian, and working with the Appian Designer.
Preparing the template
Let us assume we have a business that sells PC parts called Business Corp, and we have the following invoice template:
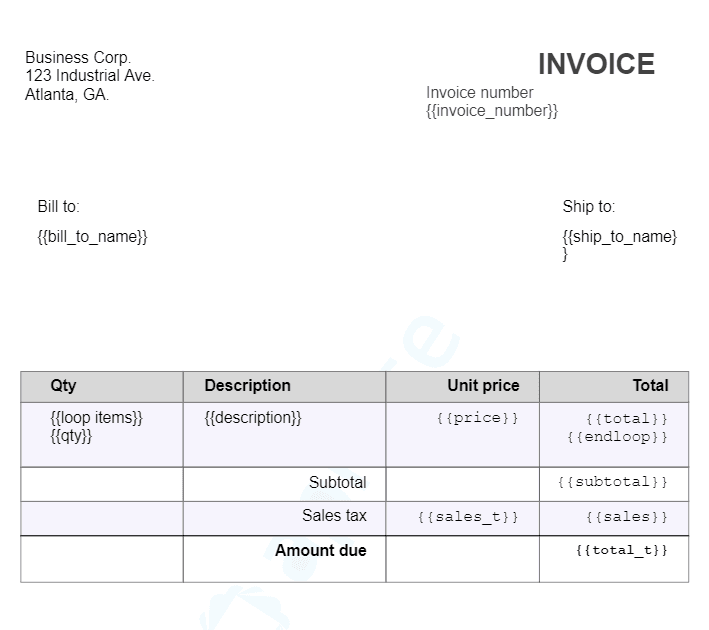
The fields we have in the following template are as follows:
Field | Description |
|---|---|
{{invoice_number}} | The invoice number. |
{{bill_to_name}} | The person we are billing to. |
{{ship_to_name}} | The person we are shipping to. |
{{loop items}} | The |
{{qty}} | The quantity of a line item in the invoice. |
{{description}} | The description of a line item in the invoice. |
{{price}} | The unit price of a line item in the invoice. |
{{total}} | The total price of a line item in the invoice. |
{{endloop}} | The |
{{subtotal}} | The subtotal of the invoice. |
{{sales_t}} | The tax of the invoice. |
{{sales}} | The total tax of the invoice. |
{{total_t}} | The total of the invoice including tax. |
For the totals in the invoice, we will be storing them in our data entity, but you could also opt to dynamically calculate them in Appian with an expression.
Setting up the Appian application
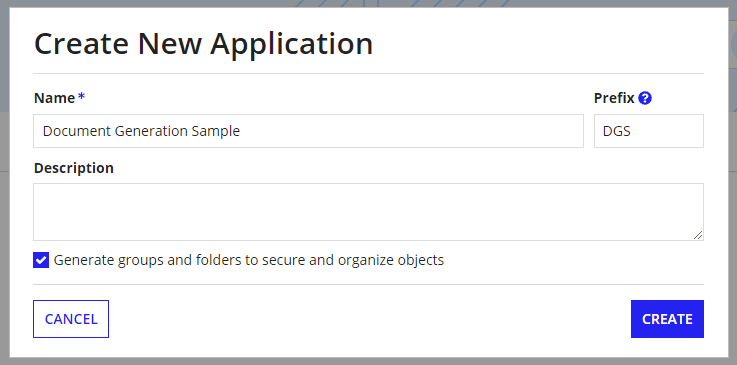
To start off in Appian, we will need an application that will allow us to view these invoices. Thus, we will start by creating one called Document Generation Sample, however, you can name this whatever you want or even use an existing application.

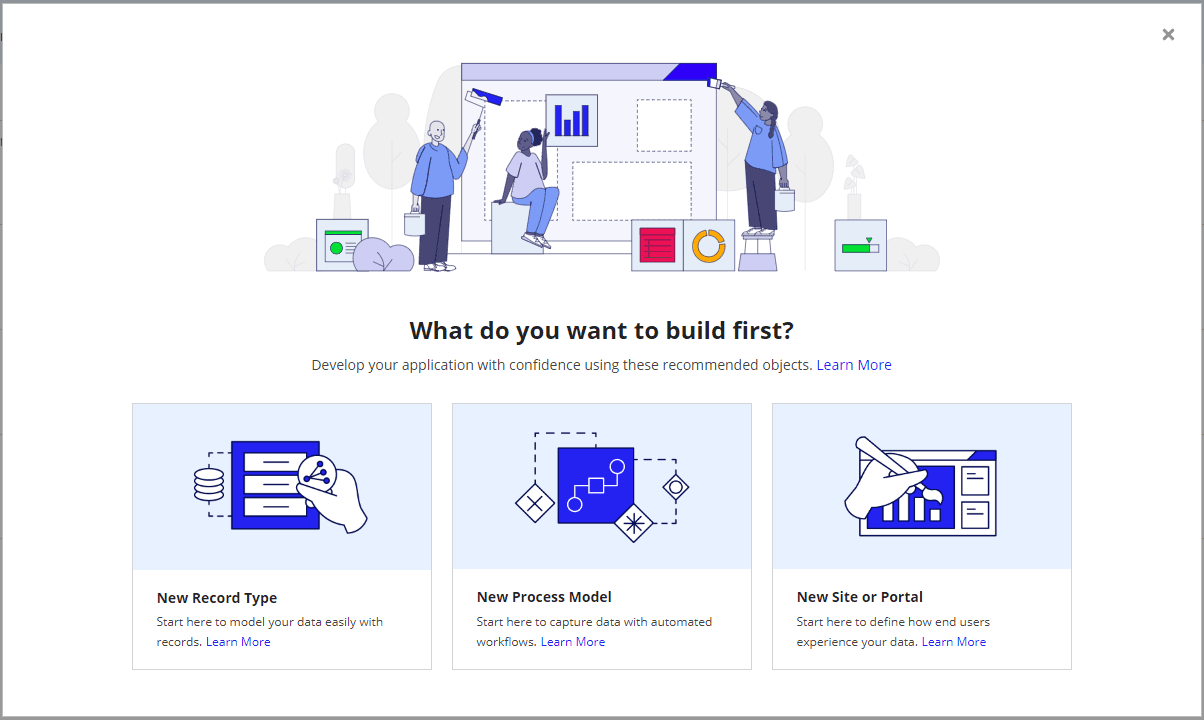
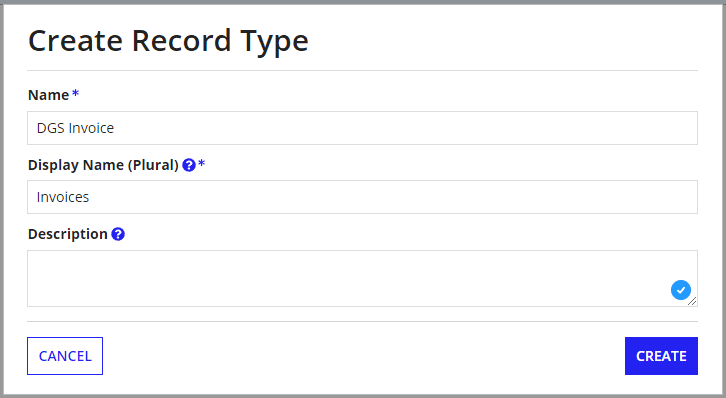
Creating the data entities
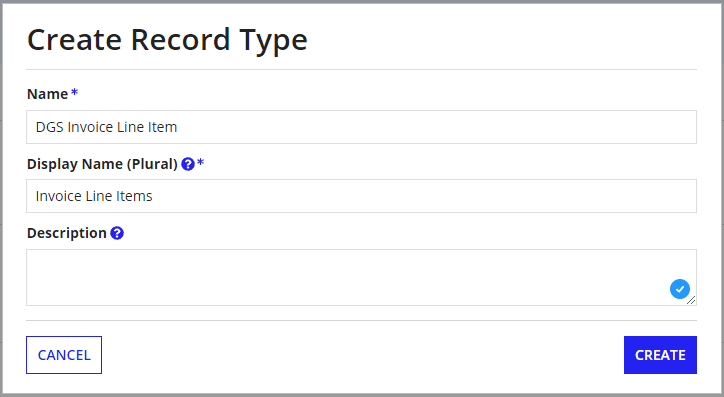
Once the app is created, we will add data entities or a record type to our application. We will need two data entities, one for the invoice, and one for the line items. We will call them Invoice, and Invoice Line Item respectively.
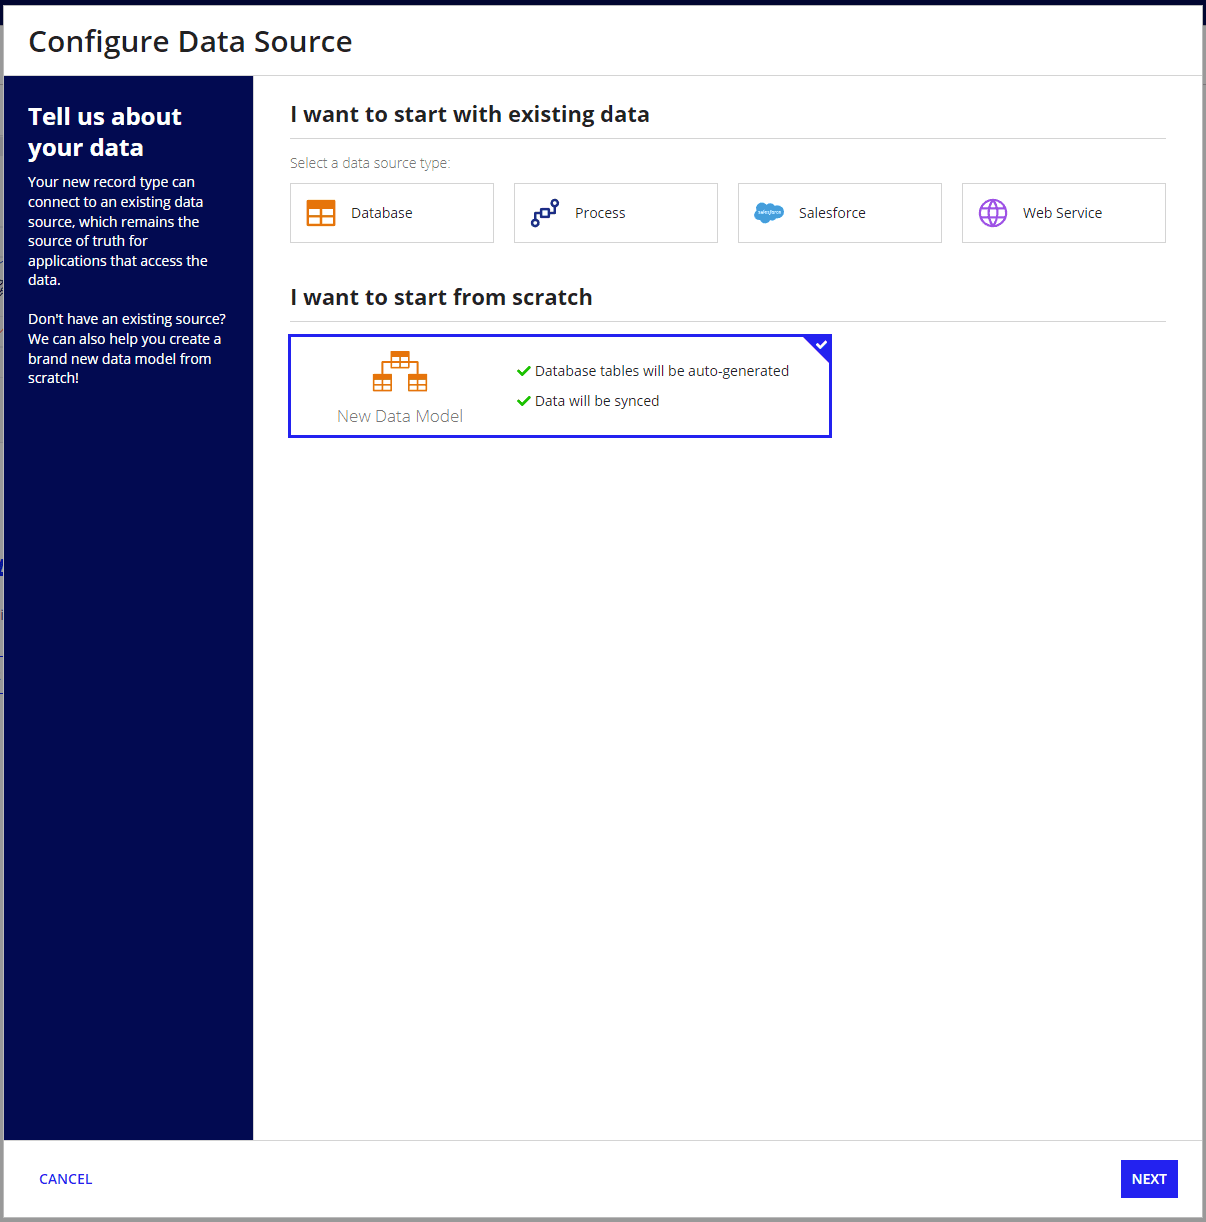
For this guide, we will create a new database table from scratch. You could also modify an existing table if you have one, but do not forget to update your data types, and data stores in the Appian Designer.
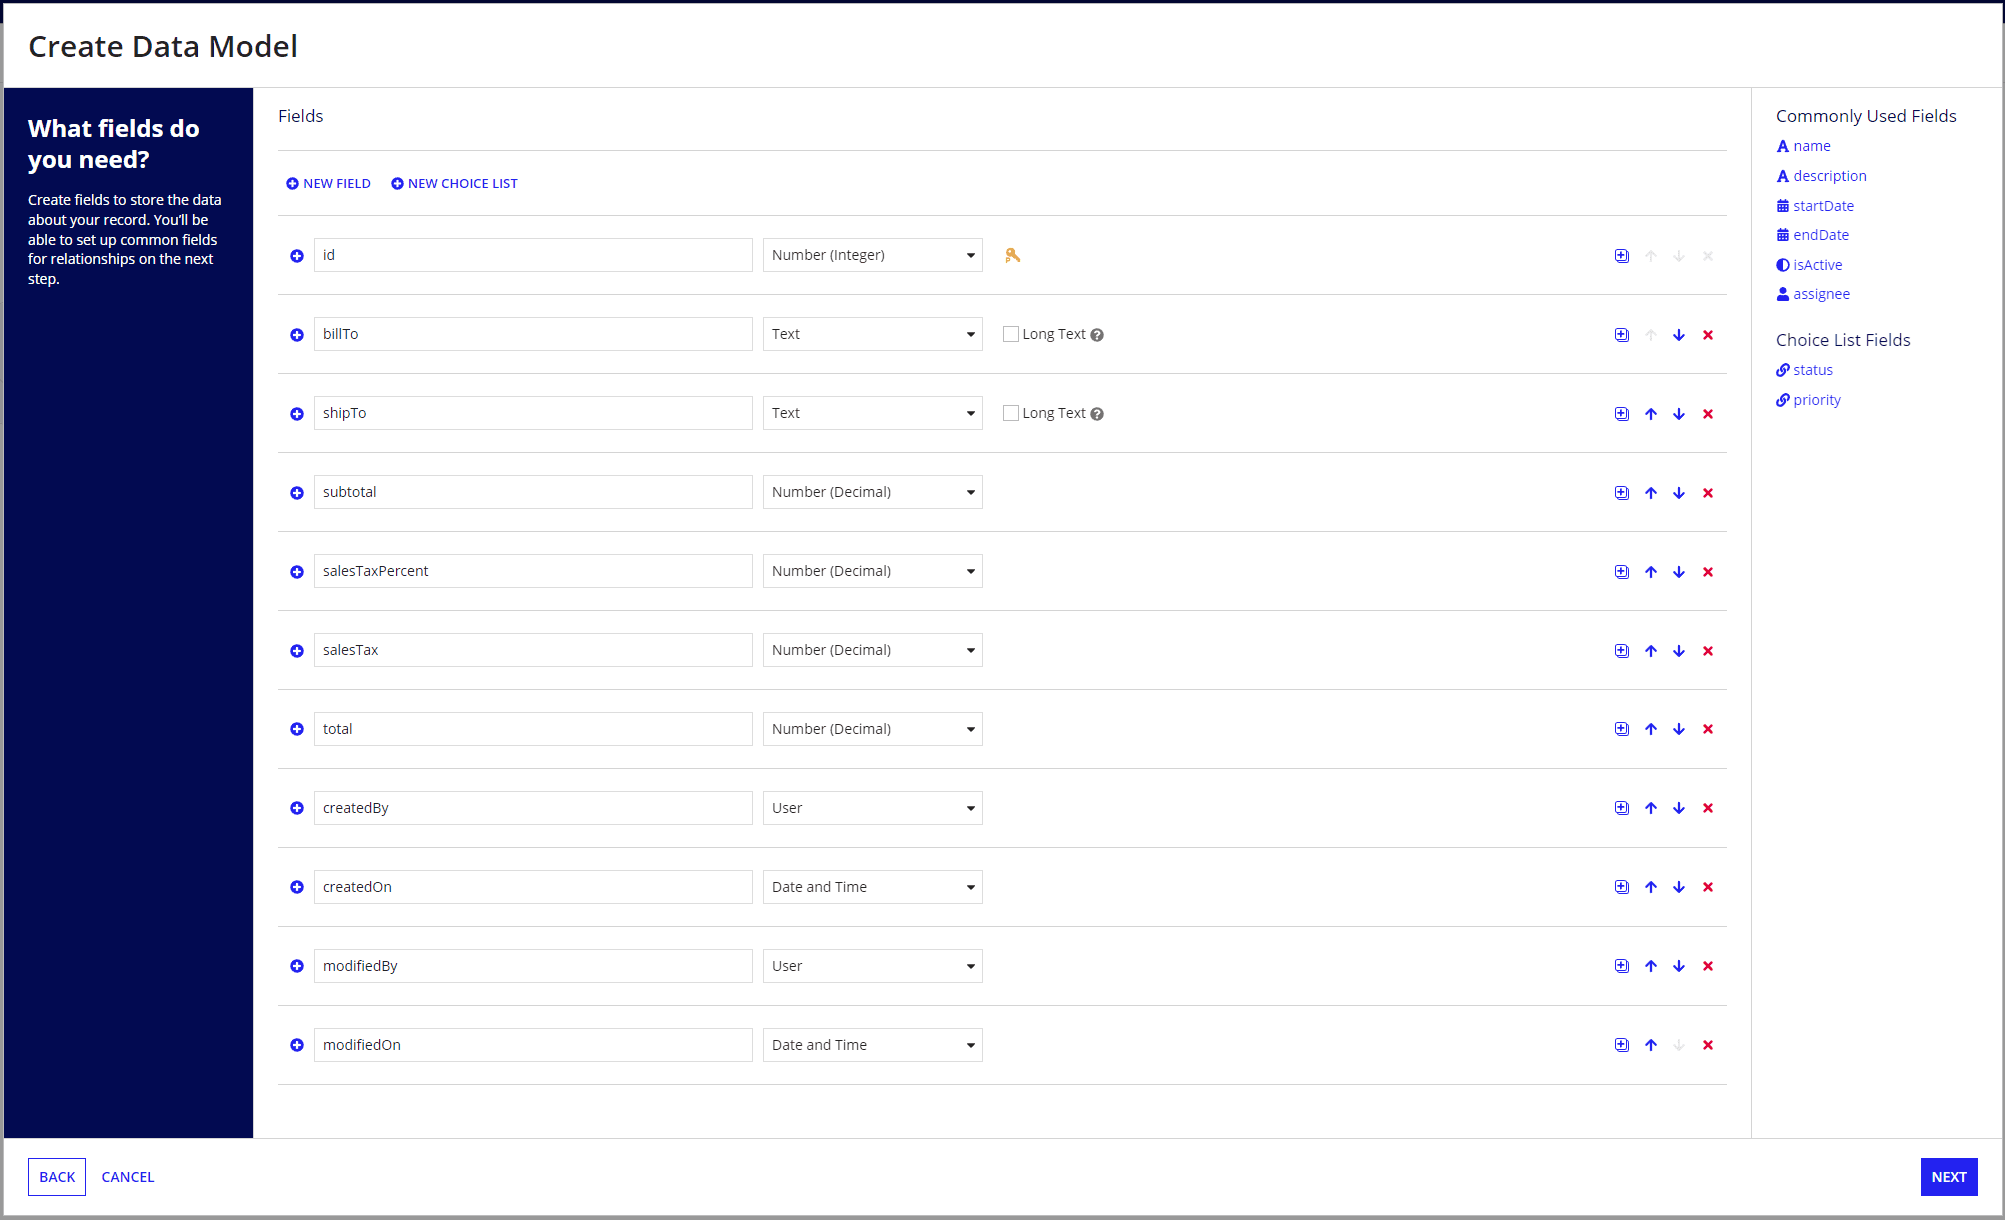
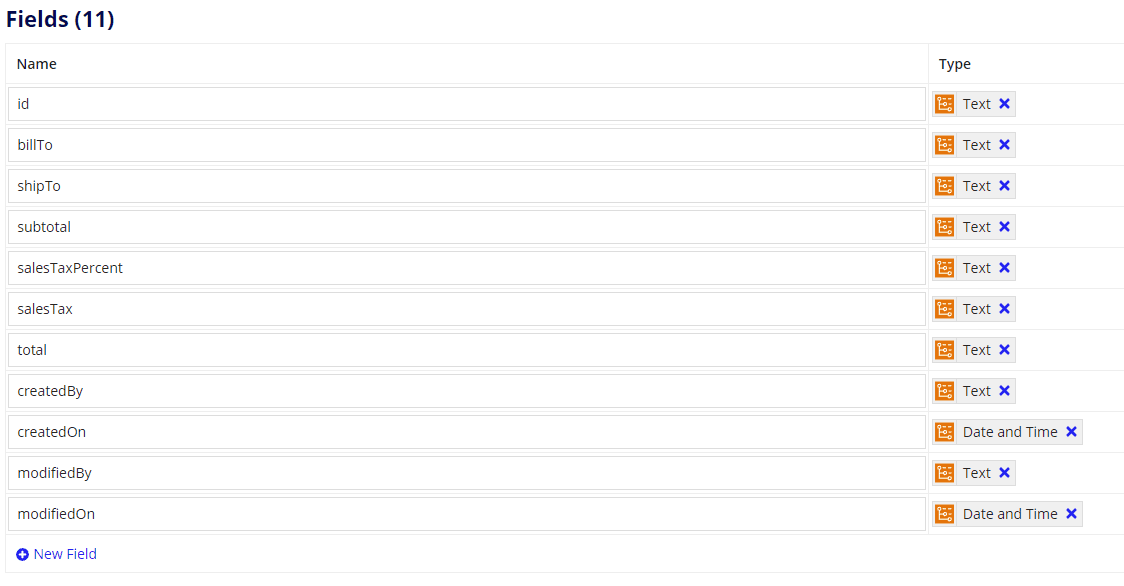
We will then add 6 fields to our table at the invoice level for the data found on the invoice. Feel free to name them however you like as we can map them later as necessary. You can optionally keep the predefined user, and date fields if you would like.
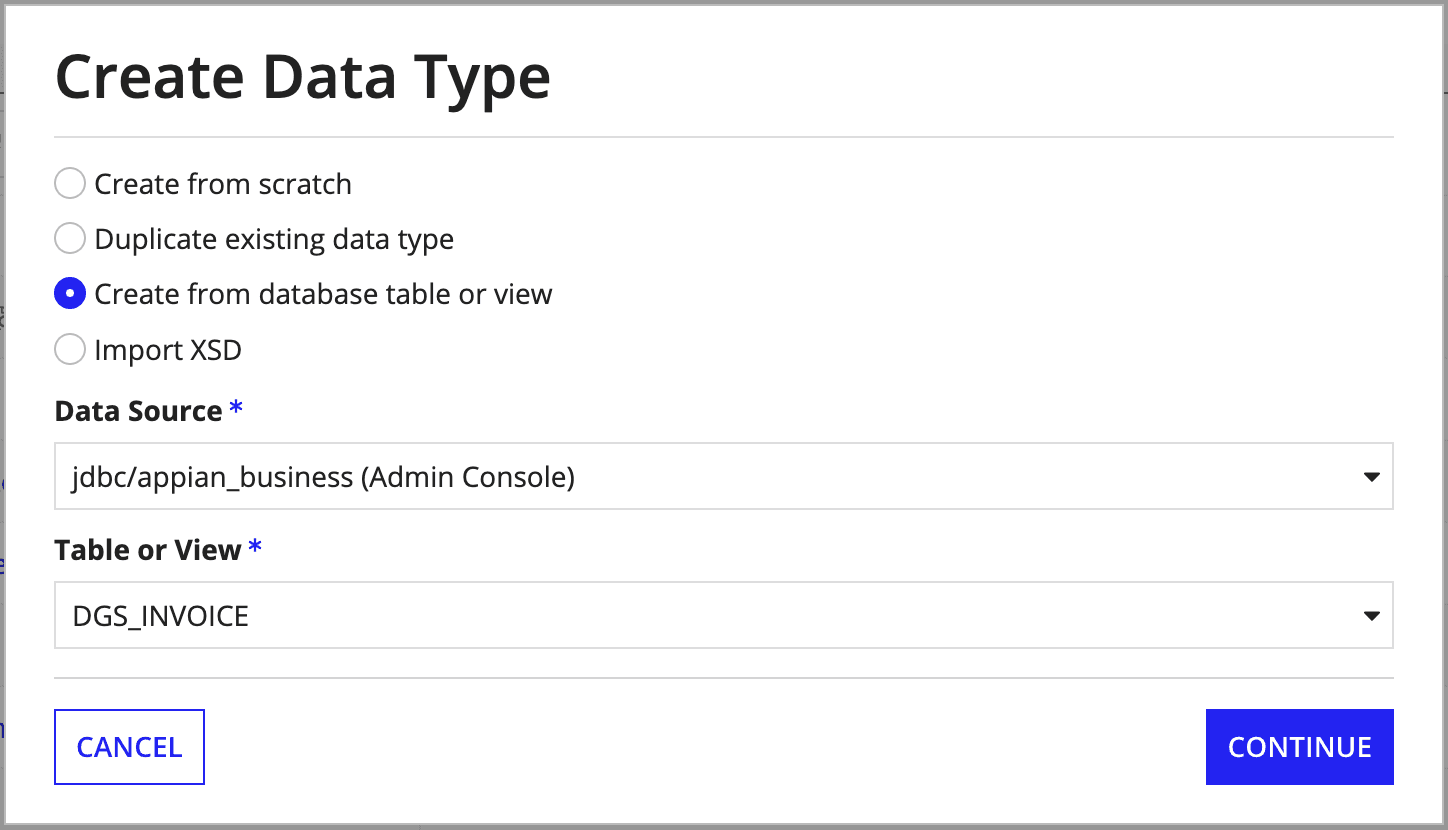
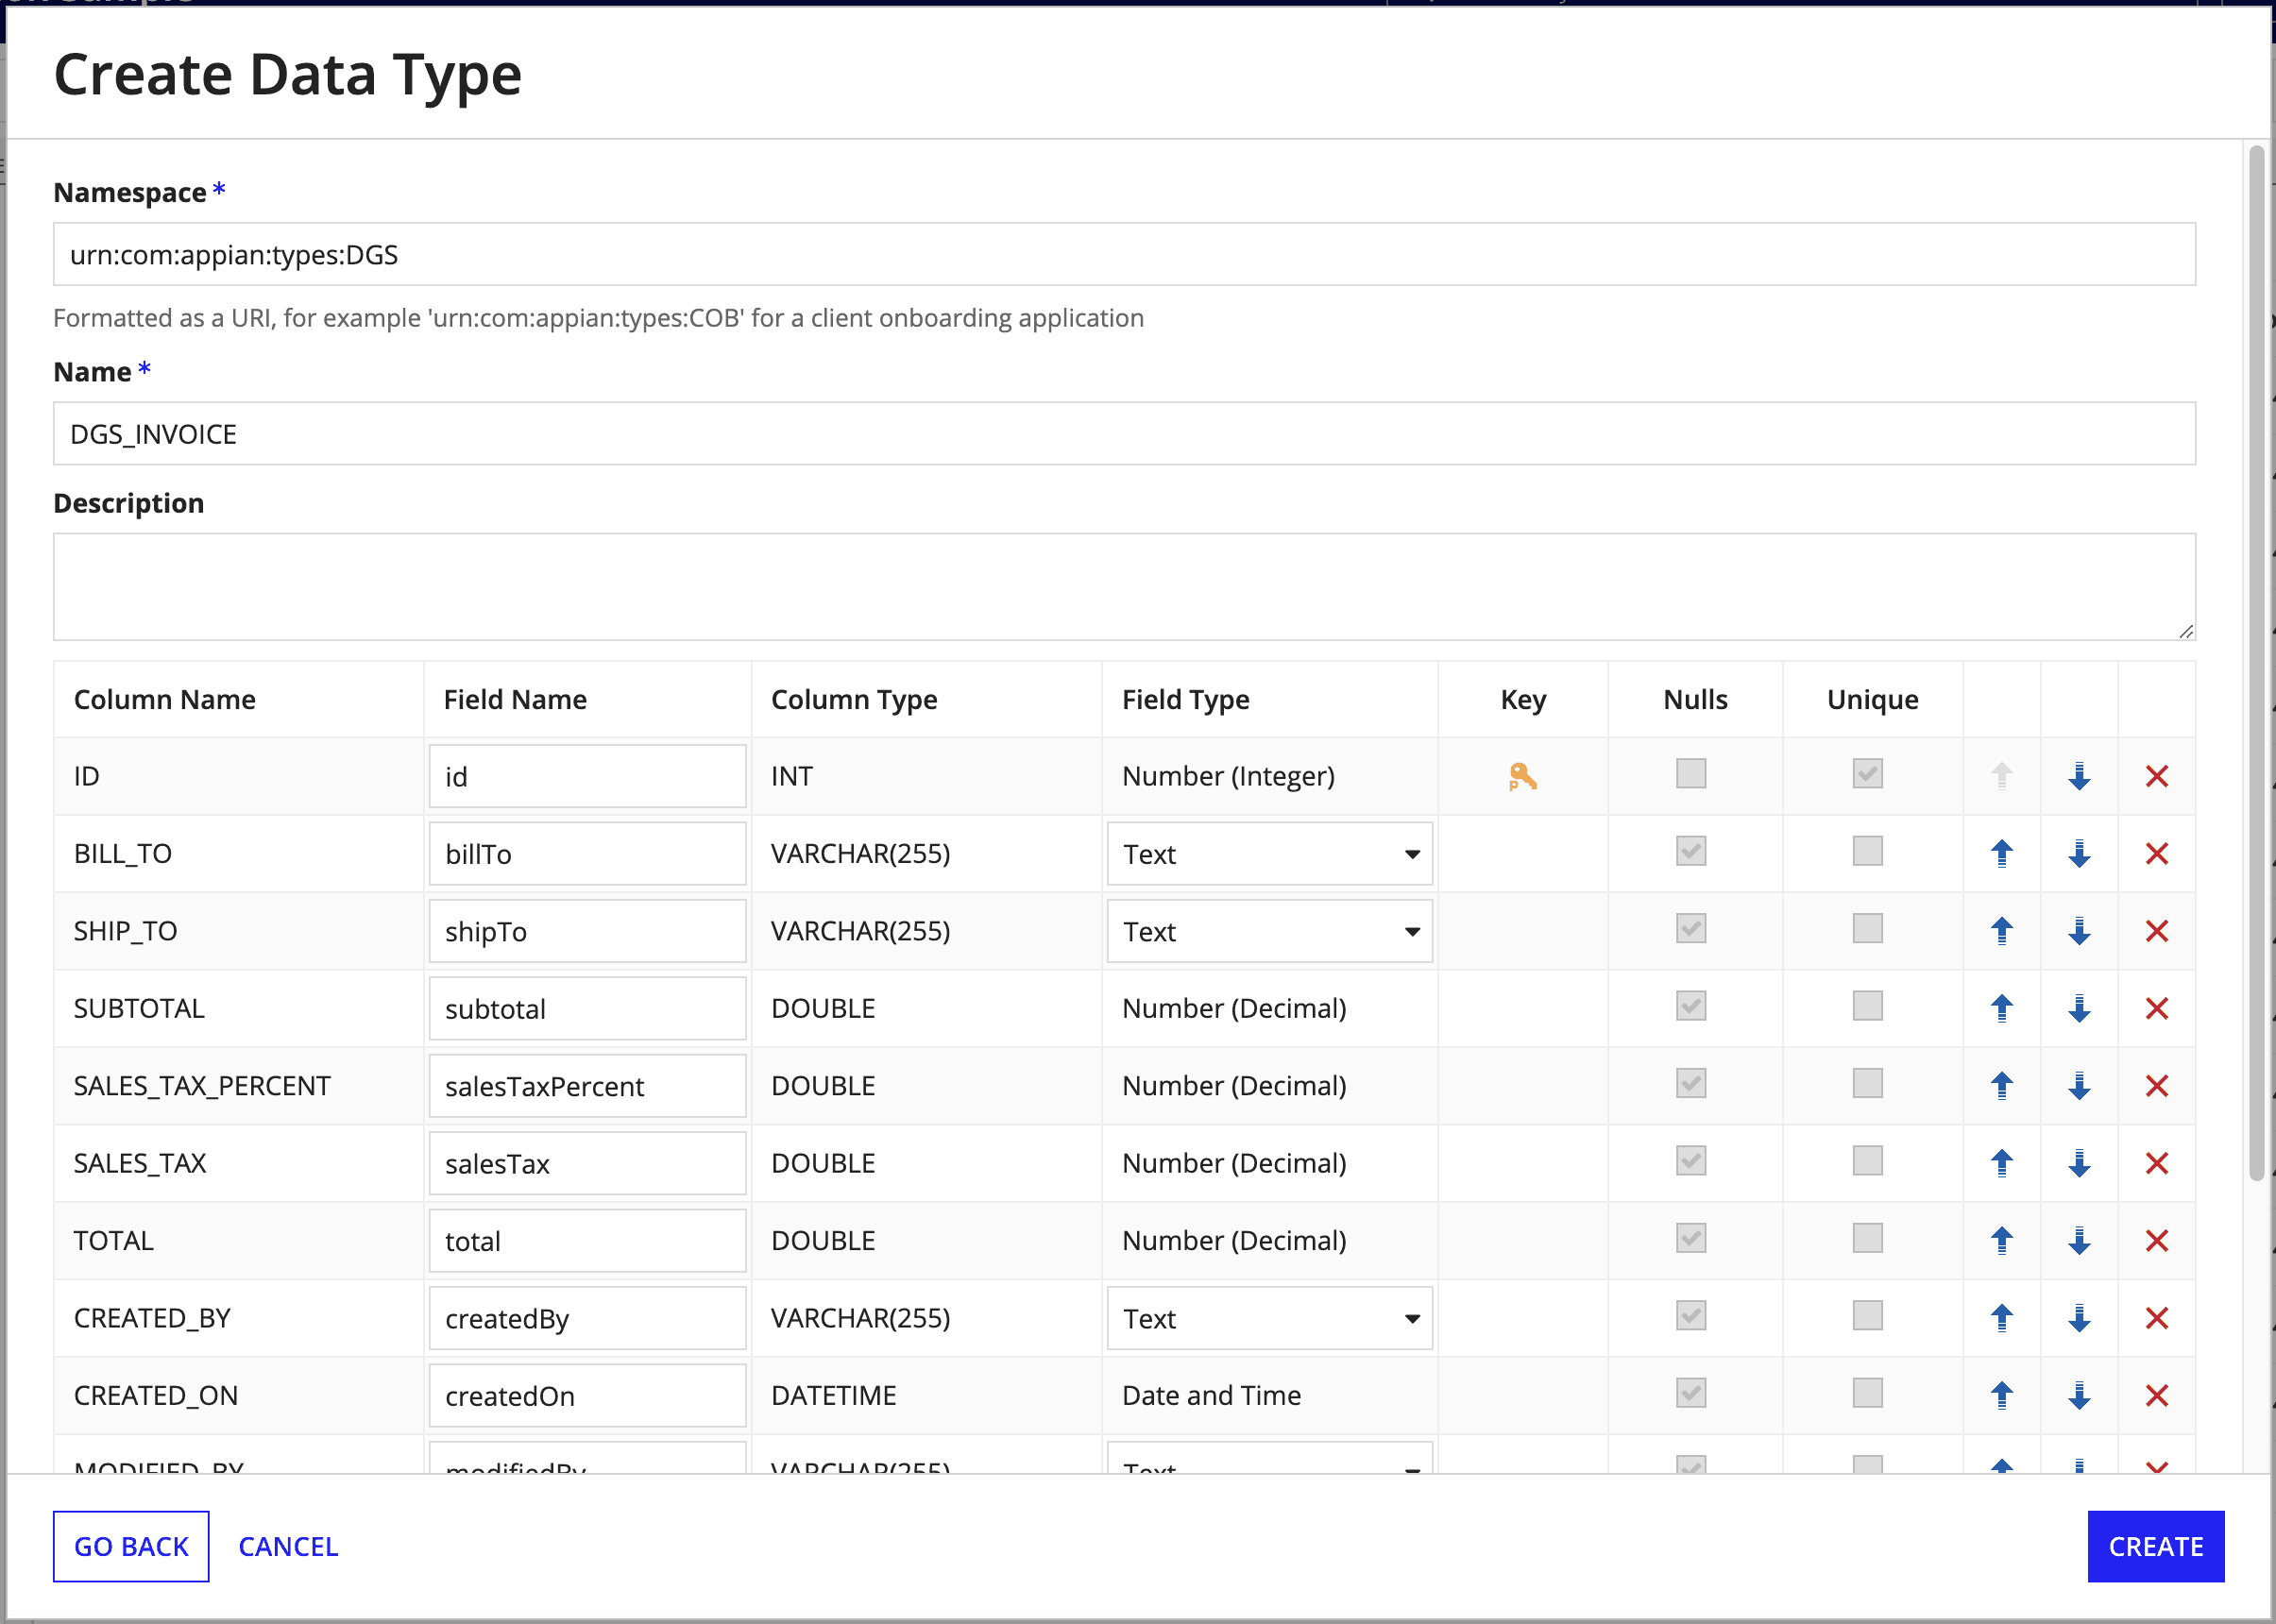
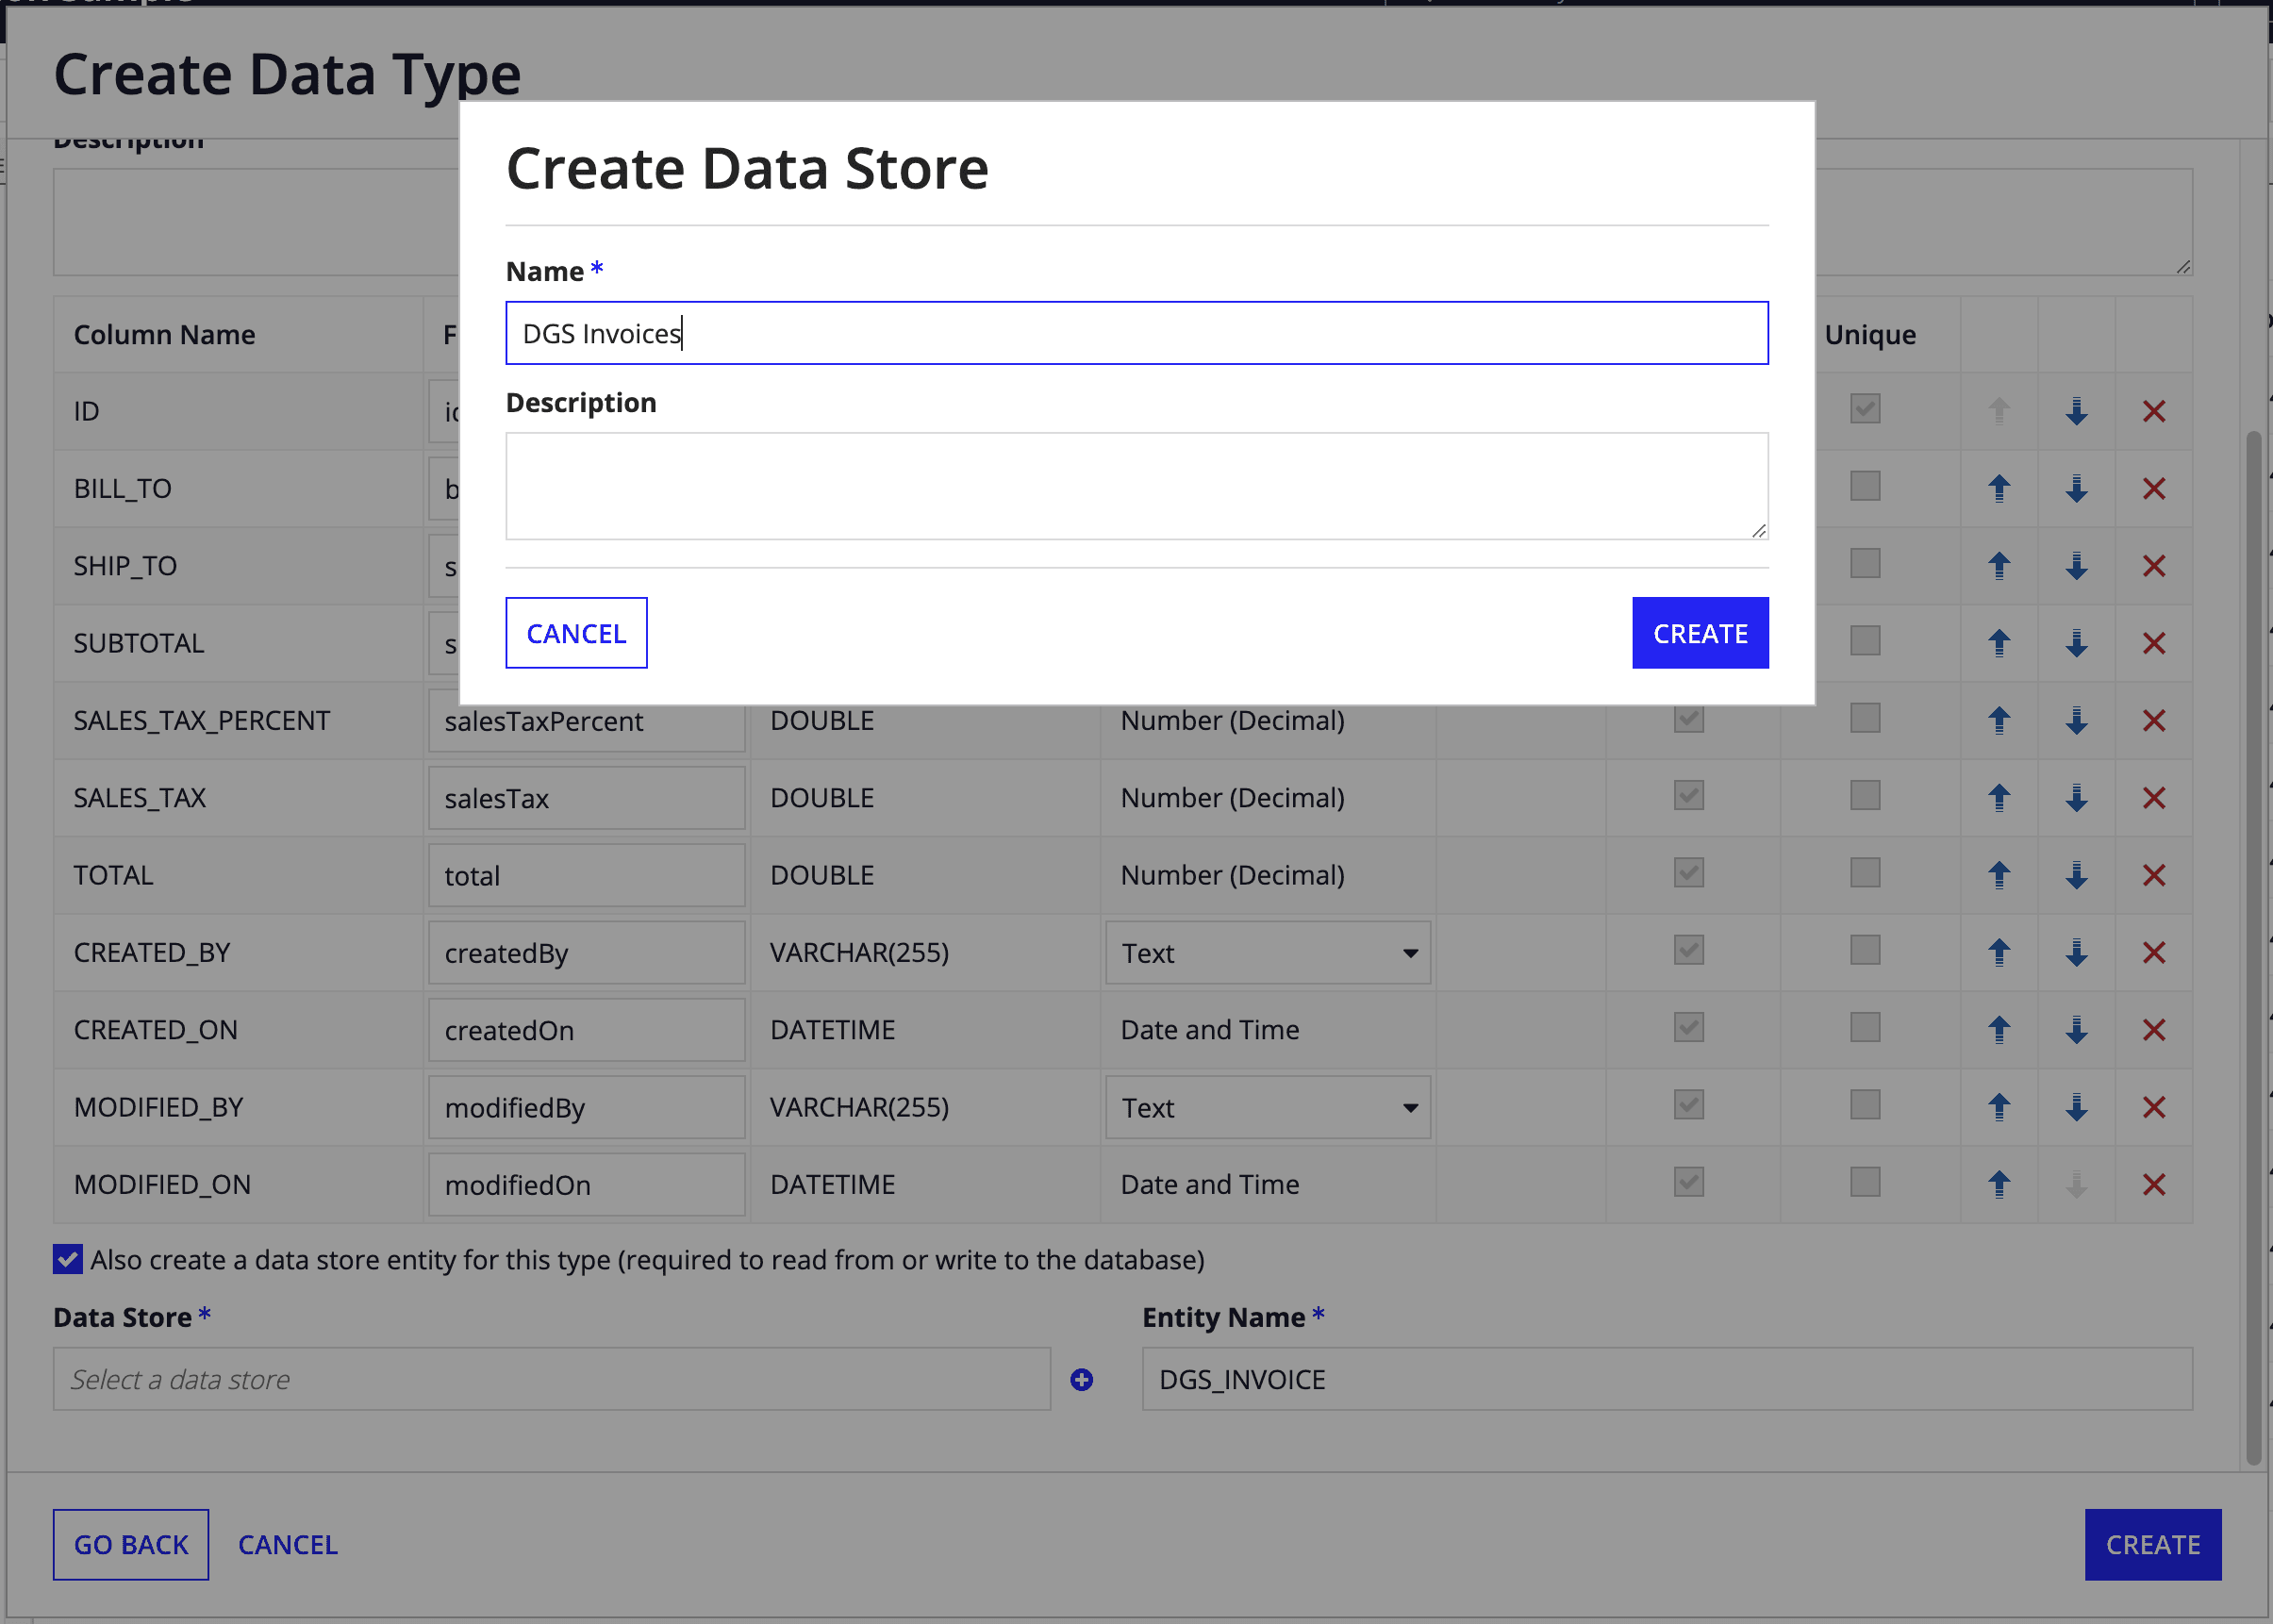
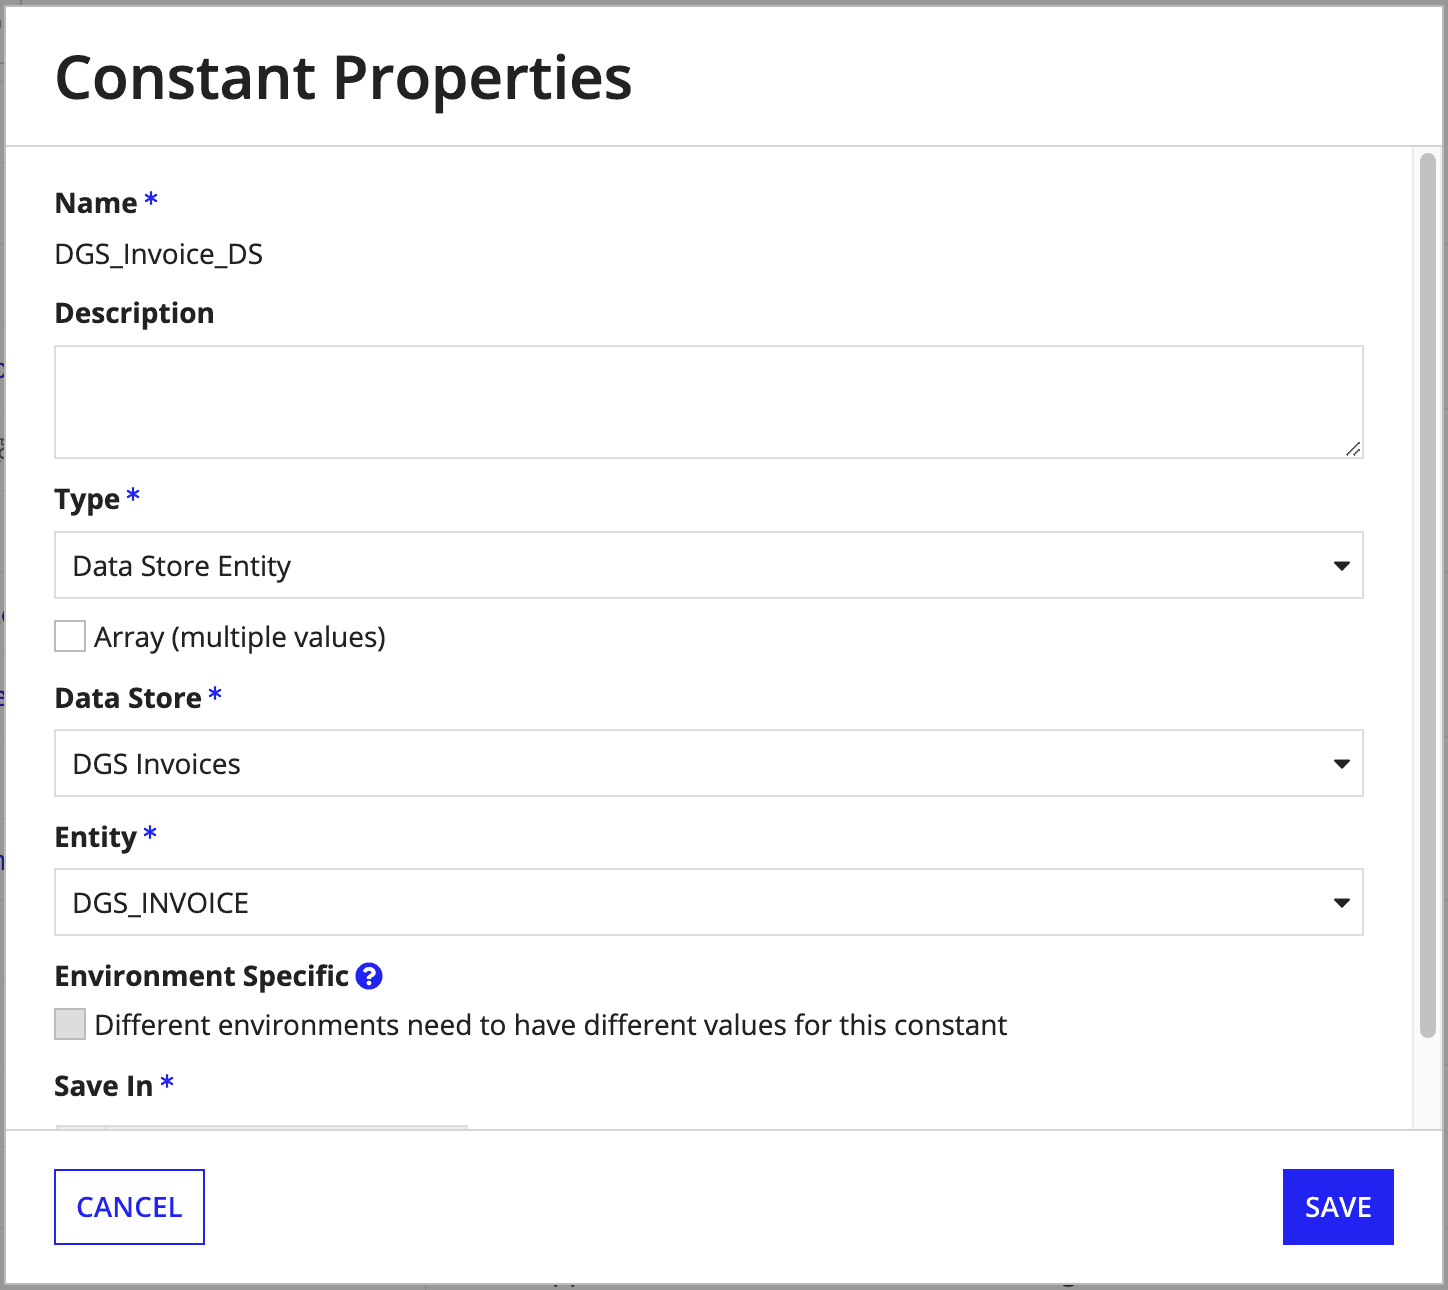
Finally, after a few more steps, we can save our Invoice entity. We can then return to the Appian Designer to create a data type, and data store for this entity. Fortunately, this can be done together. For now, we will name the data type DGS_INVOICE. Afterwards, we will need a constant for the data store to use in an expression. We will name the constant DGS_Invoices_DS, but feel free to name it however you like.
We will then need to return to the Appian Designer, and repeat the steps to create a new entity for the line items. We will call the new data entity Invoice Line Item. We will also add the line item fields to the data entity.
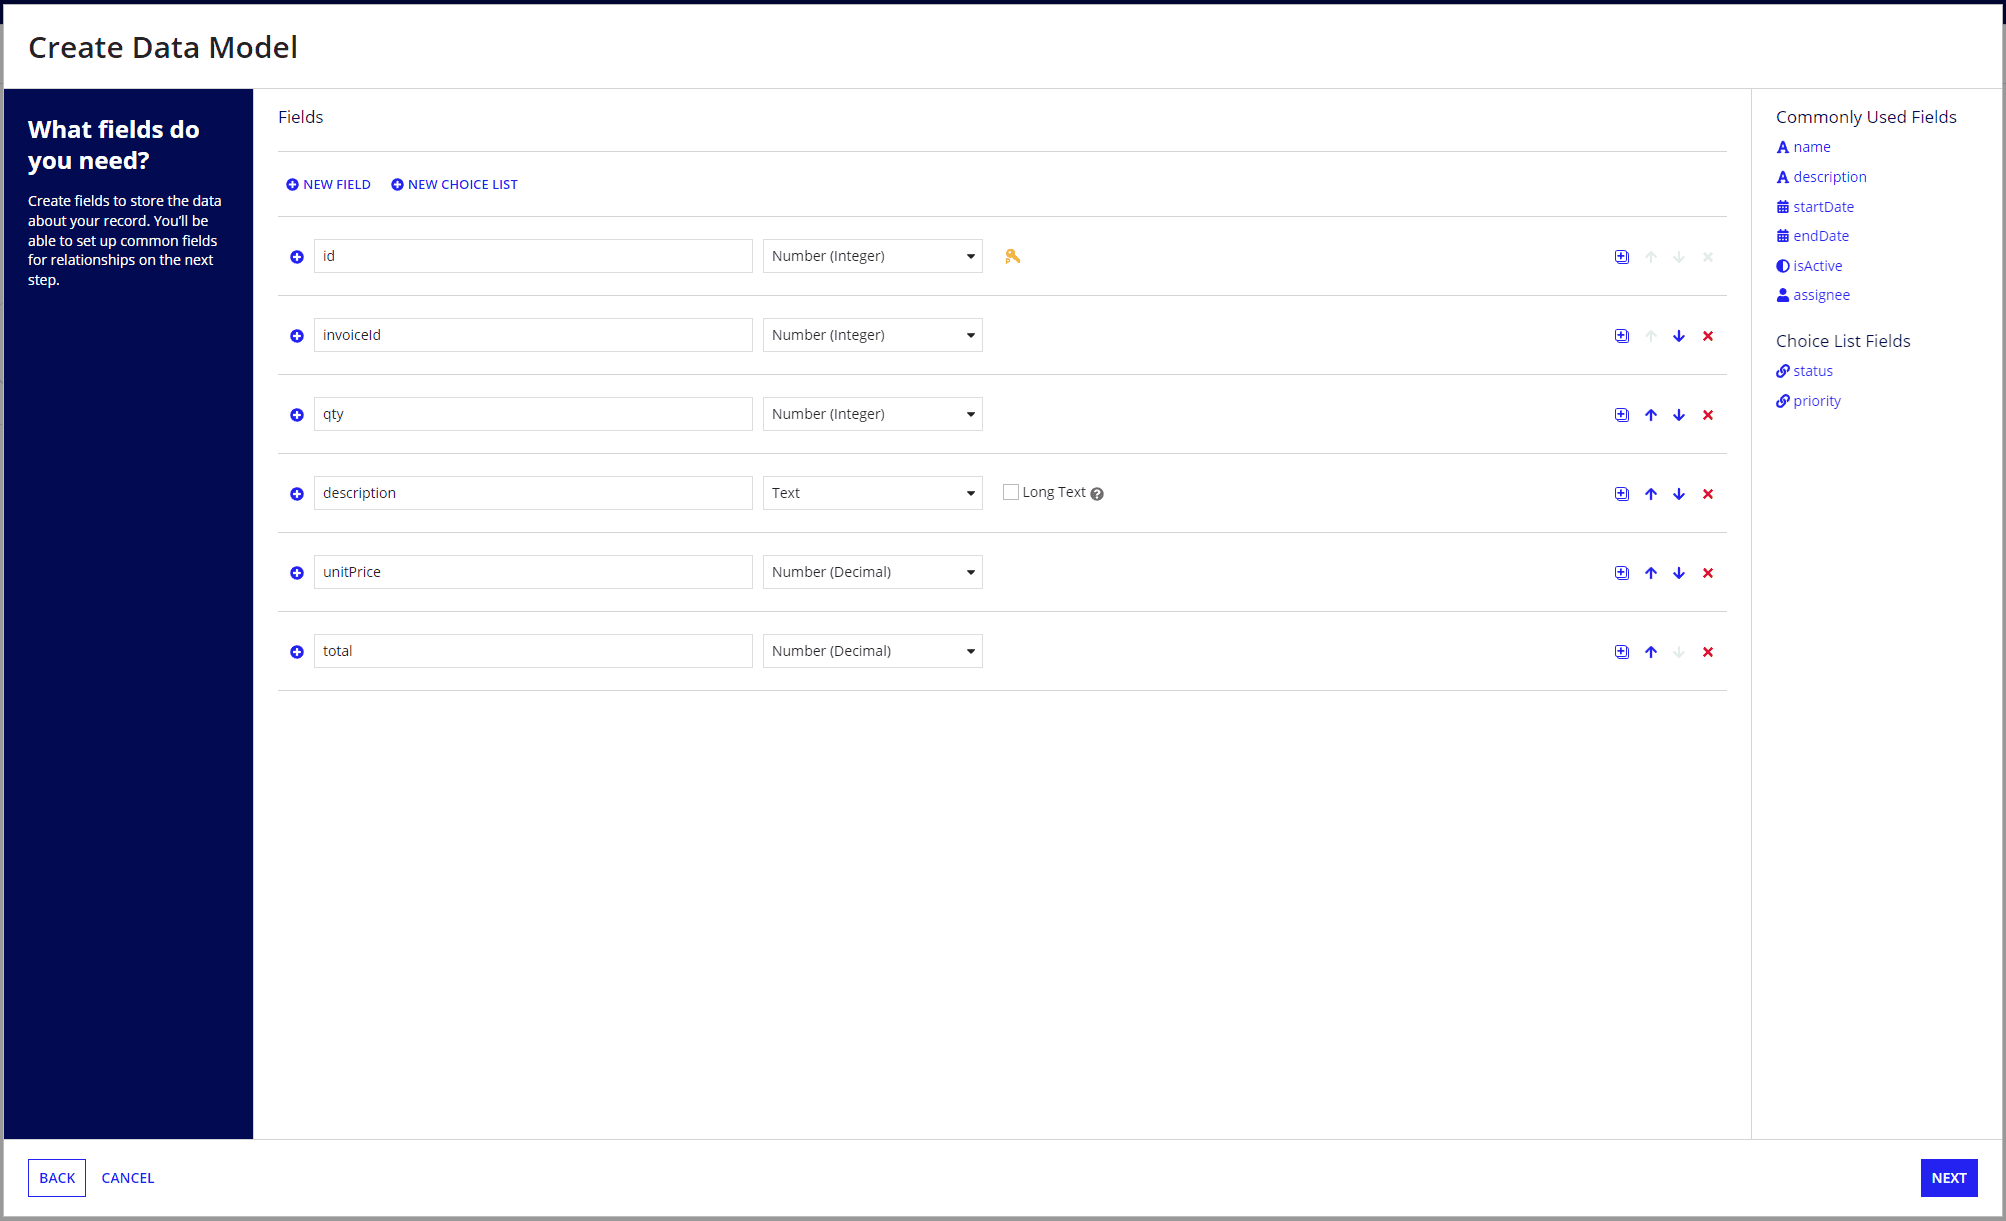
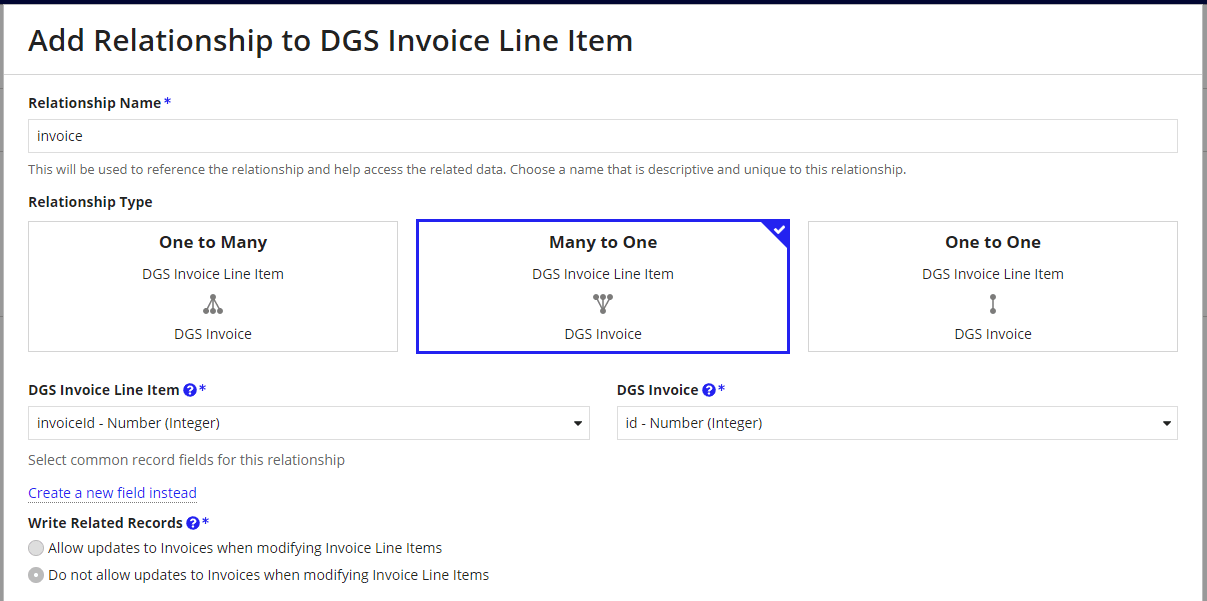
Before finalizing, and creating the line item table, we will also need to set up a relationship between the Invoice, and Invoice Line Item entities. We will do this by using the invoiceId field in the Invoice Line Item entity, and set it to be a foreign key to the Invoice entity.
Before adding the connected systems, we will also have to add a data type (DGS_INVOICE_LINE_ITEM), and data store for the line items the same way we did for the invoice type. As before, we will also add a constant called DGS_InvoiceLineItems_DS to use in the query expression later.
Adding the WebViewer Connected Systems
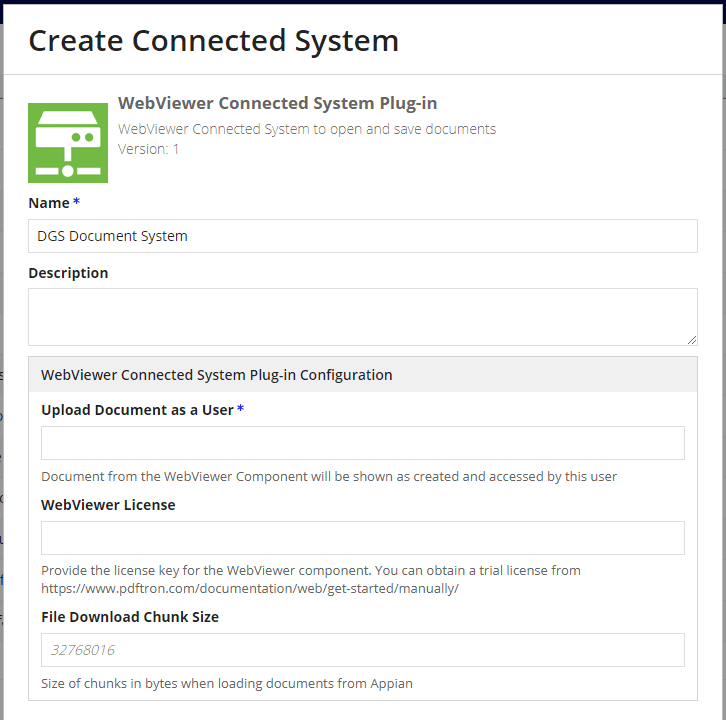
The connected systems allows WebViewer to load, and save documents to, and from Appian. We just have to add a connected systems through the designer, and select WebViewer Connected System Plug-in. For the user field, you must provide an Appian user with the correct permissions to read/write documents to a particular folder. You can leave the rest empty for now.
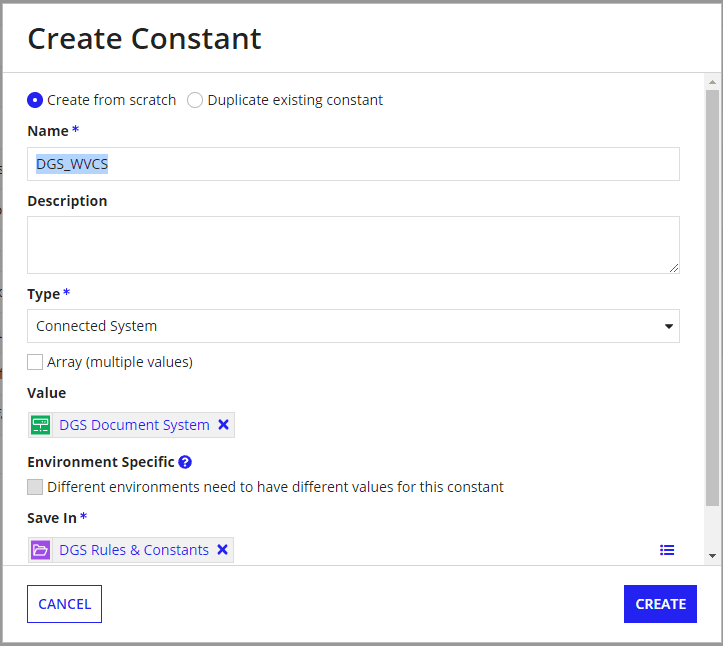
To provide WebViewer this connected system, we will need to create a constant. We will call this constant DGS_WVCS for short, and set the value to the connected system we just created. Feel free to name this constant whatever you like.
Upload the template
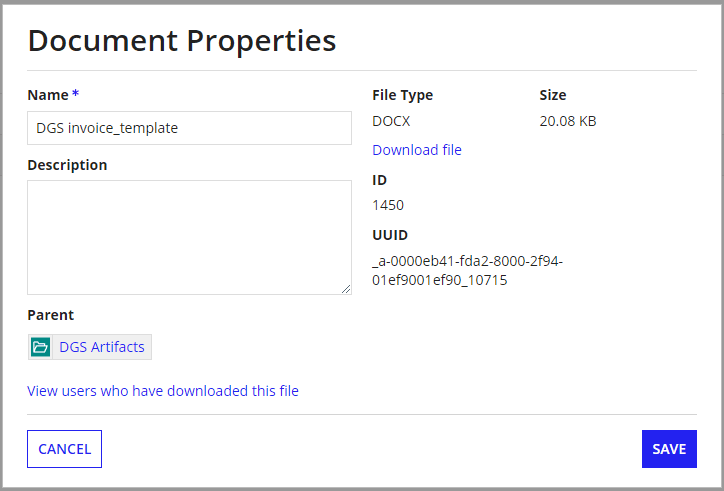
Next, we will upload the invoice template to Appian as a document. To do this, navigate to All Application Objects > DGS Knowledge Center > Artifacts. Then click the New dropdown, and select Document. From there, select the template file from your file system, and upload it. When prompted to create a constant for the document, opt out unless you need to use a constant.
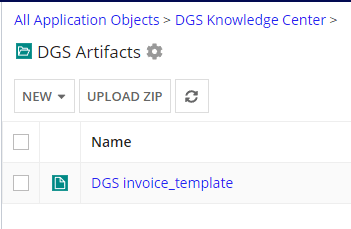
After uploading, you can click on the file in the Appian Designer to see the document ID for that document.
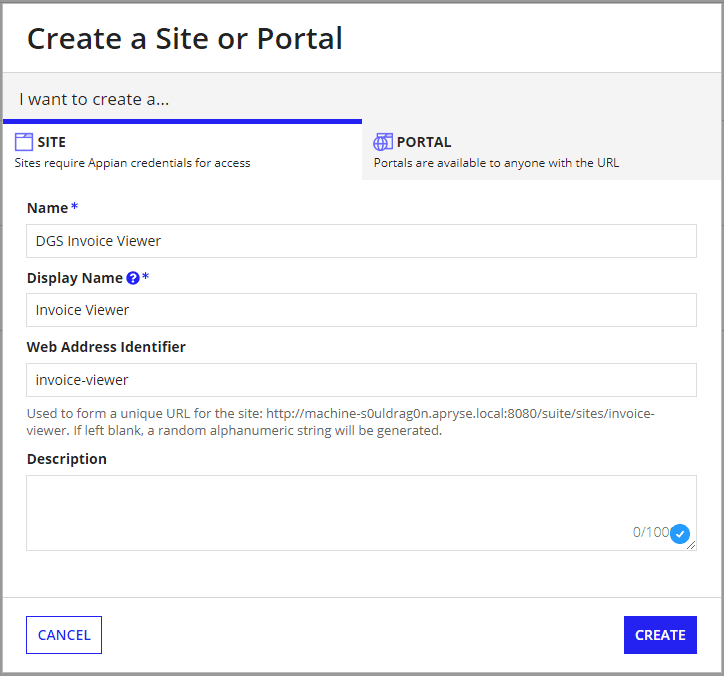
Creating the site
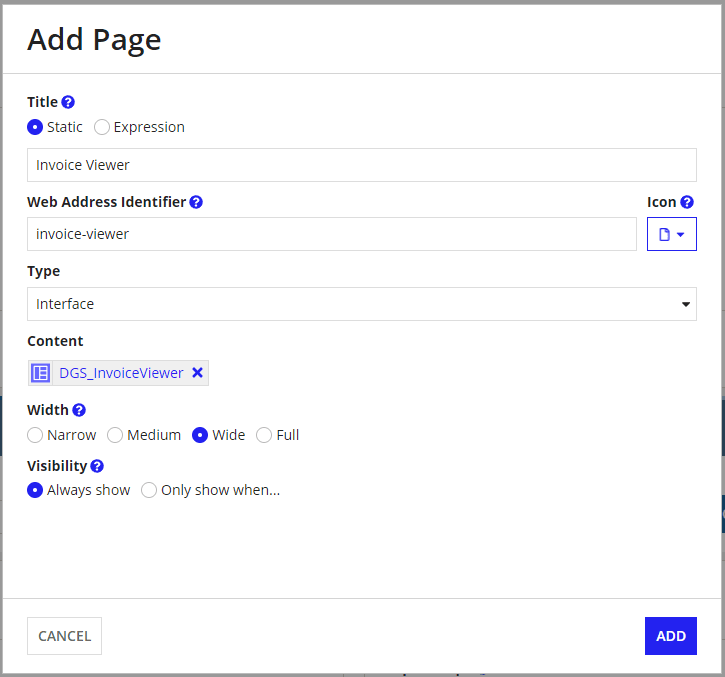
We will now create a new site and interface in the Appian Designer. We will call this site Invoice Viewer. We will need to add a Page, and Interface to the site in order to get a UI to place WebViewer on. Once you add an interface, you will have to return to the previous tab/window to add the page to the site, and save the site.
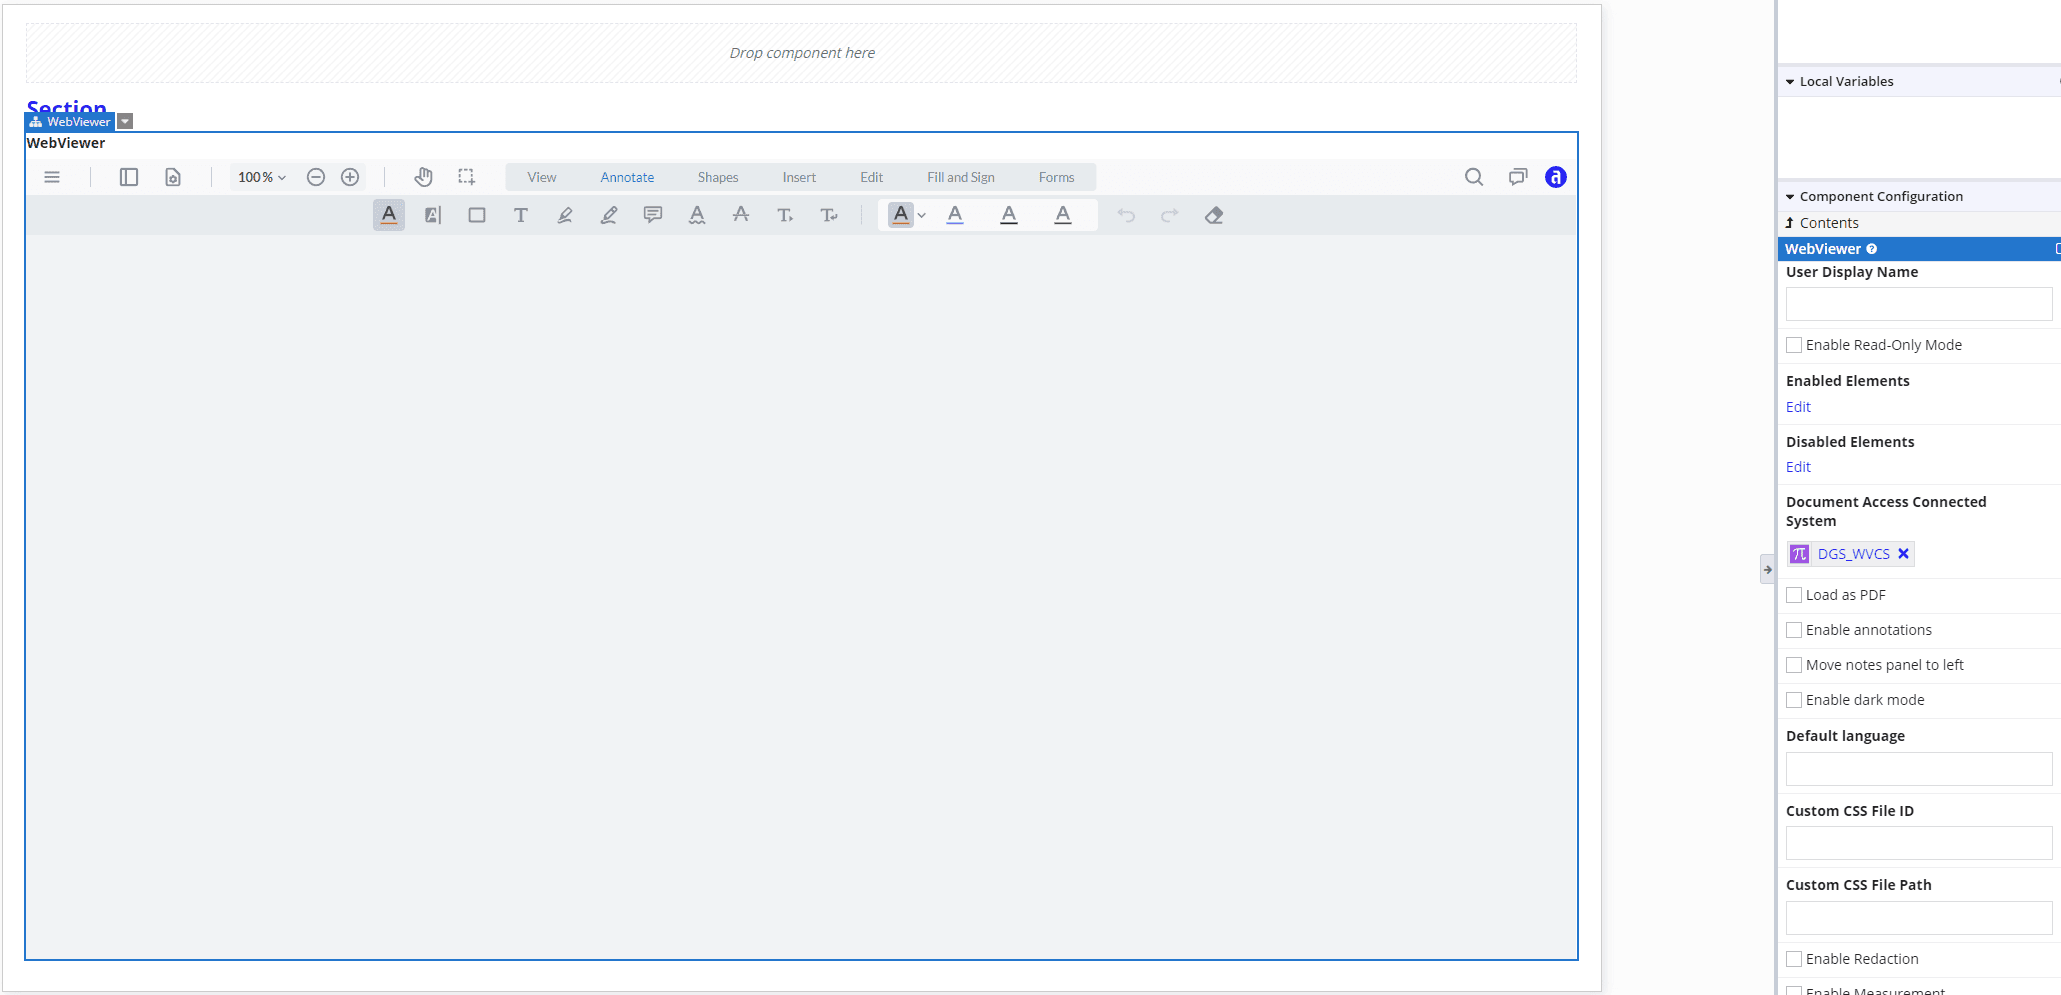
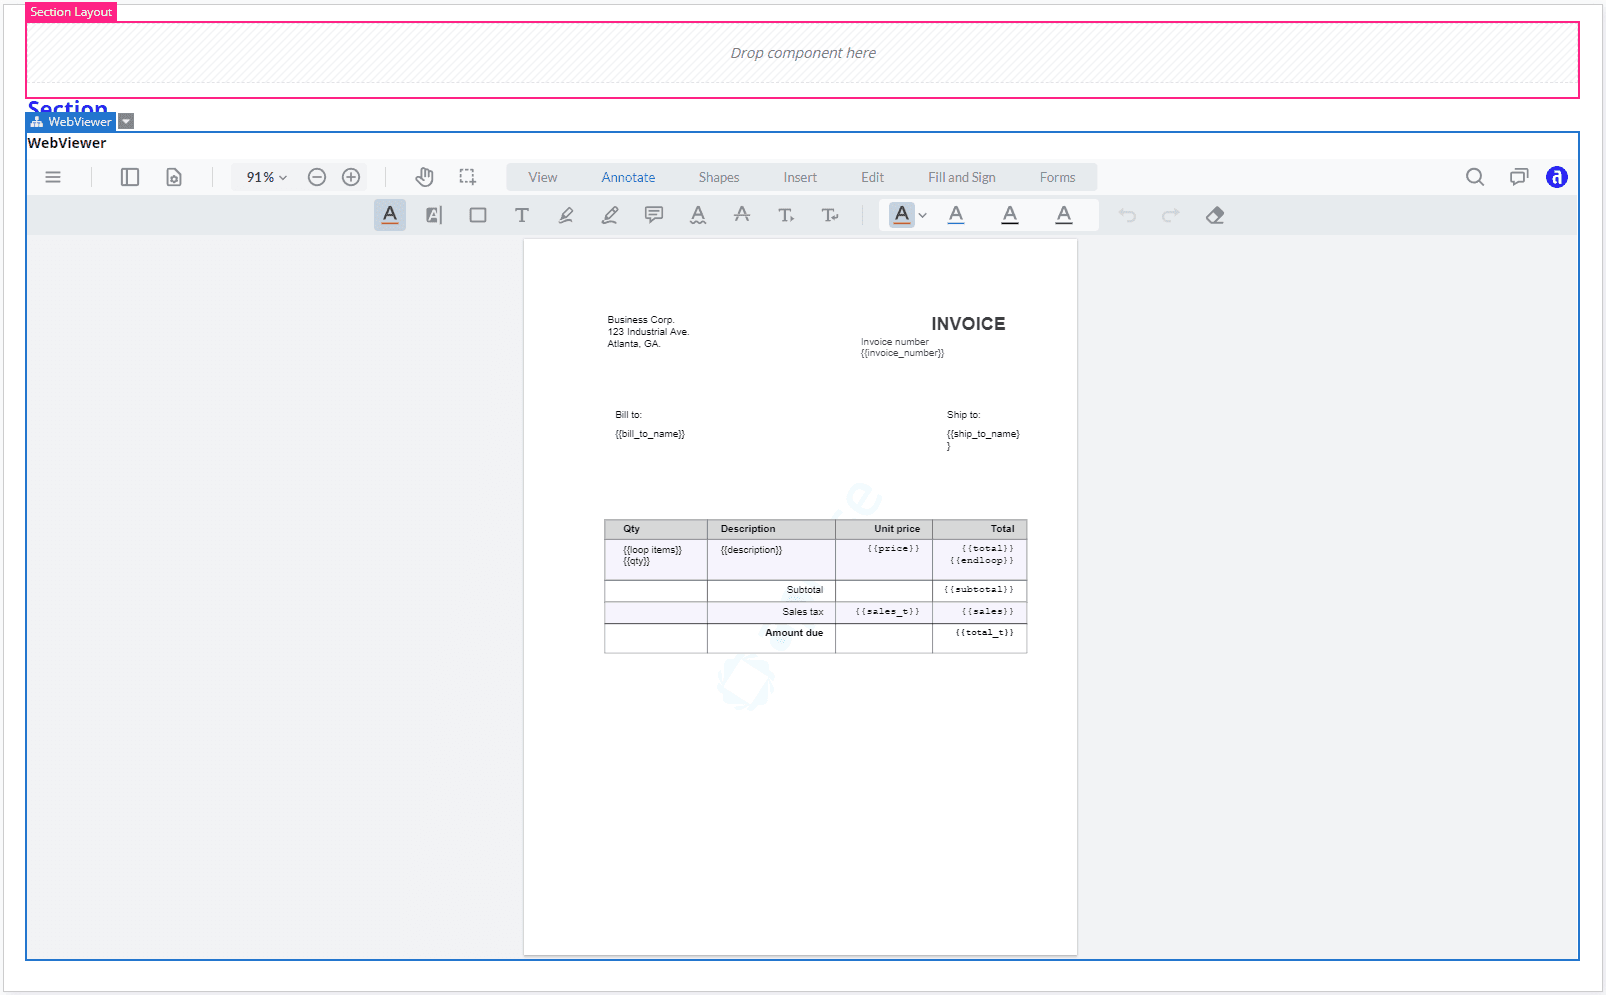
On the interface page, we will use a simple one-column layout to start just to get WebViewer on the page. We can then add the Apryse WebViewer component into the section. If you are using your own custom page, add it where you would like it to be. Initially, we will get an error about the connected systems. We can fix this by providing the connected systems constant we created earlier. If done correctly, WebViewer should load, and display the UI.
With WebViewer loaded, we can now load the template we uploaded earlier. To do this, we can go back to the document in the Artifacts folder, click on it, and copy the document ID. We can then paste this document ID into the appianDocId property in the WebViewer component. If done correctly, the template should load in WebViewer.
Wiring up with expressions
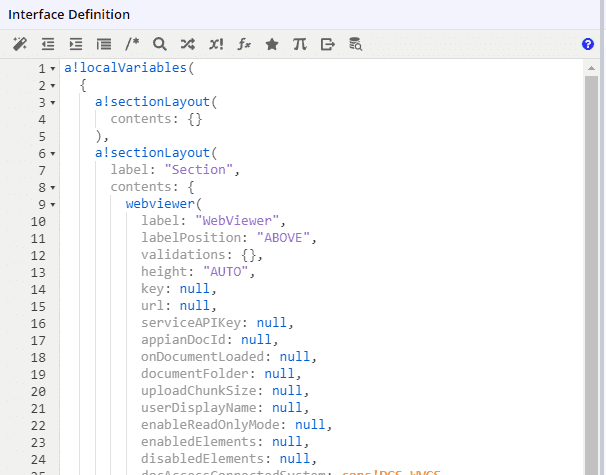
To start, we will enter expression mode in the interface, and wrap the existing expressions in a a!localVariables function to add some variables to hold our data.
Loading the invoice data
We need to get our invoice data from the database into a variable. To do this, we will use the a!queryEntity function to query the Invoice data store we created earlier. We will also need to set the pagingInfo parameter to retrieve one record. You can use your own logic to pick the correct record. We will then set the data variable to the first record in the data array.
sh
Next, we will need another variable to hold the line items for the same invoice.
sh
The column names in the expressions have been altered for the guide to remove environment specific IDs. Please reference the respective column names via the record type in your environment.
The last thing we need to do before filling the template is to create the object to pass to the templateData property of the WebViewer component. This will be where we provide the data for the template. We can do this with the a!update function to merge the two pieces of data.
sh
Filling the template
Finally, if we refresh the interface page, or press Test near the top, we get...the unfilled template. What went wrong?
If you notice, the template does not have the values filled in. If you check the browser console, WebViewer should report an error about the invoice_number not being a string. This is due to the templating engine expecting a string, but the invoice_number field data is a number. This applies to the other numerical fields as well. To fix this, we will need to convert the numerical fields to strings.

To do this, all we have to do is change the numerical field types in the data types (DGS_INVOICE, and DGS_INVOICE_LINE_ITEM) to Text instead. This will then allow us to query the types as strings instead of numbers.
Once that is done, you can refresh the interface page, and the template should load with the data.
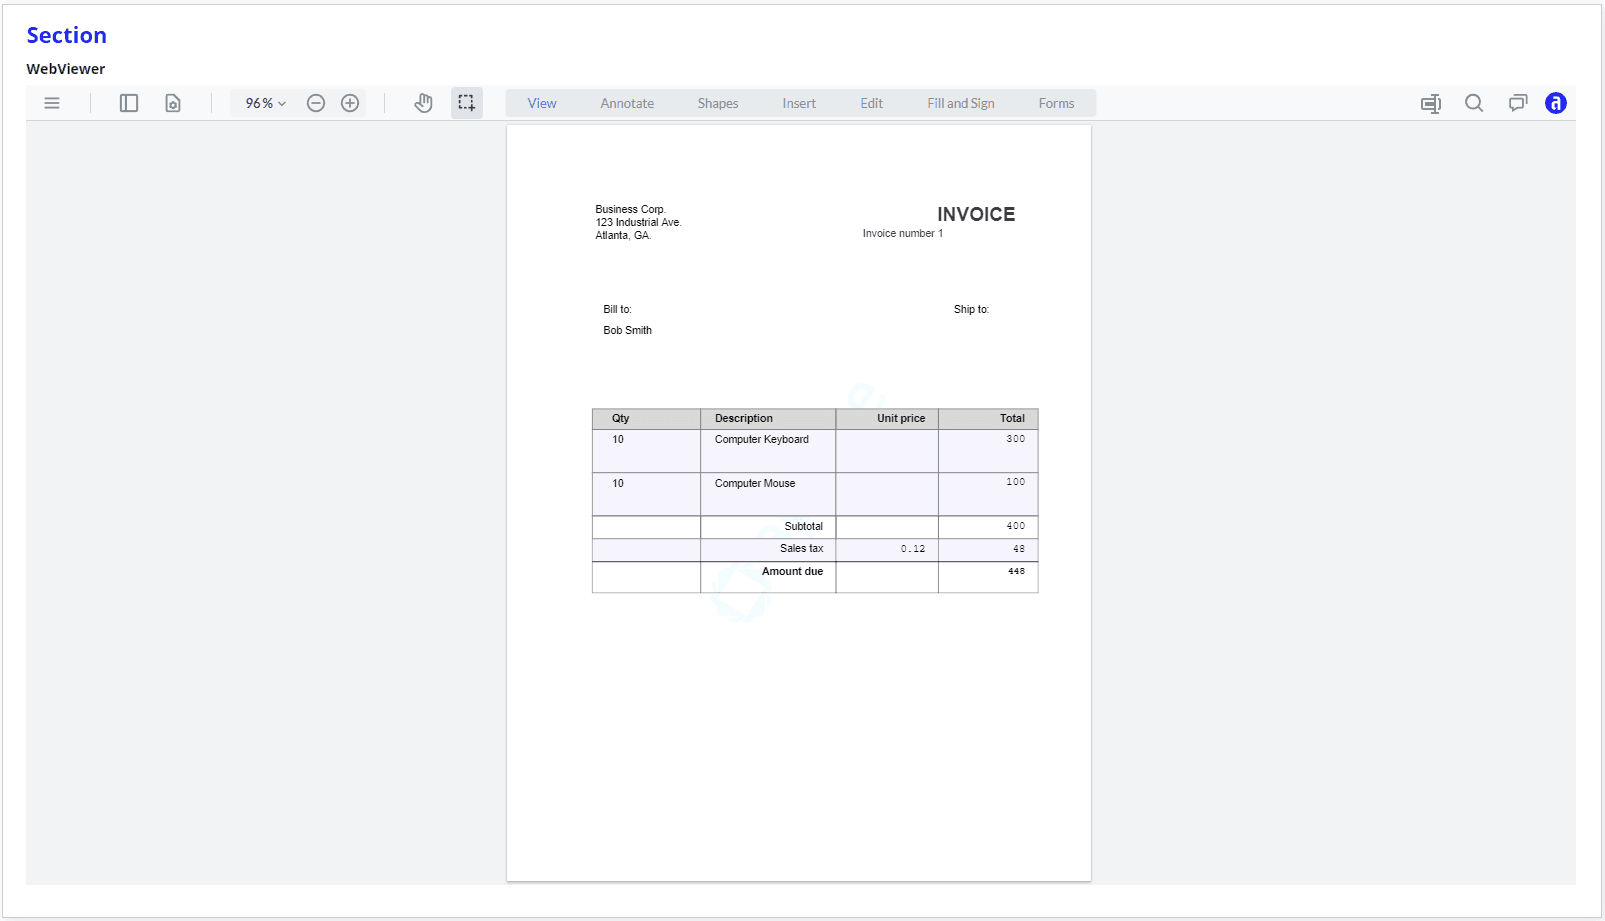
That's it! You can now generate invoices in Appian using WebViewer. You can also use this same method to generate other documents such as contracts, reports, and more.
Did you find this helpful?
Trial setup questions?
Ask experts on DiscordNeed other help?
Contact SupportPricing or product questions?
Contact Sales