Product:
General
.NET Core
.NET Framework
Java
PHP
Python
Ruby
Electron
Forms
Next.js
How to set up dependencies with Visual Studio and Apryse SDK?
If you are new to the Visual Studio development environment, follow along with these steps to set the dependencies for your project with Apryse SDK Correctly. In such a case it is recommended to use Visual Studio 2017 or 2019.
- Open a new instance of Visual Studio. Go to the
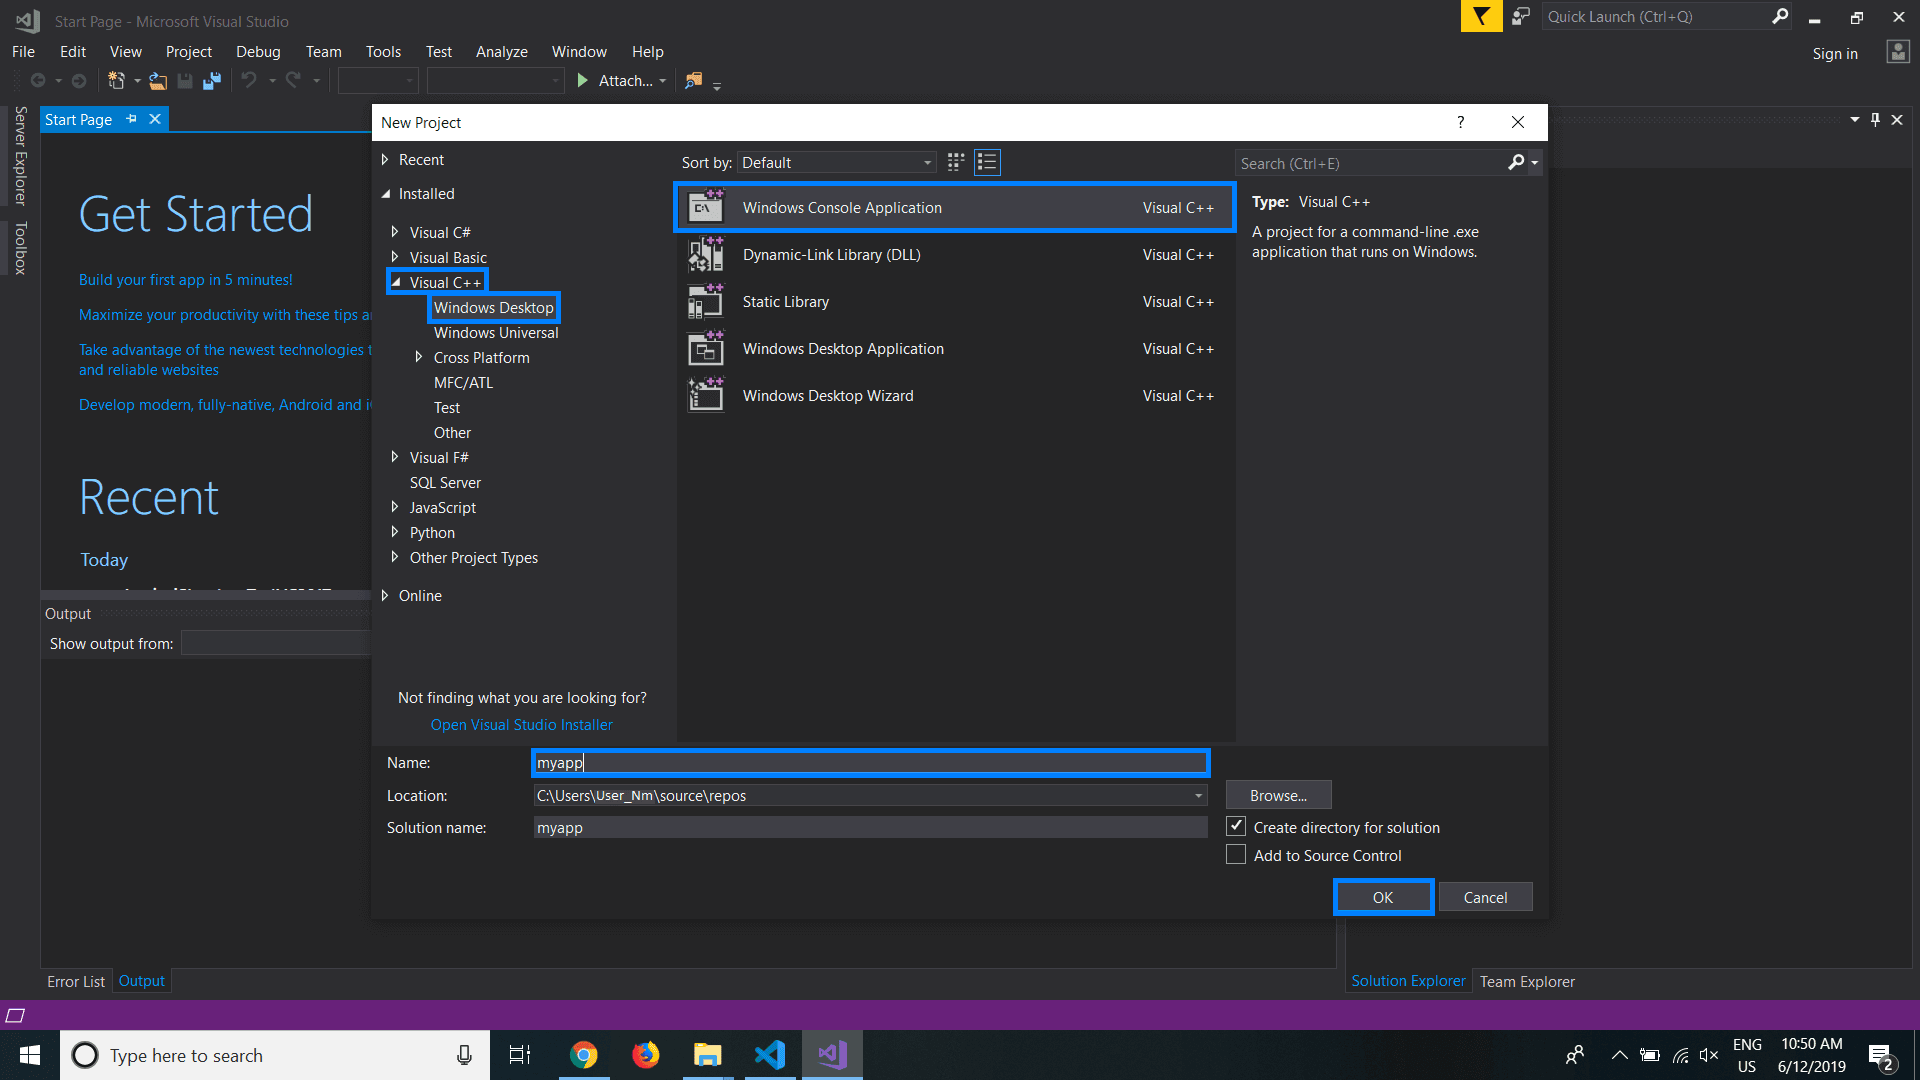
Filemenu and create a new projectFile > New > Project...You can also open theNew Projectdialog usingCtrl + Shift + N. - Click on
Visual C++in the left navigation bar and SelectWindows Console Application. - Set a name for the console application. This guide will call it
myapp. Click onOK. This should generate a default console project and open a.cppfile for you in Visual Studio.
- Find the
Solution Explorerto the right of the screen and right click on your project's name. At the bottom of the list, click on thePropertiesoption. This will open a dialog that will allow you to define important variables to compile your project with PDFNet classes and methods. - In the Configuration properties in the left panel, expand the C/C++ menu. In General settings, find the
Additional Include Directoriesfield. Add the following path:You can open a dialog to do the same by clicking on theEdit...option from the drop down for this field.Click onApply.
sh
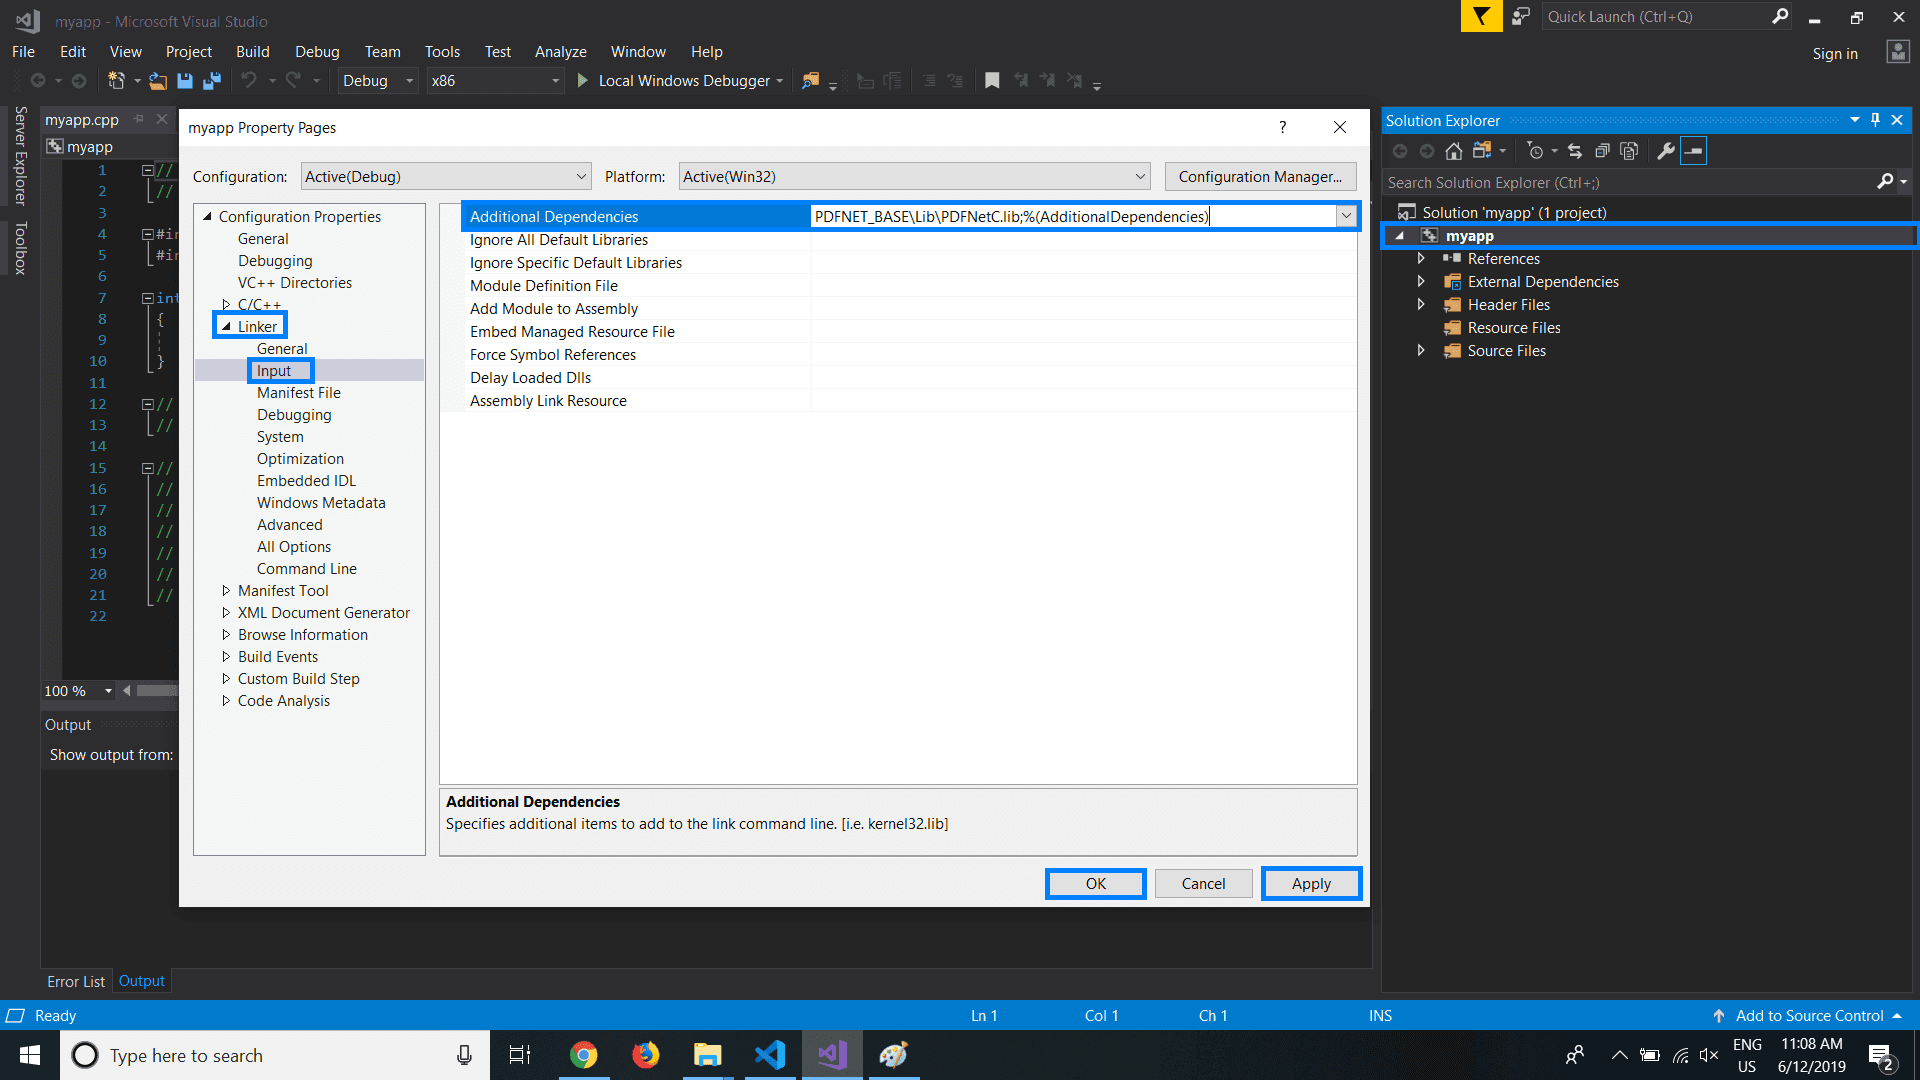
- Now navigate to the Linker Menu below C/C++. In the Input settings, find the
Additional Dependenciesand replace the entry with:Note: For Steps 5 & 6, remember to replacePDFNET_BASEwith the copied path on your clipboard.
sh
- Go back to your explorer and navigate to this directory:Copy the
PDFNetC.dllfile. Now find the output folder of the project and paste it there.By default, the path to your output folder will look similar to this:Remember to replaceUser_Namewith the name of the current user.Alternatively, you can find your project by searching by its name in the Windows Search Bar.
sh
sh
Did you find this helpful?
Trial setup questions?
Ask experts on DiscordNeed other help?
Contact SupportPricing or product questions?
Contact Sales