Product:
Custom Python wrapper for PDF library integration
There are three ways to use Apryse with Python:
- Use pip - the precompiled library for Python 3.x.
- (less common) Use PDFNet bindings to build your own wrappers.
This guide will help you get started by building your own wrapper. You can find more information about using the precompiled library
Custom Python wrapper & macOS PDF library integration
This guide will help you run Apryse samples and integrate a free trial of the Apryse SDK into Python applications on macOS. Your free trial includes unlimited trial usage and support from solution engineers.
Prerequisites
- Python3 or Python2 with developer extensions
- CMake version ≥ 2.8
- SWIG 2.0.4 - 2.0.12 or SWIG 3.0.12 or SWIG 4.0.2 and above
- Apryse's Python3 PDF library for macOS:
Run Apryse SDK in production
A commercial license key is required for use in a production environment. Please contact sales to purchase a commercial key or if you need any other license key assistance.
Keep your commercial license key confidential.
License keys are uniquely generated. Please make sure that it is not publicly available (e.g. in your public GitHub).
Initial setup
- Make a directory to store the wrappers and navigate into that directory.
- Clone the uncompiled PDFNet wrappers project by executing
sh
- Navigate to
PDFNetWrappers/PDFNetCand move the downloaded [PDFNet C/C++ SDK] for macOS(#prerequisites) into that directory and unzip it. Ensure you obtain the right architecture for your Python interpreter. This can be done with these two commands:
sh
- Now to move the headers in place, make sure you are in the
PDFNetWrappers/PDFNetCdirectory and executeandto move the PDFNet libraries in place.You can deletePDFNetCMac.zipto free up space.Your/PDFNetCfolder should be laid out like this like this:
sh
sh
sh
- Make a build directory inside
/PDFNetWrappersand navigate to it. This guide will assume the build directory is called Build. - ExecuteIf all goes well, you should get a message which reads:
sh
sh
- Execute
makefollowed bysudo make install. - Next we need to fix the
rpathsissue on Mac. While still in the sameBuilddirectory, execute these lines:
sh
- Get your Apryse trial key.
License Key
Apryse collects some data regarding your usage of the SDK for product improvement.
If you wish to continue without data collection, contact us and we will email you a no-tracking trial key for you to get started.
You are now ready to run the samples or integrate Apryse SDK into your own application.
Also check out the source for the PDFNetC wrappers here.
Run the samples
Running a specific sample
- Navigate to the
PYTHONfolder in the sample, for example/Samples/AddImageTest/PYTHONand execute./RunTest.sh.
Run all samples
- To run all tests, navigate to
/Samplesand executeThe tests will run one by one.
sh
Output files will be in /Samples/TestFiles/Output
Integrate into your application
This section will show you how to use our SDK to create a simple Apryse "Hello World!" application. It will create a document with one blank page and save it as a linearized PDF in its running directory.
- Navigate to the
/Samplesdirectory and create a new directory calledmyApp(if it does not exist already). This guide will assume your application is named myApp. For organization, create a new directory insidemyAppcalledPYTHON. - Navigate inside that
PYTHONdirectory and create a new Python file calledmyApp.py. Open it with your favorite text editor and paste this into it:
Python
- Run your application via
python myApp.py. If all goes well your output should read:
sh
Check the output.pdf that the program output in the same directory. It should be a PDF with one blank page.
Next step
Also check out the source for the PDFNetC wrappers.
Troubleshooting
Check the troubleshooting page and our PDFNetWrappers github if you run into any issues going through this document.
Custom Python wrapper & Windows PDF library integration
This guide will help you run Apryse samples and integrate a free trial of the Apryse SDK into Python applications on Windows. Your free trial includes unlimited trial usage and support from solution engineers.
Prerequisites
- Python 2.7 or 3.x.Make sure the executable name is
python.exe - cmake >= 2.8.
- SWIG 2.0.4 - 2.0.12 OR SWIG 3.0.12 OR SWIG 4.0.2 and above.
- Visual Studio.
- Download the PDFNet Wrapper files or clone the repository:If you downloaded, extract the PDFNetWrappers-master folder.
sh
- Apryse's Python PDF library for Windows:
Make sure Python, cmake and SWIG are all added to your path environment variable.
Run Apryse SDK in production
A commercial license key is required for use in a production environment. Please contact sales to purchase a commercial key or if you need any other license key assistance.
Keep your commercial license key confidential.
License keys are uniquely generated. Please make sure that it is not publicly available (e.g. in your public GitHub).
Initial setup
1. Extract the PDFNetWrappersWinXX folder from the .zip file. This guide will assume it has been extracted to the current user's Desktop.
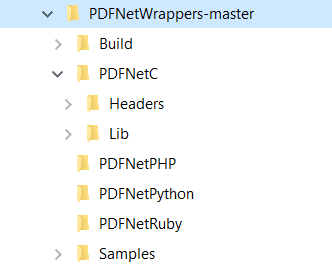
2. From the extracted folder, copy the Lib and Headers folders and paste them into PDFNetWrappers-master/PDFNetC/
3. Create a new folder called Build inside the PDFNetWrappers folder and enter it.This is what the current directory structure should look like:

4. Open a Command Prompt here and run the following:
sh
This will choose a default Visual Studio version to build the projects for. Wait for the bindings to finish. The output should end with something like this:
sh
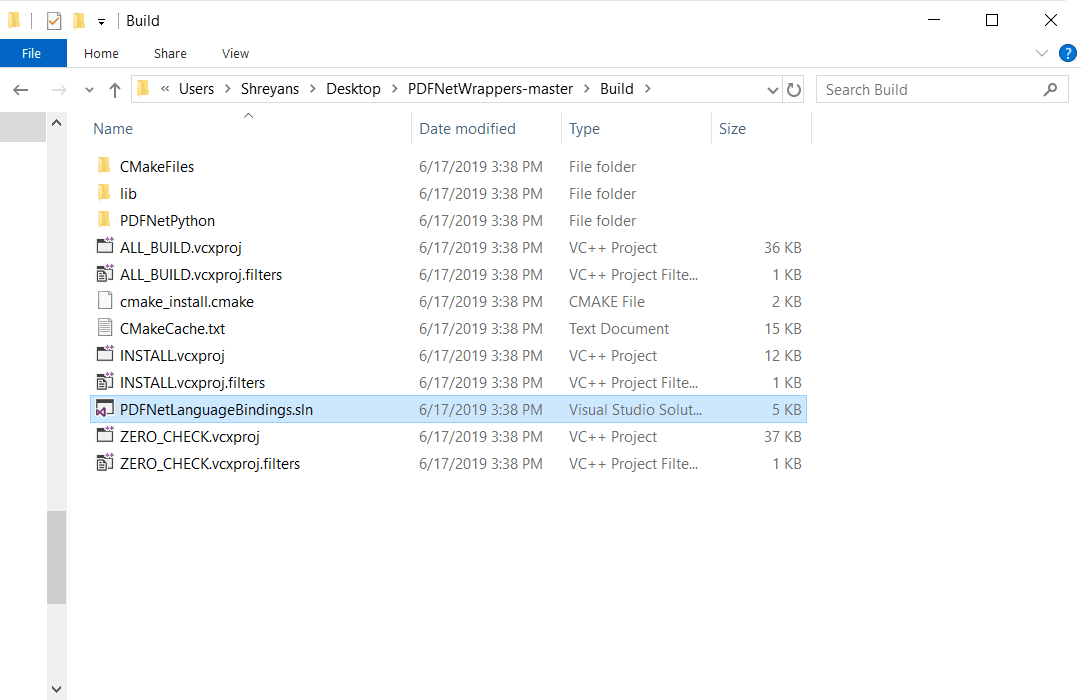
If you see error messages during this process, see the Troubleshooting section.You should have the following files in your Build directory:

5. Open the generated PDFNetLanguageBindings.sln with Visual Studio.
6. Change the build mode from Debug to Release, make sure the appropriate target version (x86 or x64) is selected and build the solution.
Release configuration only
There is no Debug version of the PDFNet library available.
x64 target missing? Otherwise skip to Step 11.
Step 7 to step 10 is only required if the x64 target build option is not available. These steps will create the x64 build target and manually copy the dynamic link library output for installation.
7. When using the PDFNetC64 (64-bit) library files then change the build configuration to x64 in the Build dropdown by choosing Configuration Manager....Under Active Solution Platform, Select <New...> and choose x64 if x64 is not displayed as a platform.Click ok then close the modal to exit.
8. Right-click project PDFNetPython within Solution Explorer and choose Properties.Under Linker, select Command Line and change X86 to X64.Click ok to exit the modal.
9. Right-click and build the PDFNetPython project.This will build the Python library files.
10. Copy the _PDFNetPython.pyd dynamic link library file to the build\lib\Release folder using the command line below or manually from Windows explorer.This will ensure the Python module which communicates through the dynamic link library can be located for installation.
sh
11. When this is done, select and build the INSTALL project.This will install PDFNetPython lib files to the PDFNetWrappers\PDFNetC\lib folder where it can be located by the samples.
12. Get your Apryse trial key.
License Key
Apryse collects some data regarding your usage of the SDK for product improvement.
If you wish to continue without data collection, contact us and we will email you a no-tracking trial key for you to get started.
The bindings should be successfully built. You can now run the samples to test out the Apryse SDK.
Run the samples
Find and enter the Samples folder (PDFNetWrappers-master/Samples). Here you can find sample code for a large number of features supported by the Apryse SDK.
The output files from all tests are stored in Samples/TestFiles/output/
Run a specific sample
- Find the sample you want to run and navigate into the
PYTHONfolder inside. - Find
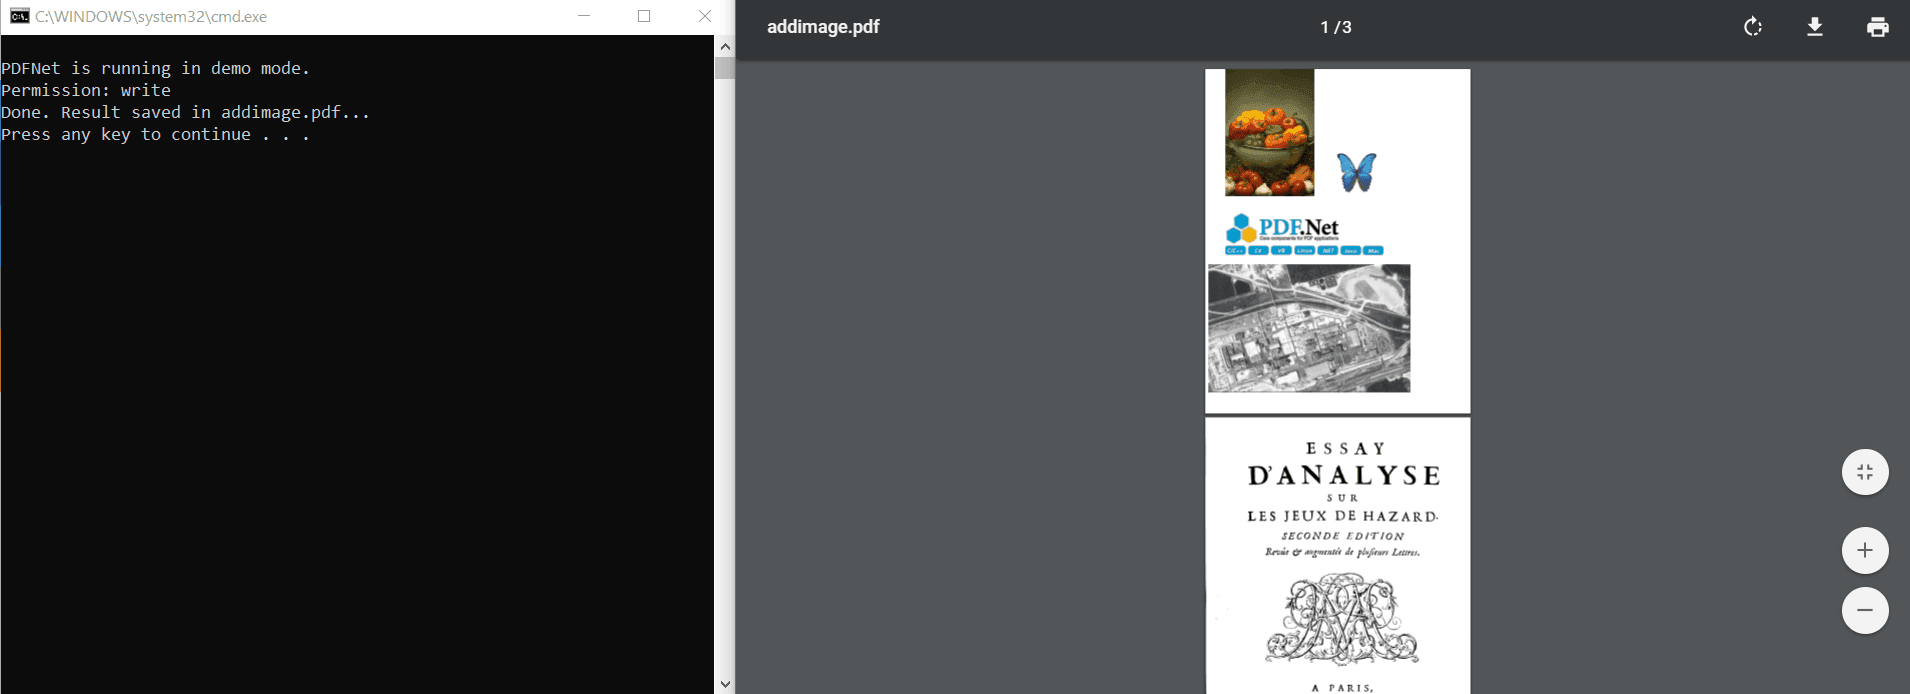
RunTest.batand run it. The results should appear on acmdwindow.

Run all samples
- Find
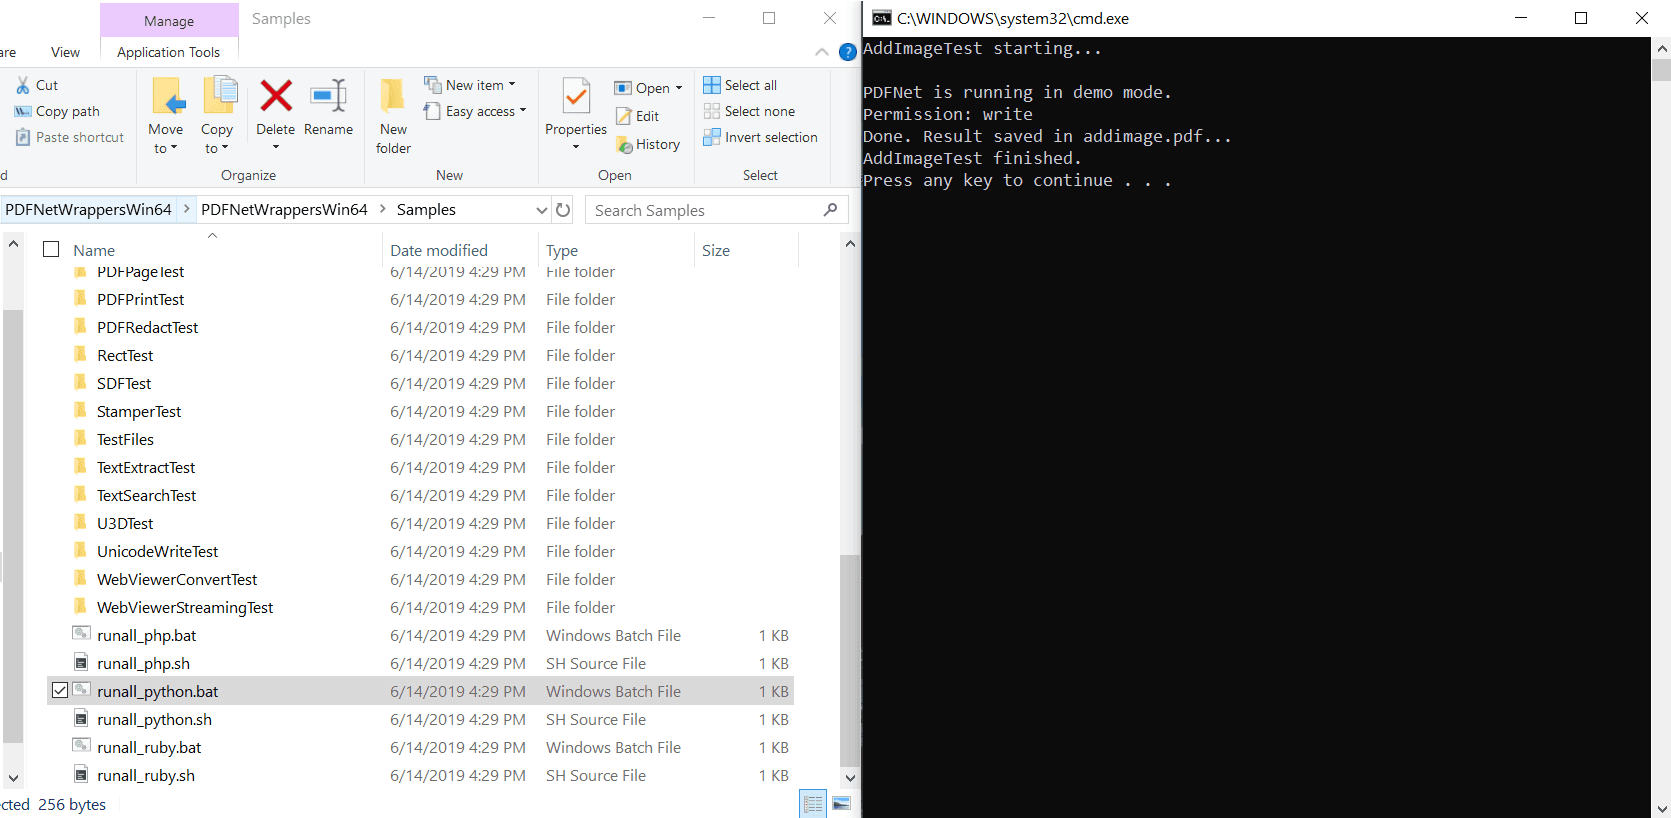
runall_python.batin the samples folder and double click on it to run it. The results should appear on acmdwindow.
Press any key when a sample ends to start the next one.

Integrate into your application
This is what we call the "Apryse Hello World" application. It is easy to integrate the rest of Apryse SDK if you are able to open, save and close a PDFDoc.
- Create a new folder in
Samplesby the nameHelloWorld. - In the
HelloWorldfolder, create a new file calledHelloWorld.py, open and edit it using your favorite text editor. - Insert the following to your file:To test that your code works, run the code using a shell in the
HelloWorldfolder using:Once you have successfully run this, you should see an output file in the working directory of this program.
Python
sh
Next step
Troubleshooting
Multiple versions of Python
More information for conflict resolution between multiple Python installations.
CMake Process finding incorrect version
Setting specific versions of Python to use for cmake.
Custom Python wrapper & Linux PDF library integration
This guide will help you run Apryse samples and integrate a free trial of the Apryse SDK into Python applications on Linux. Your free trial includes unlimited trial usage and support from solution engineers.
Prerequisites
- Python3 or Python2 with developer extensions
- CMake version ≥ 2.8
- SWIG 2.0.4 - 2.0.12 or SWIG 3.0.12 or SWIG 4.0.2 and above
- Apryse SDK for Linux:
Run Apryse SDK in production
A commercial license key is required for use in a production environment. Please contact sales to purchase a commercial key or if you need any other license key assistance.
Keep your commercial license key confidential.
License keys are uniquely generated. Please make sure that it is not publicly available (e.g. in your public GitHub).
Initial setup
- Make a directory to store the wrappers and navigate into that directory.
- Clone the uncompiled PDFNet wrappers project by executing
sh
- Navigate to
PDFNetWrappers/PDFNetCand download the PDFNet C/C++ SDK into that directory. Ensure you obtain the right architecture for your Python interpreter. For example, if your interpreter is 64bit (which this guide will assume), execute
sh
- Unpack
PDFNetC64.tar.gzbytar xvzf PDFNetC64.tar.gz, then executeandto move the PDFNet libraries in place.You can deletePDFNetC64.tar.gzto free up space.Your/PDFNetCfolder should be laid out like this like this:
sh
sh
sh
- Make a build directory inside
/PDFNetWrappersand navigate to it. This guide will assume the build directory is called Build. - ExecuteIf all goes well, you should get a message which reads:
sh
sh
- Execute
makefollowed bysudo make install. You are now ready to run the samples or integrate Apryse SDK into your own application.
Also check out the source for the PDFNetC wrappers here.
- Get your Apryse trial key.
License Key
Apryse collects some data regarding your usage of the SDK for product improvement.
If you wish to continue without data collection, contact us and we will email you a no-tracking trial key for you to get started.
Run the samples
Running a specific sample
- Navigate to the
PYTHONfolder in the sample, for example/Samples/AddImageTest/PYTHONand execute./RunTest.sh.
Run all samples
- To run all tests, navigate to
/Samplesand executeThe tests will run one by one.
sh
Output files will be in /Samples/TestFiles/Output
Integrate into your application
This section will show you how to use our SDK to create a simple Apryse "Hello World!" application. It will create a document with one blank page and save it as a linearized PDF in its running directory.
- Navigate to the
/Samplesdirectory and create a new directory calledmyApp(if it does not exist already). This guide will assume your application is named myApp. For organization, create a new directory insidemyAppcalledPYTHON. - Navigate inside that
PYTHONdirectory and create a new Python file calledmyApp.py. Open it with your favorite text editor and paste this into it:
Python
- Run your application via
python myApp.py. If all goes well your output should read:
sh
Check the output.pdf that the program output in the same directory. It should be a PDF with one blank page.
Next step
Also check out the source for the PDFNetC wrappers.
Troubleshooting
Check the troubleshooting page and our PDFNetWrappers github if you run into any issues going through this document.
Did you find this helpful?
Trial setup questions?
Ask experts on DiscordNeed other help?
Contact SupportPricing or product questions?
Contact Sales