Product:
Create, Edit and Test Template Extraction with the Apryse Template Designer Application
This guide demonstrates how to create a new template, edit an existing one, and test recognition with these templates using the ApryseTemplateDesigner Application.
Create and Edit Templates
Go to the application’s executable file (ApryseTemplateDesigner.exe) and launch it.
This will launch the application, and you will see the following window.
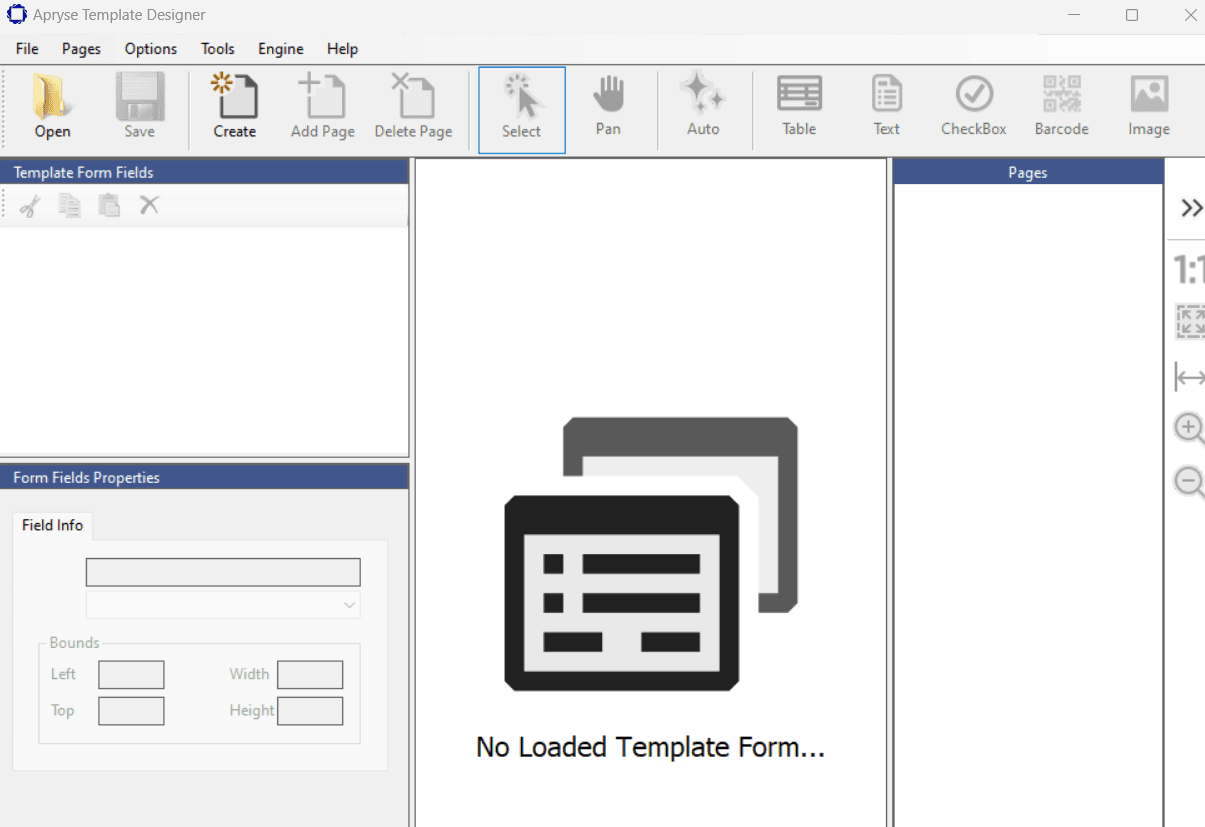
Now, we will create the template form that will be used to classify the filled forms.
Click the “Create” button on the upper toolbar,

Or go to the File menu and select “Create Template Form.” This will open a save file dialog. Choose an appropriate file name, as this will become your template name. The file will be saved in the (*.template) format, which will contain your template information.
For our example, let’s name it “myTemplate.template”

Now we have an empty template, and we need to add some form pages to it. These pages will serve as master's when extracting data from filled forms.
Add Pages to Template Form
Click the “Add Page” button on the top toolbar to add a template page,

Or go to the Pages menu and select “Add Template Form Page.”
This will add new pages to your template. These pages can be in various file formats and may contain single or multiple pages.
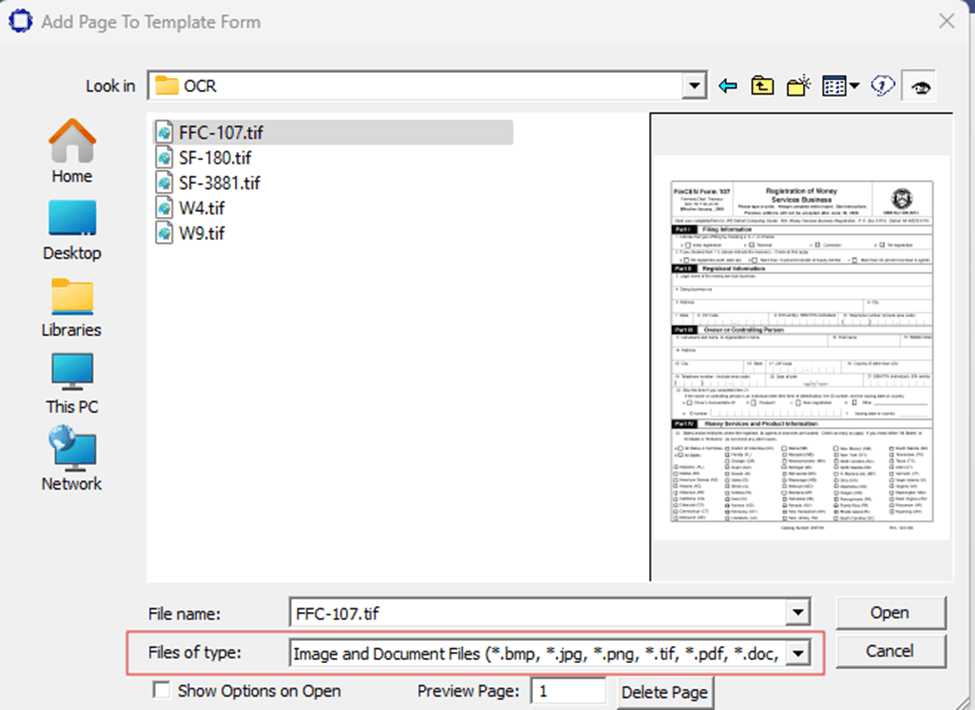
As shown in the screenshot above, we will select the file (FFC-107.tif) for this guide, this file is located in the images folder within the application directory.
This file contains two pages, so you will be prompted to choose whether to add all the pages or just a specific one.
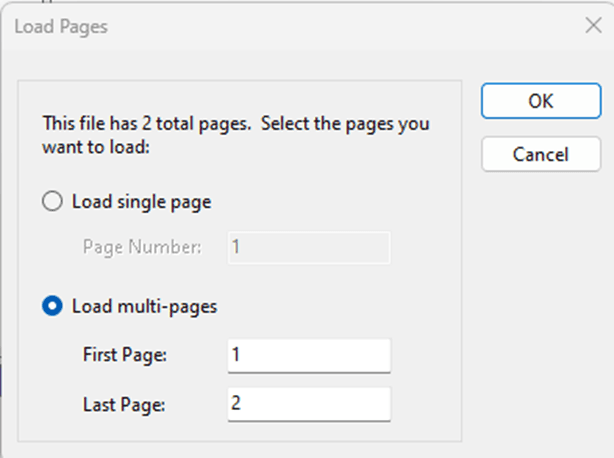
Let’s load all the pages in this file, by clicking OK the pages will appear in the right thumbnail viewer, where you can switch between them to view and edit.
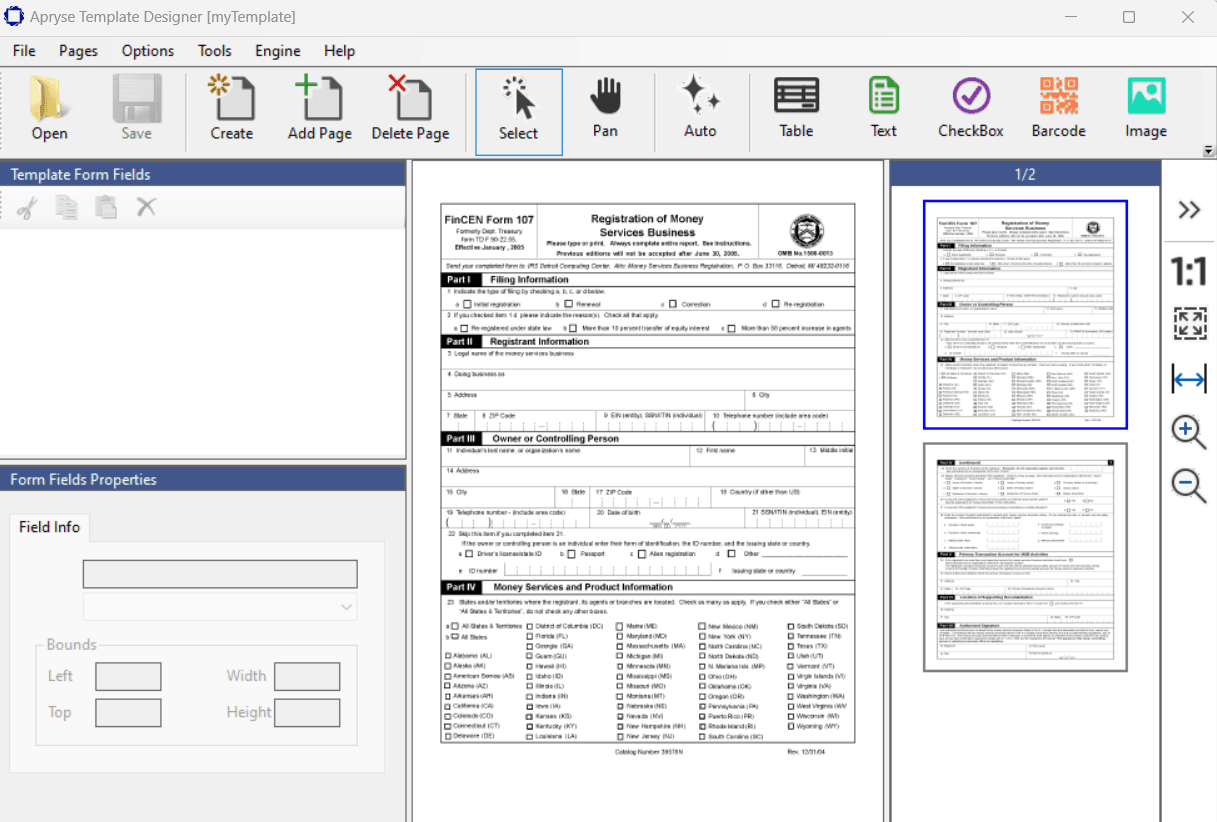
When you check your template folder, you’ll notice a new folder named with (index). This folder stores cache data to speed up the classification and extraction process.
You can add more pages using the same button.
To delete a specific page, simply click the ‘Delete Page’ button on the top toolbar.

Or by going to the Pages menu and selecting “Delete Template Form Page.”
Edit existing form template
If you already have a template form created and want to modify it, simply load the existing template by clicking the “Open” button,

Or go to the File menu and select “Open Template Form.” Choose the template file and start editing.
Add Fields to Template Form
Fields are used to capture data from the filled forms after they're extracted. The type of each field depends on the nature of data that will be filled in it.
We have various types of fields, which you can see in the top toolbar.

CheckBox/RadioButton field
Let’s add (CheckBox/RadioButton) field
Click the button "CheckBox"

And draw a rectangle around the specified area on the first page, as illustrated in the screenshot.

Check the Form Fields Properties in the left panel. In the first tab (Field Info), you can set the field name and change its type.
Rename the field to “Initial Registration Check Box” and click the save button on the upper toolbar.
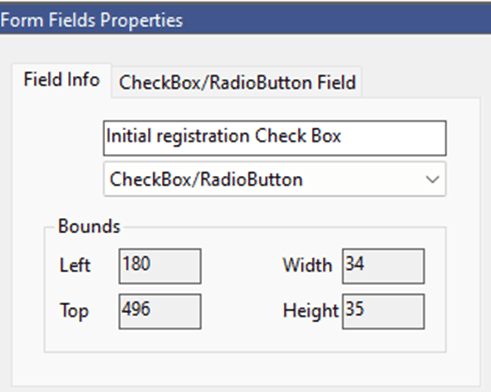
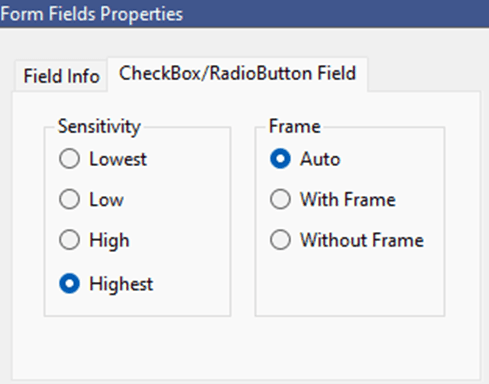
When you select the second tab (CheckBox/RadioButton Field), you can configure the field’s sensitivity and frame options. In our example, we will leave them at their default values.
You can repeat the steps above to add additional (CheckBox/RadioButton) fields.
Text field
Click the button on the top toolbar,

Then draw a rectangle around the empty text area you want to extract. This area is supposed to be filled when using the filled form.
In our example, let’s draw it below “Legal name of them money…” and rename the added text field to “legalName_TextField”.

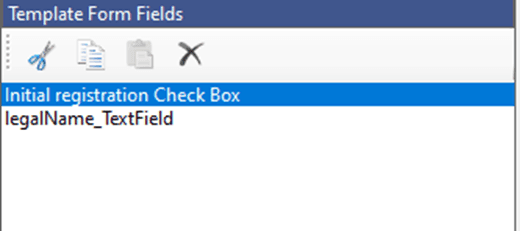
You can add multiple text fields by repeating the steps above. Additionally, you can navigate to, copy, and delete fields using the Template Form Fields window on the left pane of the application.
Add Fields Smartly
The application supports adding form fields automatically, allowing all form fields to be smartly detected by pressing the “Auto” button on the upper toolbar.

After that, you can edit, add, or delete any field that does not meet your needs.
Now that we have added two fields to our template form for extraction from the filled form, let’s proceed to the next step: extracting the filled form data.
Test the Template Form Against Possible Matches
Click the extract form fields button,

If you haven’t already saved your changes to the template, you will be prompted to do so. Click “Yes” to save and continue, open file dialog will show, select the filled form file and continue, in our test we will choose file (FCC-107_OCR_Filled.tif) that is included in the application folder.
This file contains two pages so you will be prompted to choose which pages you want to extract so choose all pages and hit Ok
An open file dialog will appear. select the filled form file and continue. in our test, we will choose the file “FCC-107_OCR_Filled.tif” located in the application folder.
This file contains two pages, so you will be prompted to choose which pages to extract. select all pages and click “OK”.
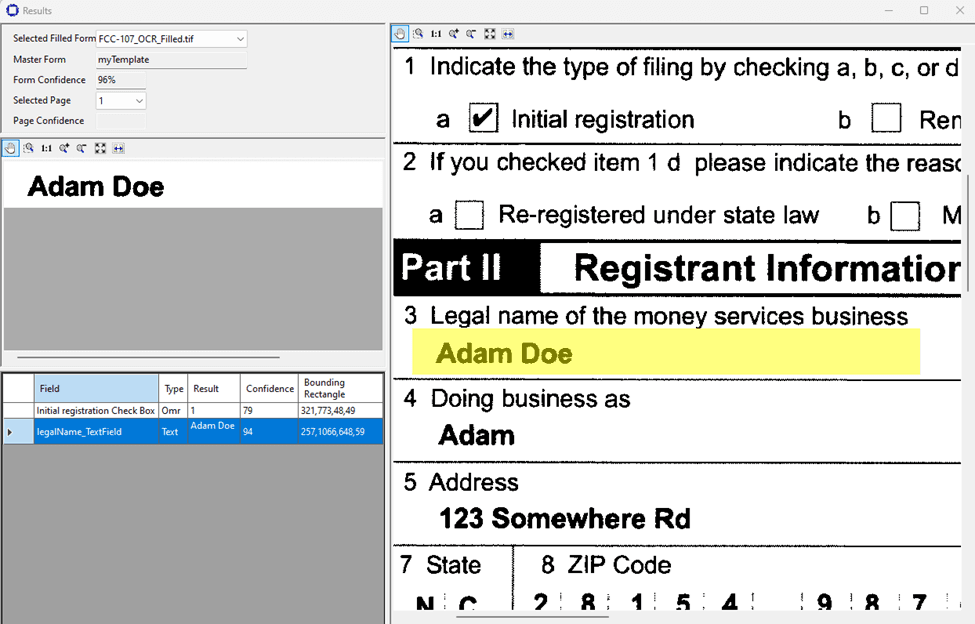
After you click “OK,” the extraction process will start, and a new window with the results will appear. As you can see below, the checkbox is correctly extracted.
Check this for filled forms path
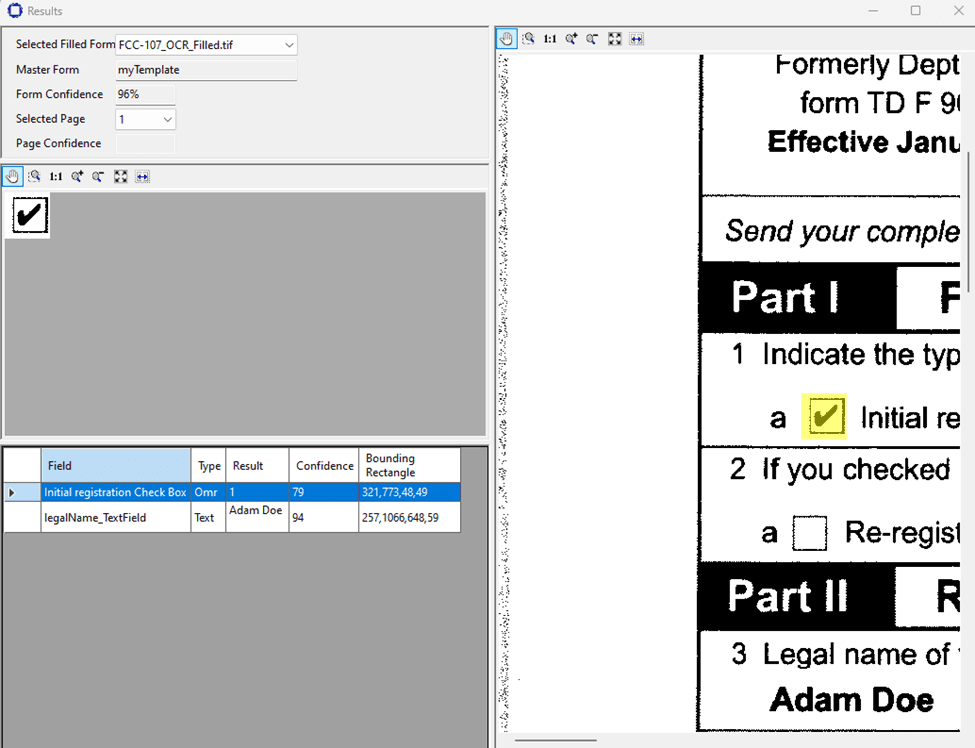
Also navigate to other fields, such as our text field.
More features in the application
The application provides a feature to classify a filled form and determine which of your template forms it belongs to. this helps you load the correct template form into the application when processing a specific filled form, especially if you have multiple template forms.
To do this, click the “Classify” button,

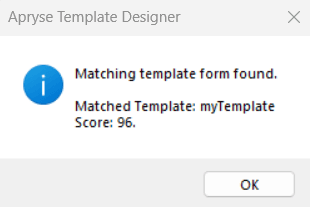
Then choose the filled form you want to classify. for example, let’s select the filled form “FCC-107_OCR_Filled.tif.”
You will get the following result:
Wrap-up
This tutorial demonstrated how to use the Template Designer application to create and modify a template form. it also covered how to test the template forms against filled forms.
Did you find this helpful?
Trial setup questions?
Ask experts on DiscordNeed other help?
Contact SupportPricing or product questions?
Contact Sales