Some test text!

Search
Hamburger Icon

Web / Guides / Working with form fields and widgets

Working with form fields and widgets

Form fields and widget annotations are the two main components of a form workflow. The sections below cover some of the common use cases when working with form fields and widgets.

Creating form fields

Creating form fields requires you to define the value and type of the field, along with some optional parameters. You can find a detailed explanation on field creation by visiting Creating form fields . Below is a simple example of a text field.

WebViewer(...)
  .then(instance => {
    const { Annotations, annotationManager } = instance.Core;

    const field = new Annotations.Forms.Field("some text field name", {
      type: 'Tx',
    });

    annotationManager.getFieldManager().addField(field);
  });

Setting widget flags

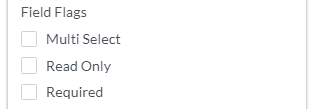
WidgetFlags allow you to define certain behaviors of a field and its associated widgets. The currently available WidgetFlags can be found on this page. A WidgetFlags object can be passed to a form field at creation to define the default state of the field.

List Box Options

WebViewer(...)
  .then(instance => {
    const { annotationManager, Annotations } = instance.Core;
    const { WidgetFlags } = Annotations;

    const flags = new WidgetFlags();
    flags.set(WidgetFlags.MULTILINE, true);
    flags.set(WidgetFlags.REQUIRED, true);

    const field = new Annotations.Forms.Field("some text field name", {
      type: 'Tx',
      flags,
    });

    annotationManager.getFieldManager().addField(field);
  });

Updating widget flags

You can update WidgetFlags by accessing the WidgetFlags that have been added to the field. This can be done by calling the set method. All WidgetFlags accept a boolean value to determine the desired state.

WebViewer(...)
  .then(instance => {
    const { annotationManager, Annotations } = instance.Core;
    const { WidgetFlags } = Annotations;

    const flags = new WidgetFlags();
    flags.set(WidgetFlags.READ_ONLY, true);

    const field = new Annotations.Forms.Field("some text field name", {
      type: 'Tx',
      flags
    });

    field.flags.set(WidgetFlags.READ_ONLY, false);

    annotationManager.getFieldManager().addField(field);
  });

Configuring multiple widgets for a single field

The PDF specification allows multiple widgets to be associated with a single field, ensuring consistency across these widgets. For instance, a user may want to enter their first name only once in a form. We support this functionality by passing the same field into different widgets during object creation.

Two Widgets One Field

function createWidget (field, options, x, y, Annotations) {
  let newWidget = new Annotations.TextWidgetAnnotation(field, options);
  newWidget.PageNumber = 1;
  newWidget.X = x;
  newWidget.Y = y;
  newWidget.Width = 50;
  newWidget.Height = 20;
  return newWidget;
}

WebViewer(...)
  .then(instance => {
    const { annotationManager, Annotations } = instance.Core;

    const field = new Annotations.Forms.Field("some text field name", {
      type: 'Tx',
    });

    const widgetAnnot = createWidget(field, {}, 100, 100, Annotations);
    const widgetAnnot02 = createWidget(field, {}, 200, 200, Annotations);

    annotationManager.getFieldManager().addField(field);
    annotationManager.addAnnotations([widgetAnnot, widgetAnnot02]);
    annotationManager.drawAnnotationsFromList([widgetAnnot]);
  });

Configuring widgets across multiple pages

You can also link widget annotations across multiple pages to a single form field. The same update behavior mentioned in the previous section applies. In the example below, we extend the createWidget function to accept a Page argument. Finally, we attach multiple cross-page widgets to a single field. This allows you to have shared fields across multiple PDF pages, streamlining data entry and ensuring that updates to one widget are automatically propagated to the other widgets.

Two Widgets One Field

function createWidget (field, options, x, y, Annotations, page = 1) {
  let newWidget = new Annotations.TextWidgetAnnotation(field, options);
  newWidget.PageNumber = page;
  newWidget.X = x;
  newWidget.Y = y;
  newWidget.Width = 50;
  newWidget.Height = 20;
  return newWidget;
}

WebViewer(...)
  .then(instance => {
    const { annotationManager, Annotations } = instance.Core;

    const field = new Annotations.Forms.Field("some text field name", {
      type: 'Tx',
    });

    const widgetAnnot = createWidget(field, {}, 100, 100, Annotations);
    const widgetAnnot02 = createWidget(field, {}, 200, 200, Annotations);
    const widgetAnnot03 = createWidget(field, {}, 200, 200, Annotations, 2);
    const widgetAnnot04 = createWidget(field, {}, 200, 200, Annotations, 3);

    annotationManager.getFieldManager().addField(field);
    annotationManager.addAnnotations([widgetAnnot, widgetAnnot02, widgetAnnot03, widgetAnnot04]);
    annotationManager.drawAnnotationsFromList([widgetAnnot, widgetAnnot02, widgetAnnot03, widgetAnnot04]);
  });

Updating field values

The most consistent way to update a field's value is to call the setValue method on the field object. This will result in the field being updated along with all of the associated widgets.

WebViewer(...)
  .then(instance => {
    const { annotationManager, Annotations } = instance.Core;

    const field = new Annotations.Forms.Field("some text field name", {
      type: 'Tx',
    });

    field.setValue("Hello World");
    annotationManager.getFieldManager().addField(field);
  });

Additional field properties

The field has optional additional properties that can further define its behavior.

Max length

This defines the maximum number of characters that can be inputted into the field.

WebViewer(...)
  .then(instance => {
    const { annotationManager, Annotations } = instance.Core;

    const field = new Annotations.Forms.Field("some text field name", {
      type: 'Tx',
    });

    field.set({
      maxLen: 5,
    });

    annotationManager.getFieldManager().addField(field);
  });

Tooltips

This defines the tooltip that will be displayed when a user hovers over the widget annotation.

Example Tooltip

WebViewer(...)
  .then(instance => {
    const { annotationManager, Annotations } = instance.Core;

    const field = new Annotations.Forms.Field("some text field name", {
      type: 'Tx',
    });

    field.set({
      tooltipName: "I'm a tooltip!"
    });

    annotationManager.getFieldManager().addField(field);
  });

Options

Options are only applicable to list box and combo box field types. They define the possible values a user can select when interacting with these fields.

List Box Options

WebViewer(...)
  .then(instance => {
    const { annotationManager, Annotations } = instance.Core;

    const options = [
      { value: 'option1', displayValue: 'Option 1' },
      { value: 'option2', displayValue: 'Option 2' },
      { value: 'option3', displayValue: 'Option 3' },
    ];

    // Creates a listbox field. WidgetFlags.COMBO is false by default, so no `flags` object is needed.
    field = new Annotations.Forms.Field("some list box name", {
      type: 'Ch',
      options
    });

    annotationManager.getFieldManager().addField(field);
  });

Trial setup questions? Ask experts on Discord
Need other help? Contact Support
Pricing or product questions? Contact Sales