Product:
Get started with Full API
The full API is a complete browser side PDF SDK, unlocking viewing, parsing and editing of PDF files. This guide will demonstrate how to set up a basic full API project that outputs the number of pages in a PDF document.
The full API does not require any conversion of documents but can only view PDF documents.
Initial setup
This guide will require the following files:
- The WebViewer folder.
- An empty HTML document.
- An empty JavaScript document.
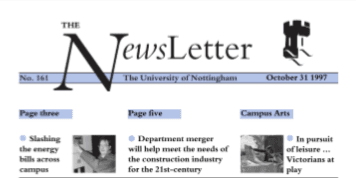
- A PDF document of your choice. For this guide we will be using the newsletter PDF document.
- An image to add to the PDF document. For this guide we will be using an image of a butterfly.

Setting up the HTML file
Open up index.html with a text editor and copy/paste the following code into the HTML document.
HTML
Here we include the required WebViewer file and start out with a single "viewer" div that we will add content to using a script.
Setting up your JavaScript document
In our custom script index.js, the WebViewer function is called to create a new WebViewer instance that will be added as a child to our "viewer" div.
JavaScript
Overview of WebViewer initialization parameters:
path- String representing the URL that points to the WebViewer libraries.initialDoc- String representing the URL of the document that will be loaded in WebViewer.showLocalFilePicker- Boolean that determines whether we can open local documents in the viewer.fullAPI- If true, allows the Full API to be used andPDFNetwill be available on the instance.licenseKey- String containing the license key (you do not need to set this property if you are just trialing)
If you open index.html from a server, you should be able to see your document displayed in WebViewer.
Now that we have our pdf displayed, let's use the full API to manipulate the document.
In order to run this on browsers without ES7 support, you can convert the file to ES5 using ES7-to-ES5 transformers such as Babel.
If you run the project again in a server, you should be able to see "Hello WebViewer" pop up in an alert box once WebViewer has loaded. Before the custom code is run however, several checks and initializations need to be done first.
PDFNet.initialize()- Initializes Full API backend. This should be called before any Full API functions are called.doc.getPDFDoc()- Extracts the PDFNet PDFDoc object from the WebViewer document.pdfDoc.requirePage()- Ensures that a particular page of the pdf document is finished downloading before we read or write from it.- If the page(s) to be edited cannot be known until the custom script runs,
requirePage()can be called instead in the middle of the custom code, but only by unlocking and relocking all operations. - An example of this can be seen in the html file of the Viewer Edit test on the samples page.
- If the page(s) to be edited cannot be known until the custom script runs,
Writing your custom code
Let us change our main() code to do something more interesting:
JavaScript
This code sample adds the "butterfly.png" image to location (x:100, y:600) relative to the lower left corner of the document's first page.
Once our custom code has finished running, two final functions docViewer.refreshAll() and docViewer.updateView() are called to refresh and update the WebViewer display.
The resulting viewer should look like this:

Converting async/await code (important for IE usage)
This guide and all other Full API guides use ES7 async/await functions in JavaScript which are currently supported in Chrome, Firefox, Edge, Safari, and Opera but may be unsupported in other browsers. If you are working with a browser without async/await support, you will have to transpile the code from ES7 to ES5 using something like Babel.
Full API samples
The best way to get started with writing your own full API code is to run the full API samples. You can find working samples and their source code on the Full API samples page.
Did you find this helpful?
Trial setup questions?
Ask experts on DiscordNeed other help?
Contact SupportPricing or product questions?
Contact Sales