Product:
Libraries and Frameworks
Integrations
Mendix
SharePoint
File Handler App with Graph APIs
Welcome to Apryse. This guide will help you integrate a free trial of WebViewer into SharePoint Online as a web part. It will help you clone the SharePoint sample repository and show you how to integrate WebViewer as a web part. Your free trial includes unlimited trial usage and support from solution engineers.
Prerequisites
- Node v22.21.0 and NPM
- SPFx: v1.21.1
- WebViewer:
- (Optional but recommended) Node Version Manager
- Get your Apryse trial key.
License Key
Apryse collects some data regarding your usage of the SDK for product improvement.
If you wish to continue without data collection, contact us and we will email you a no-tracking trial key for you to get started.
For step-by-step help on setting up a SharePoint development environment, see one of the following:
- SharePoint DX Setup Guide
- Set up your Microsoft 365 Tenant
- Set up your SharePoint Framework Development Environment
License Key Required
The trial of Apryse SDK requires a trial license key, which is provided in the box titled "License Key". A commercial license key is required for use in a production environment. Please contact sales to purchase a commercial key or if you need any other license key assistance.
Keep your license keys confidential.
License keys are uniquely generated. Please make sure that it is not publicly available (e.g. in your public GitHub).
SharePoint File Handler
File handlers are an Microsoft 365 add-in that allows user to define customized actions on specified file types. With File Handlers, you can enable the following user experience:
- Create new files in the browser
- File preview
- Custom actions that launch into your app
Create a helper app
You can started with creating a helper app that assist you to register the File Handler app in Azure Active Directory.
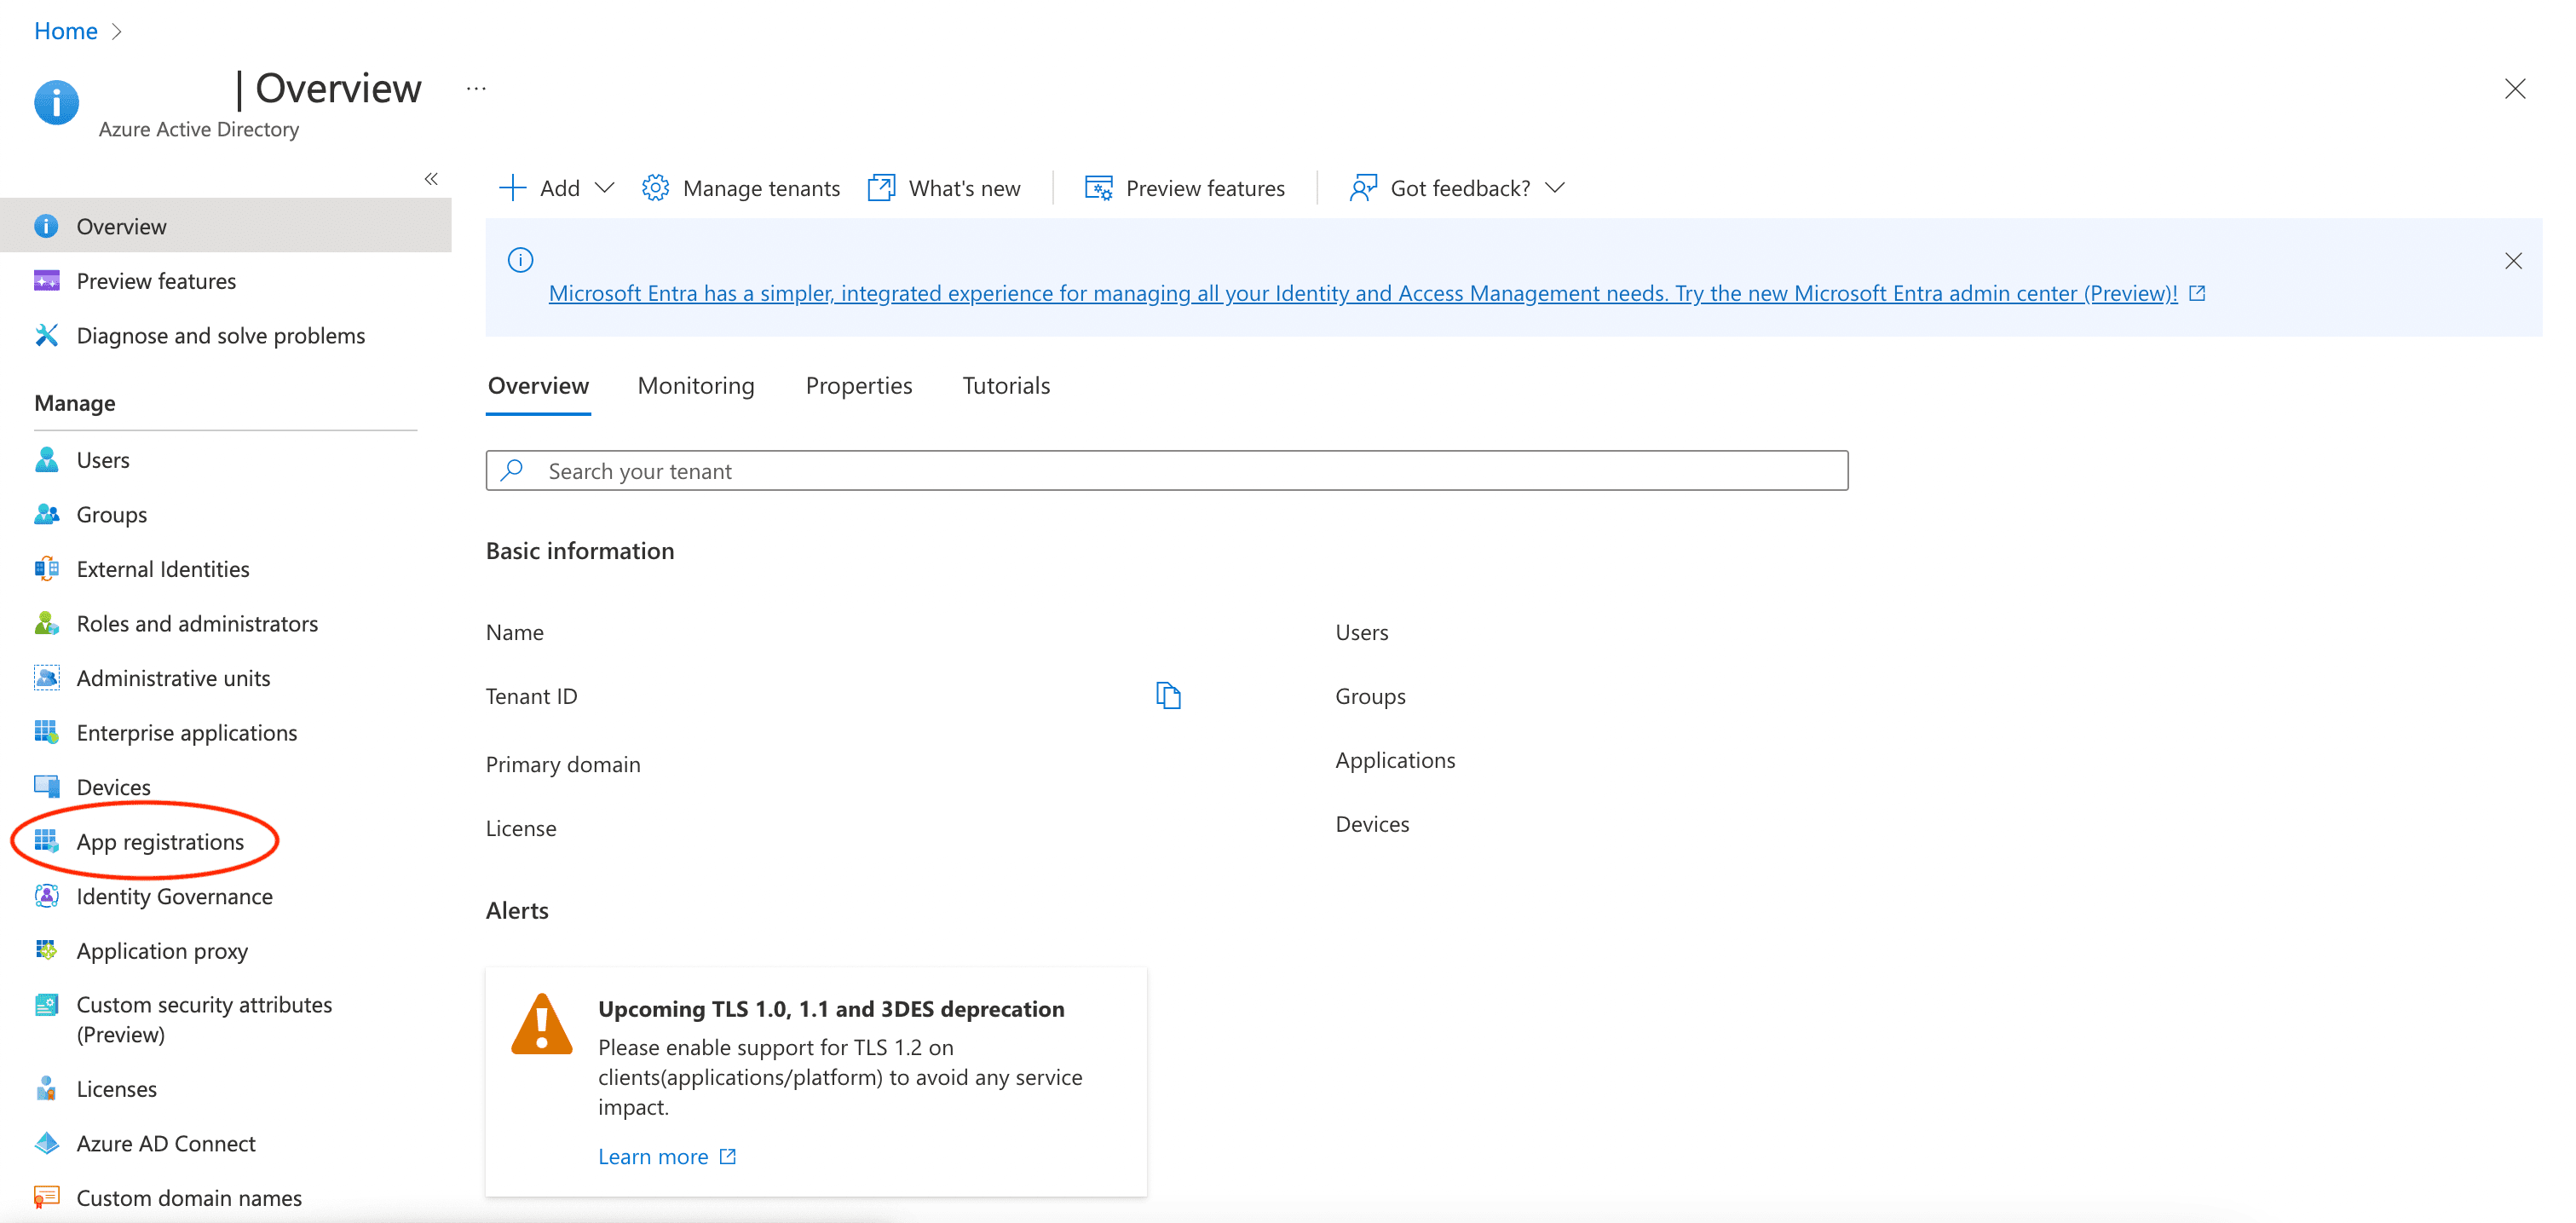
- Sign in to Azure Portal
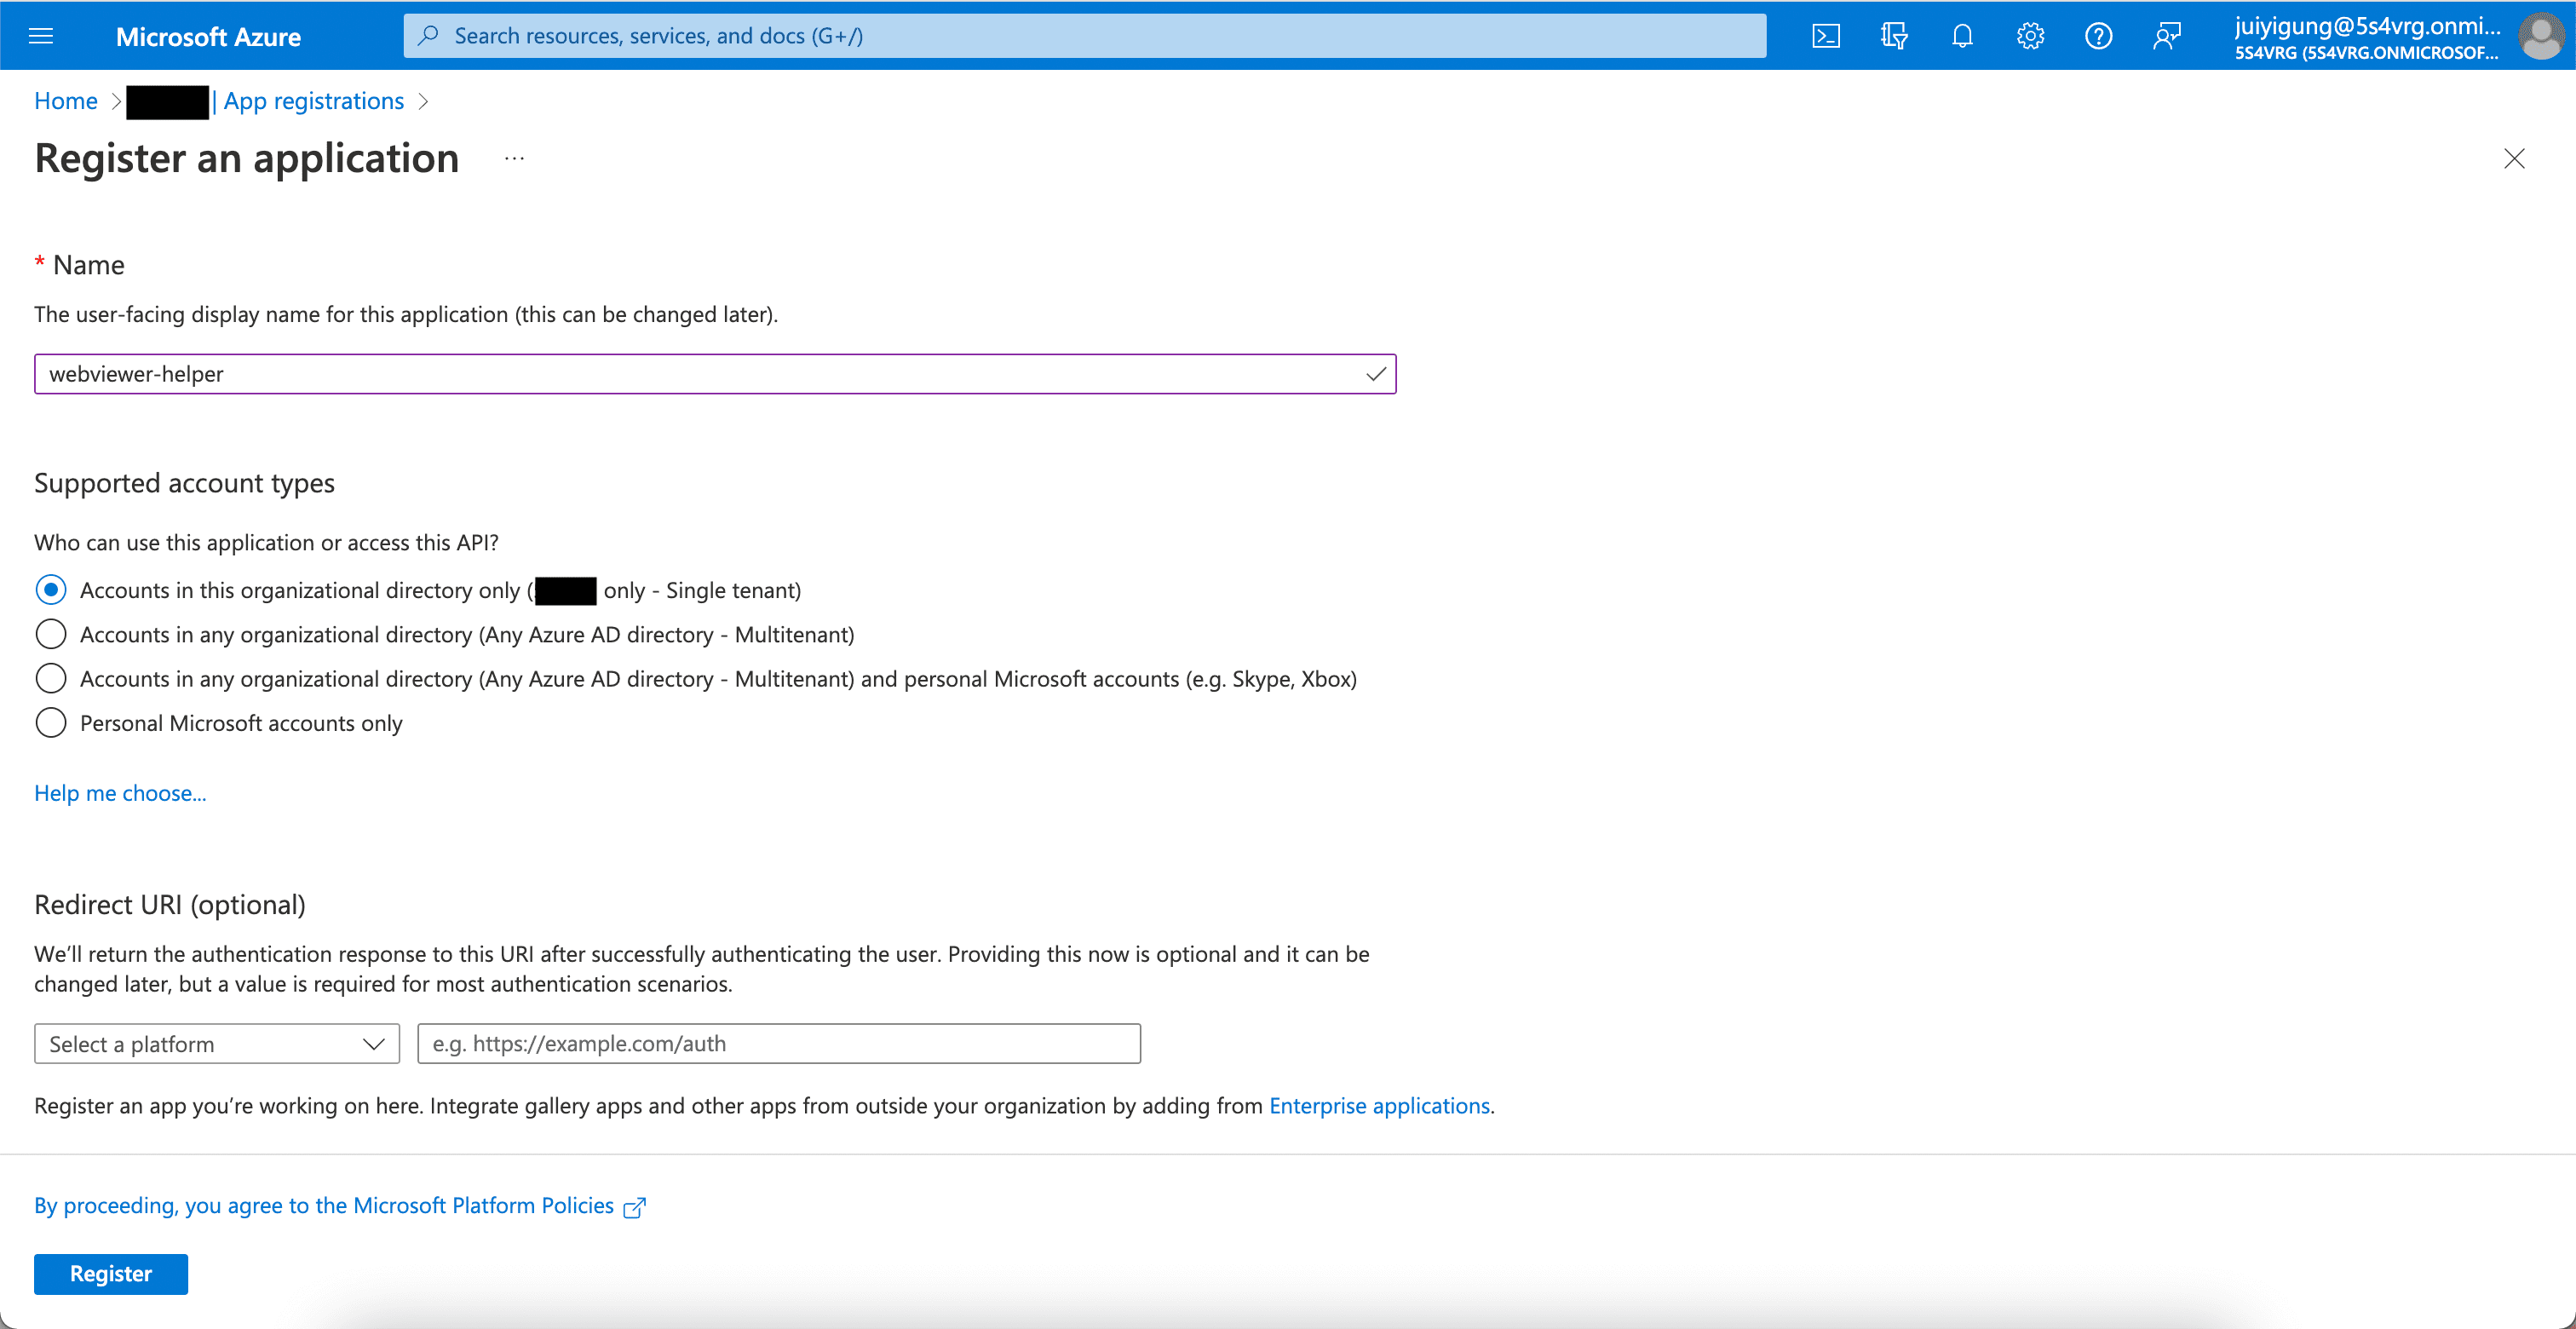
- Select App Registrations on the left panel and click + New Registration. Fill in a name that you would find it easily. We put webviewer-helper and click Register.
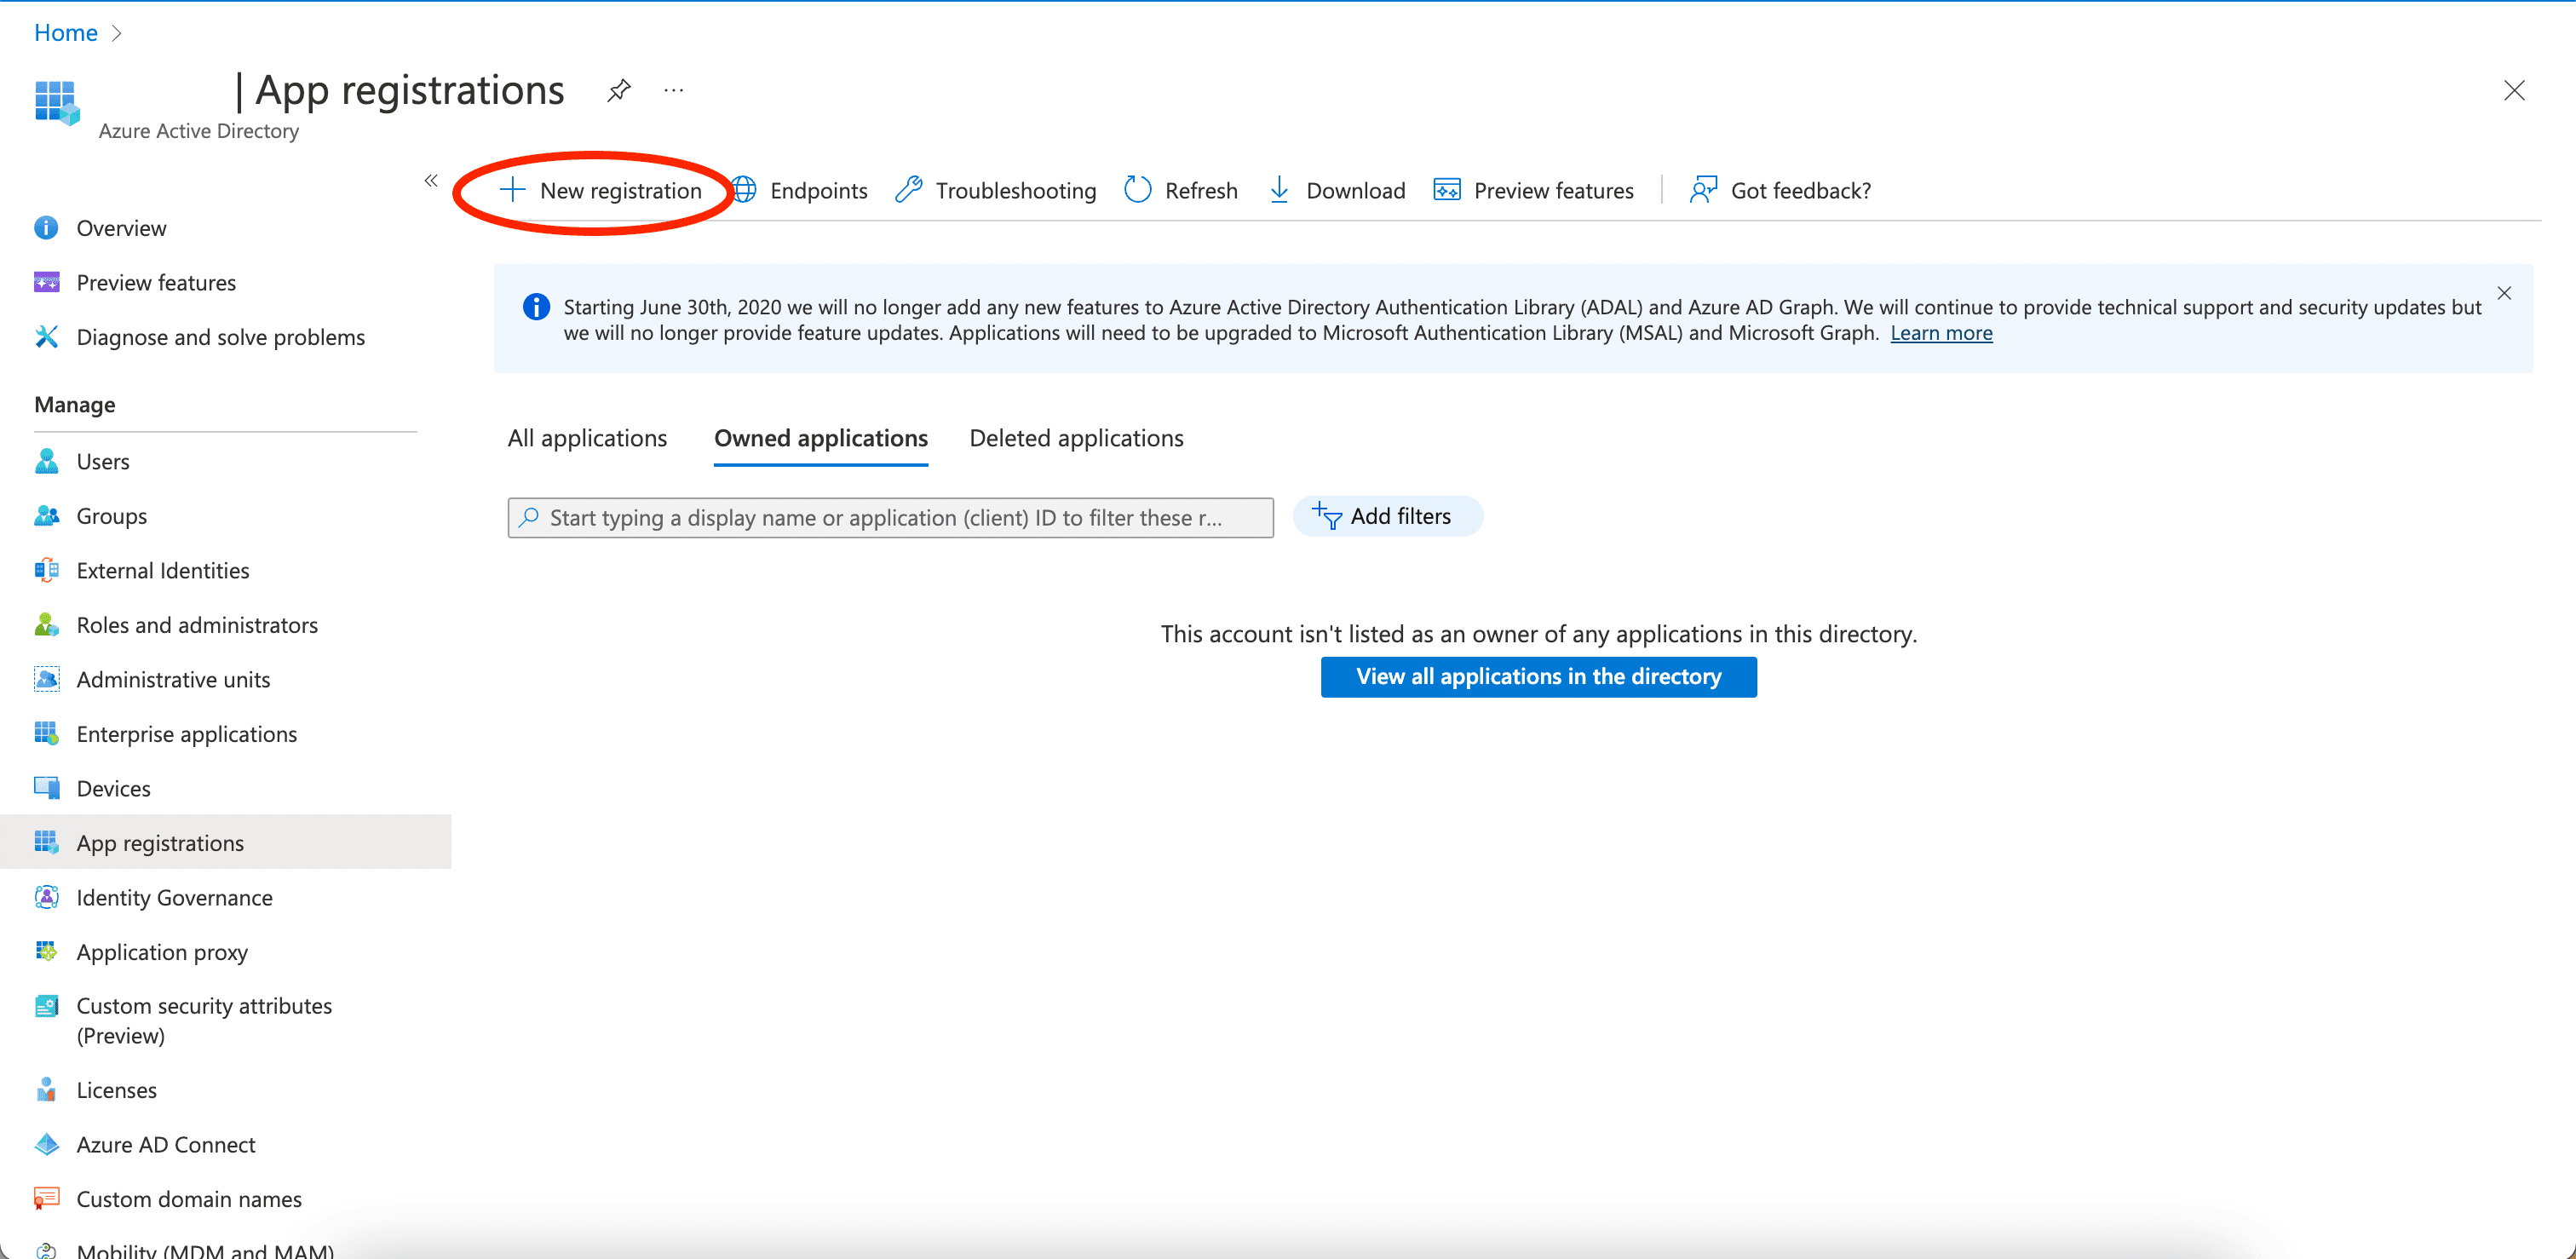
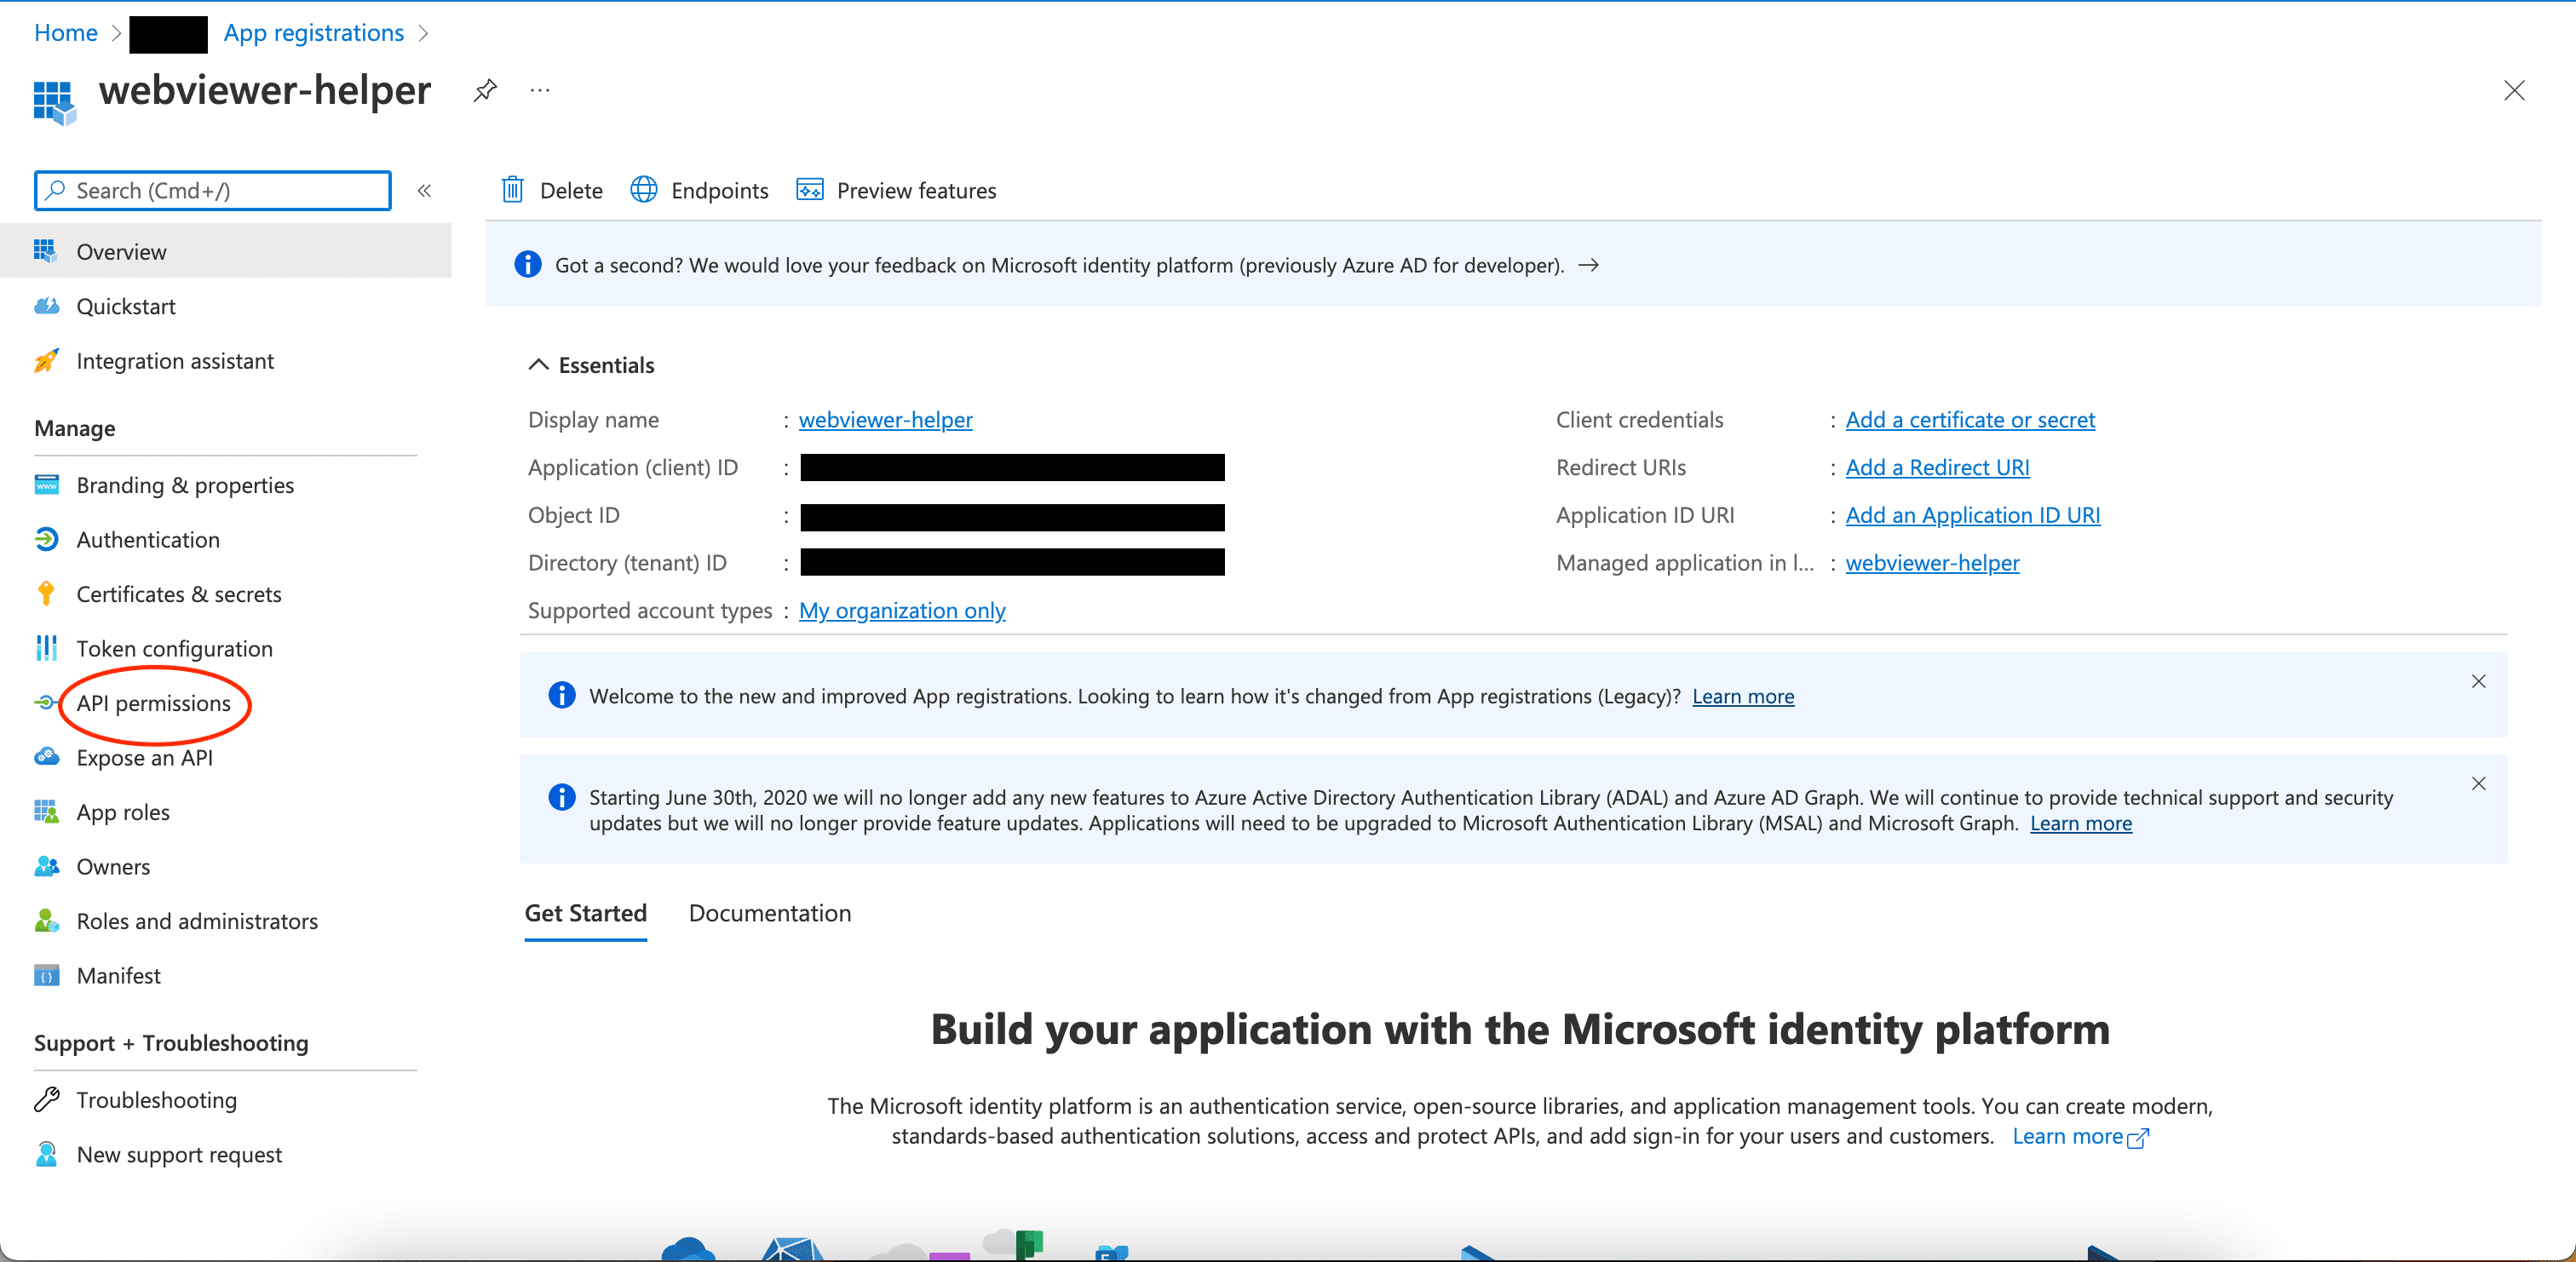
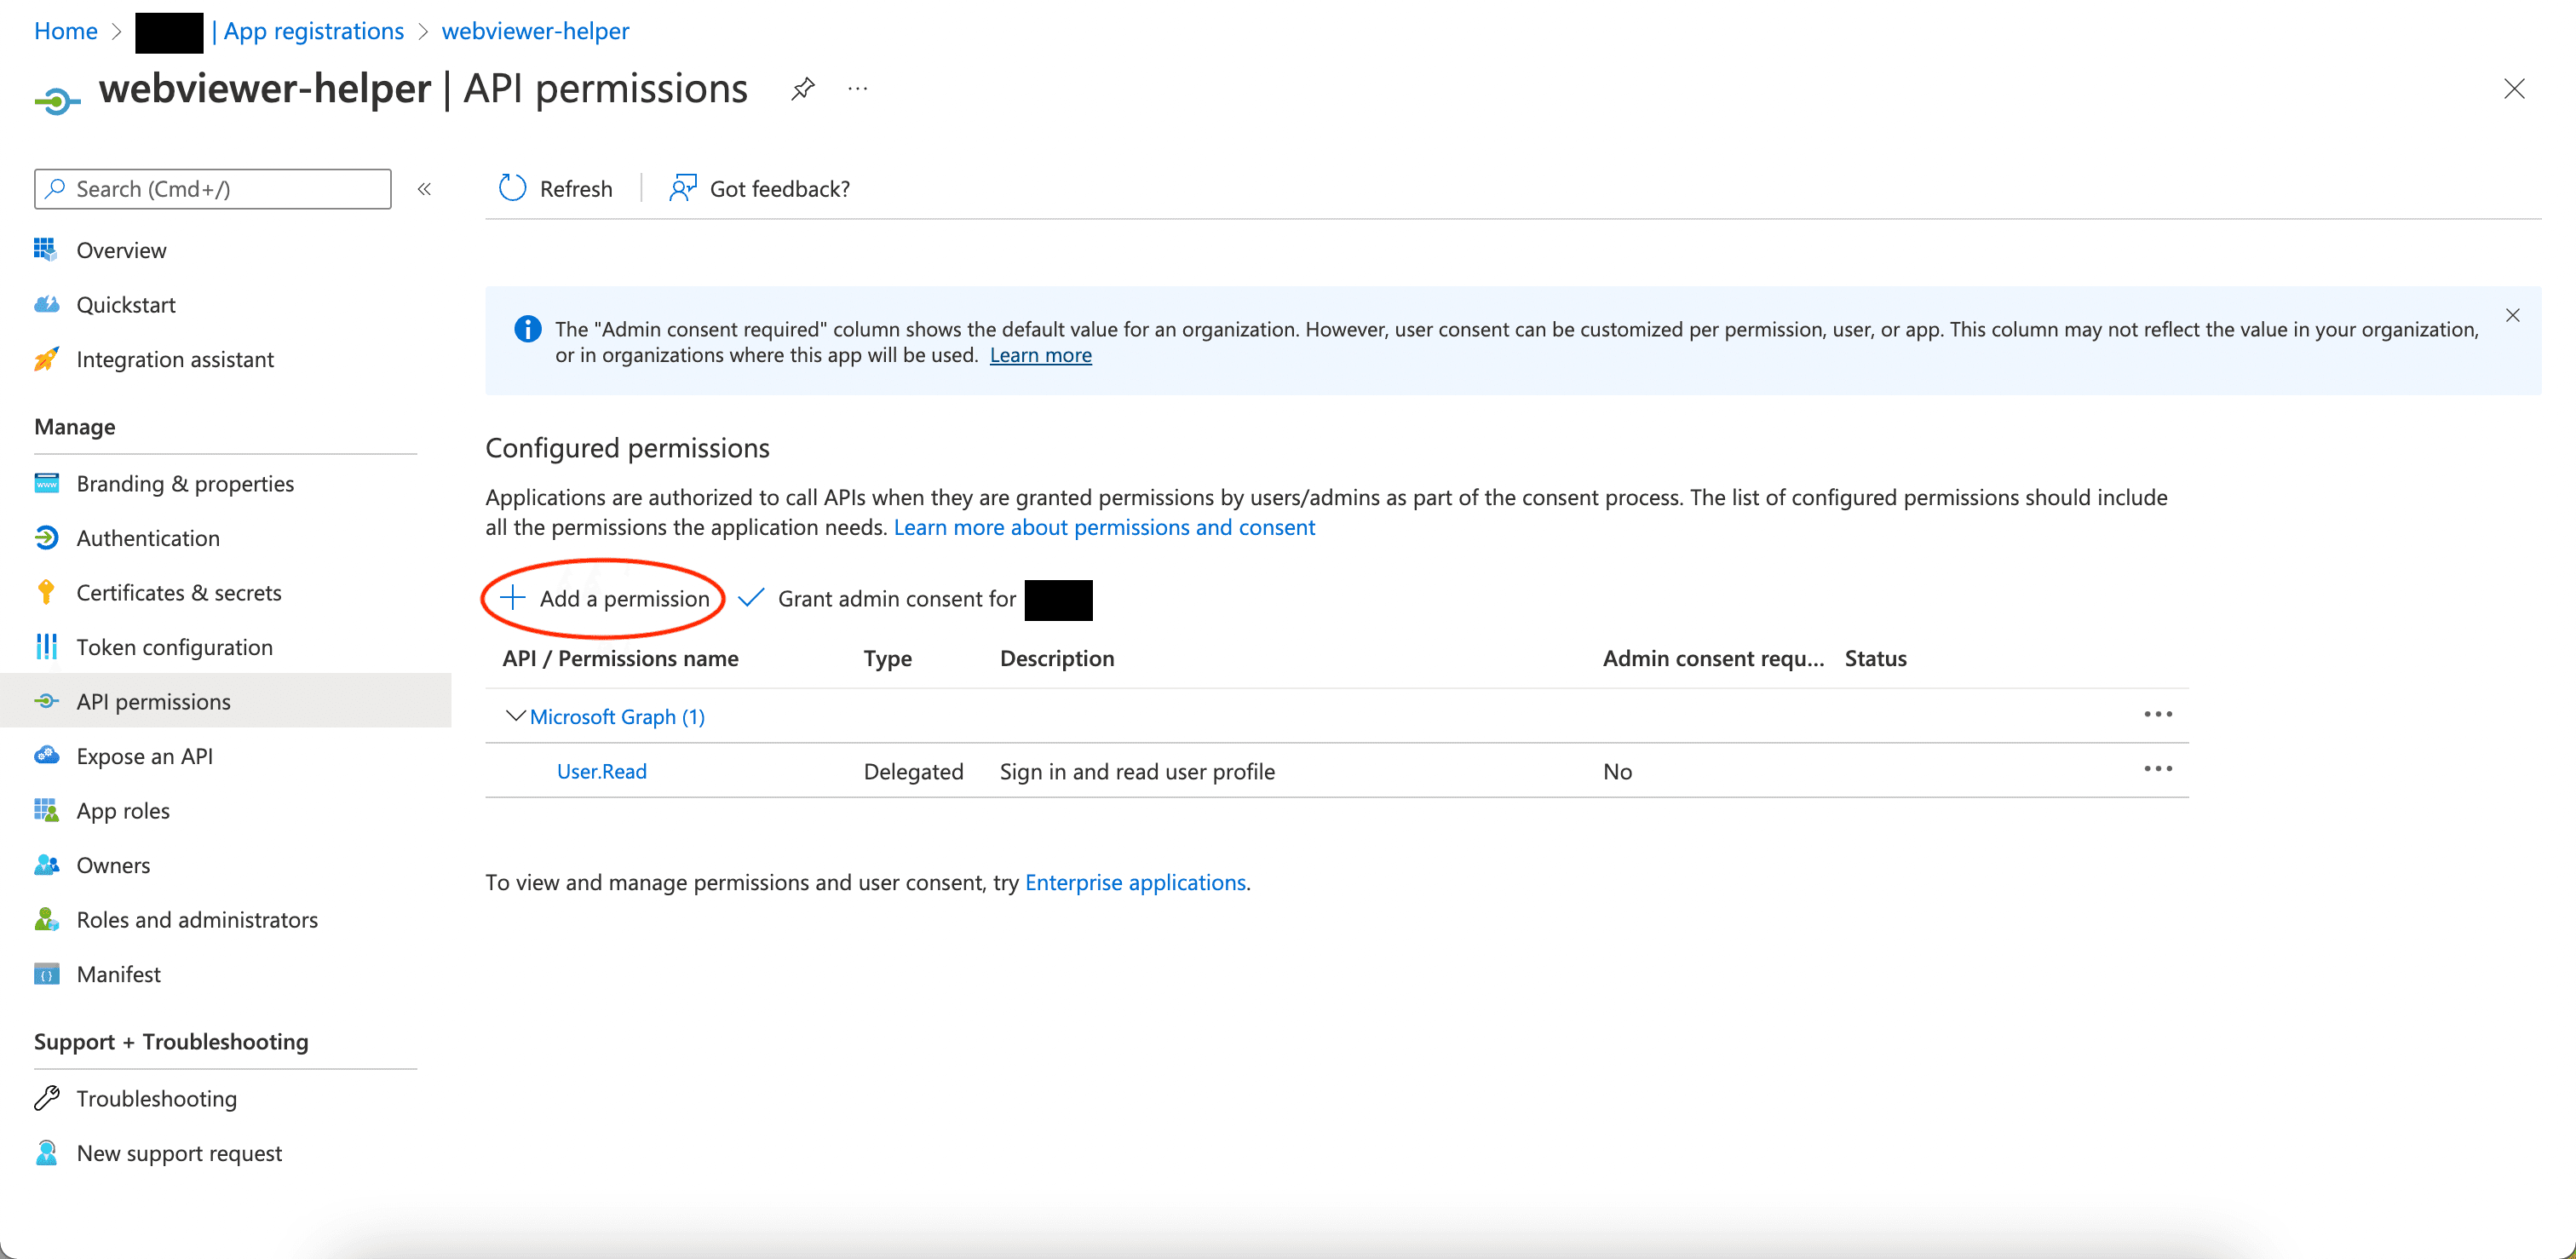
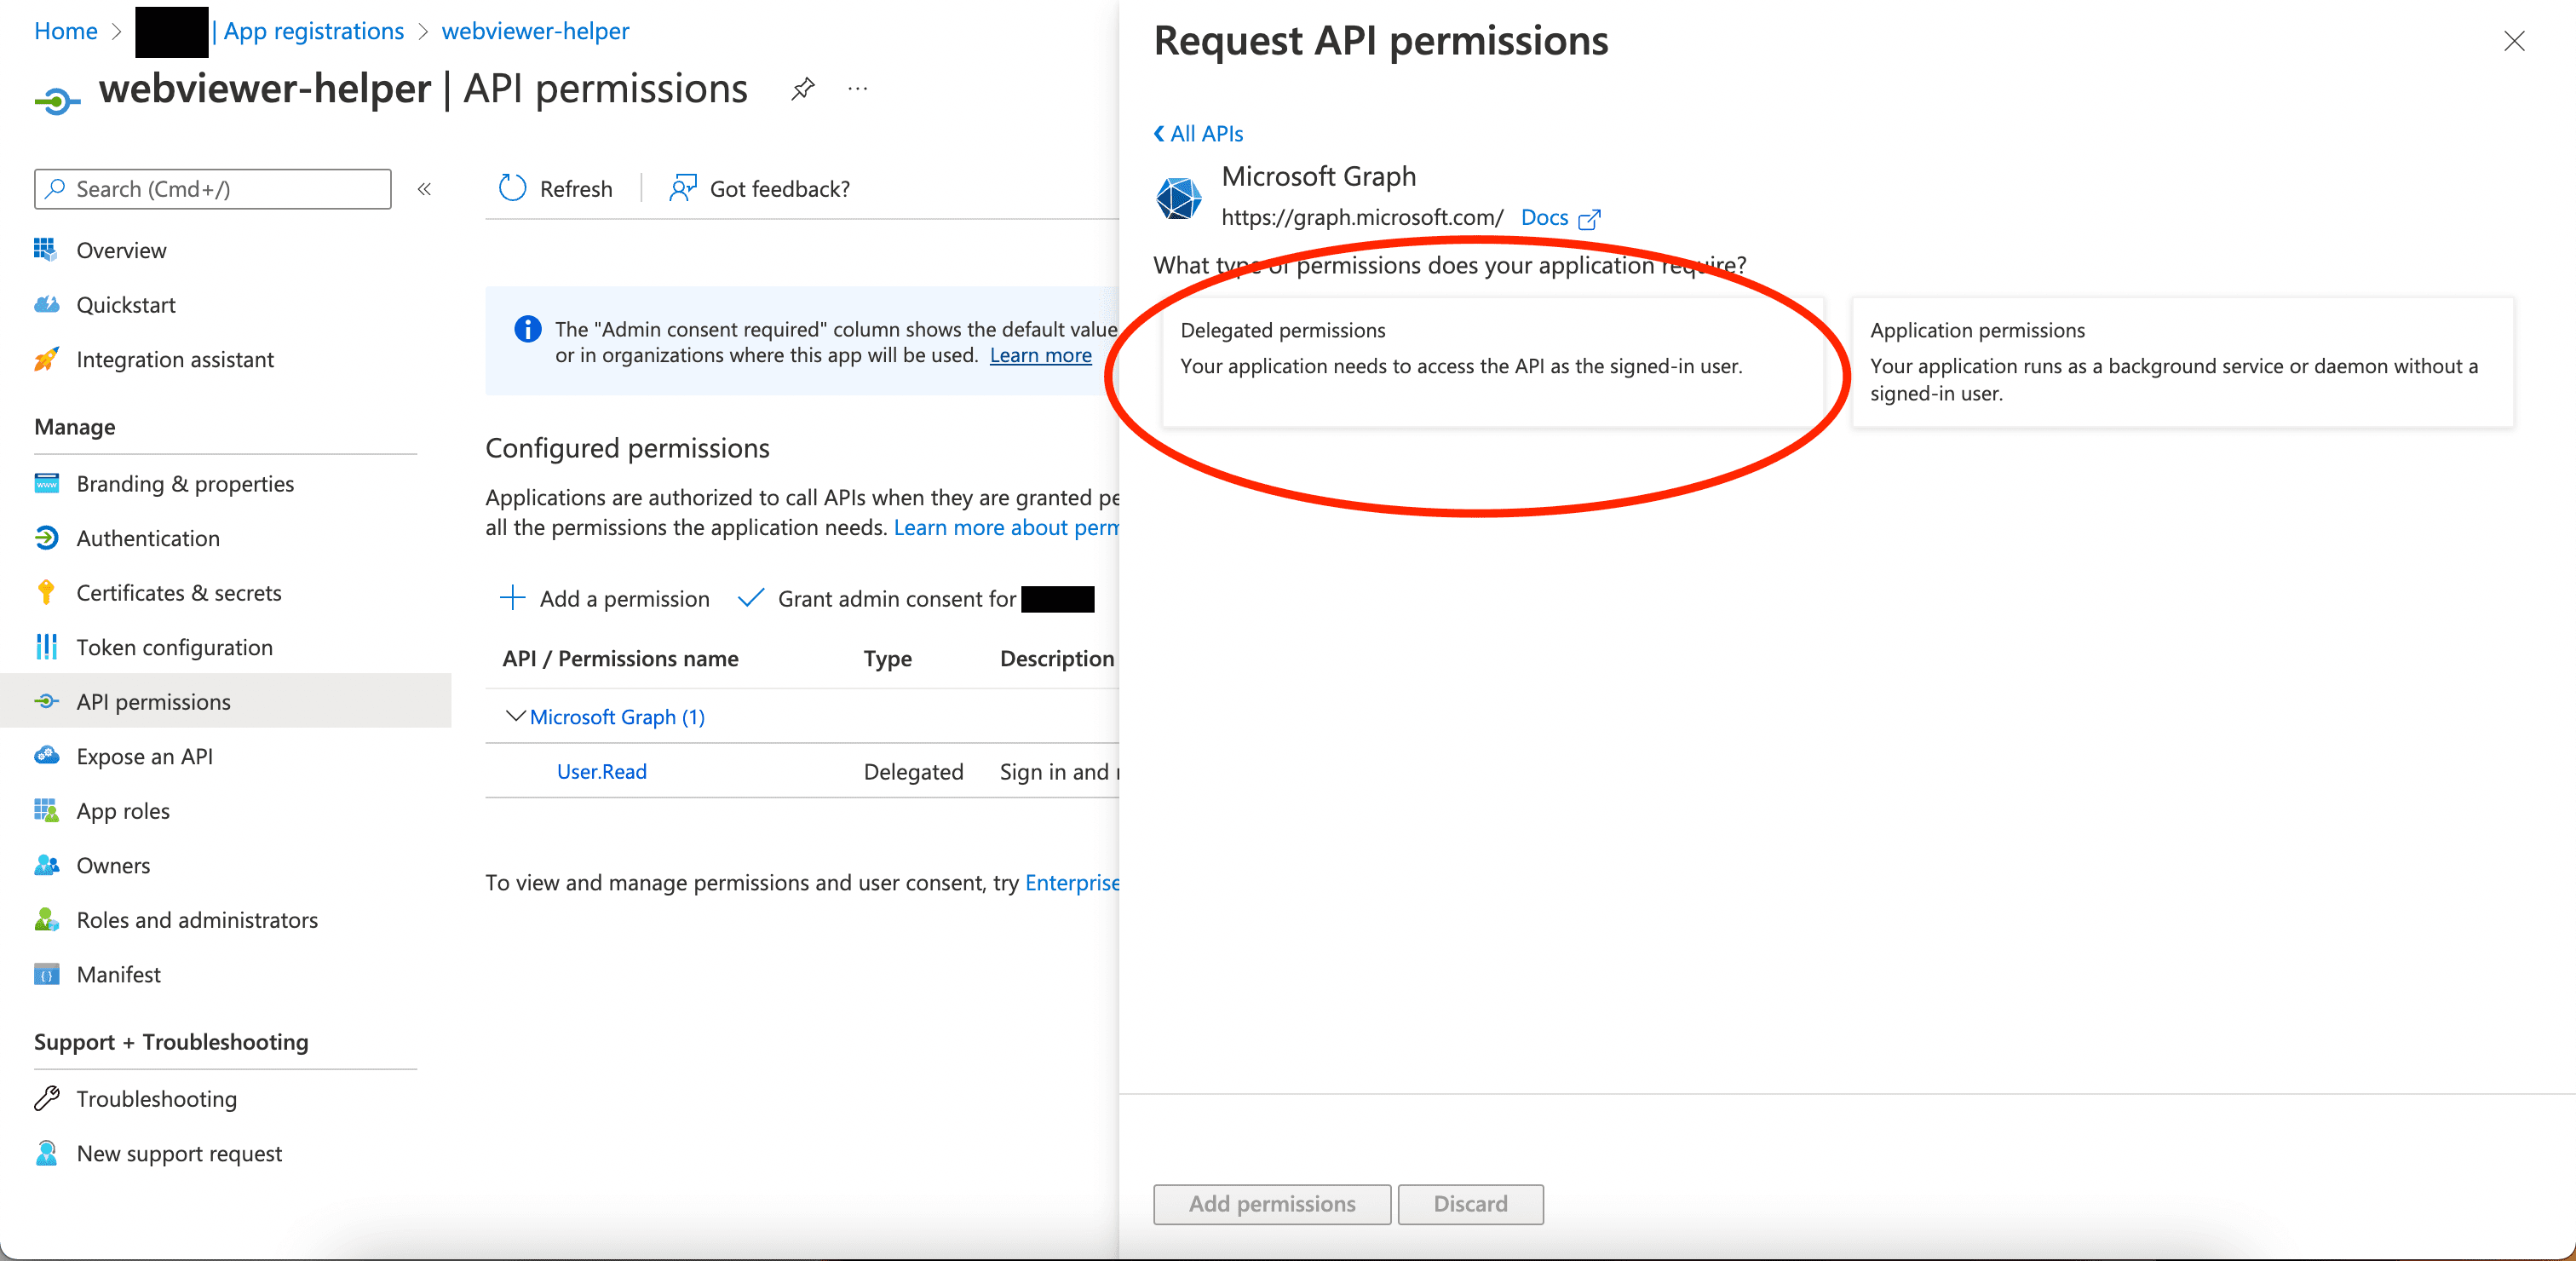
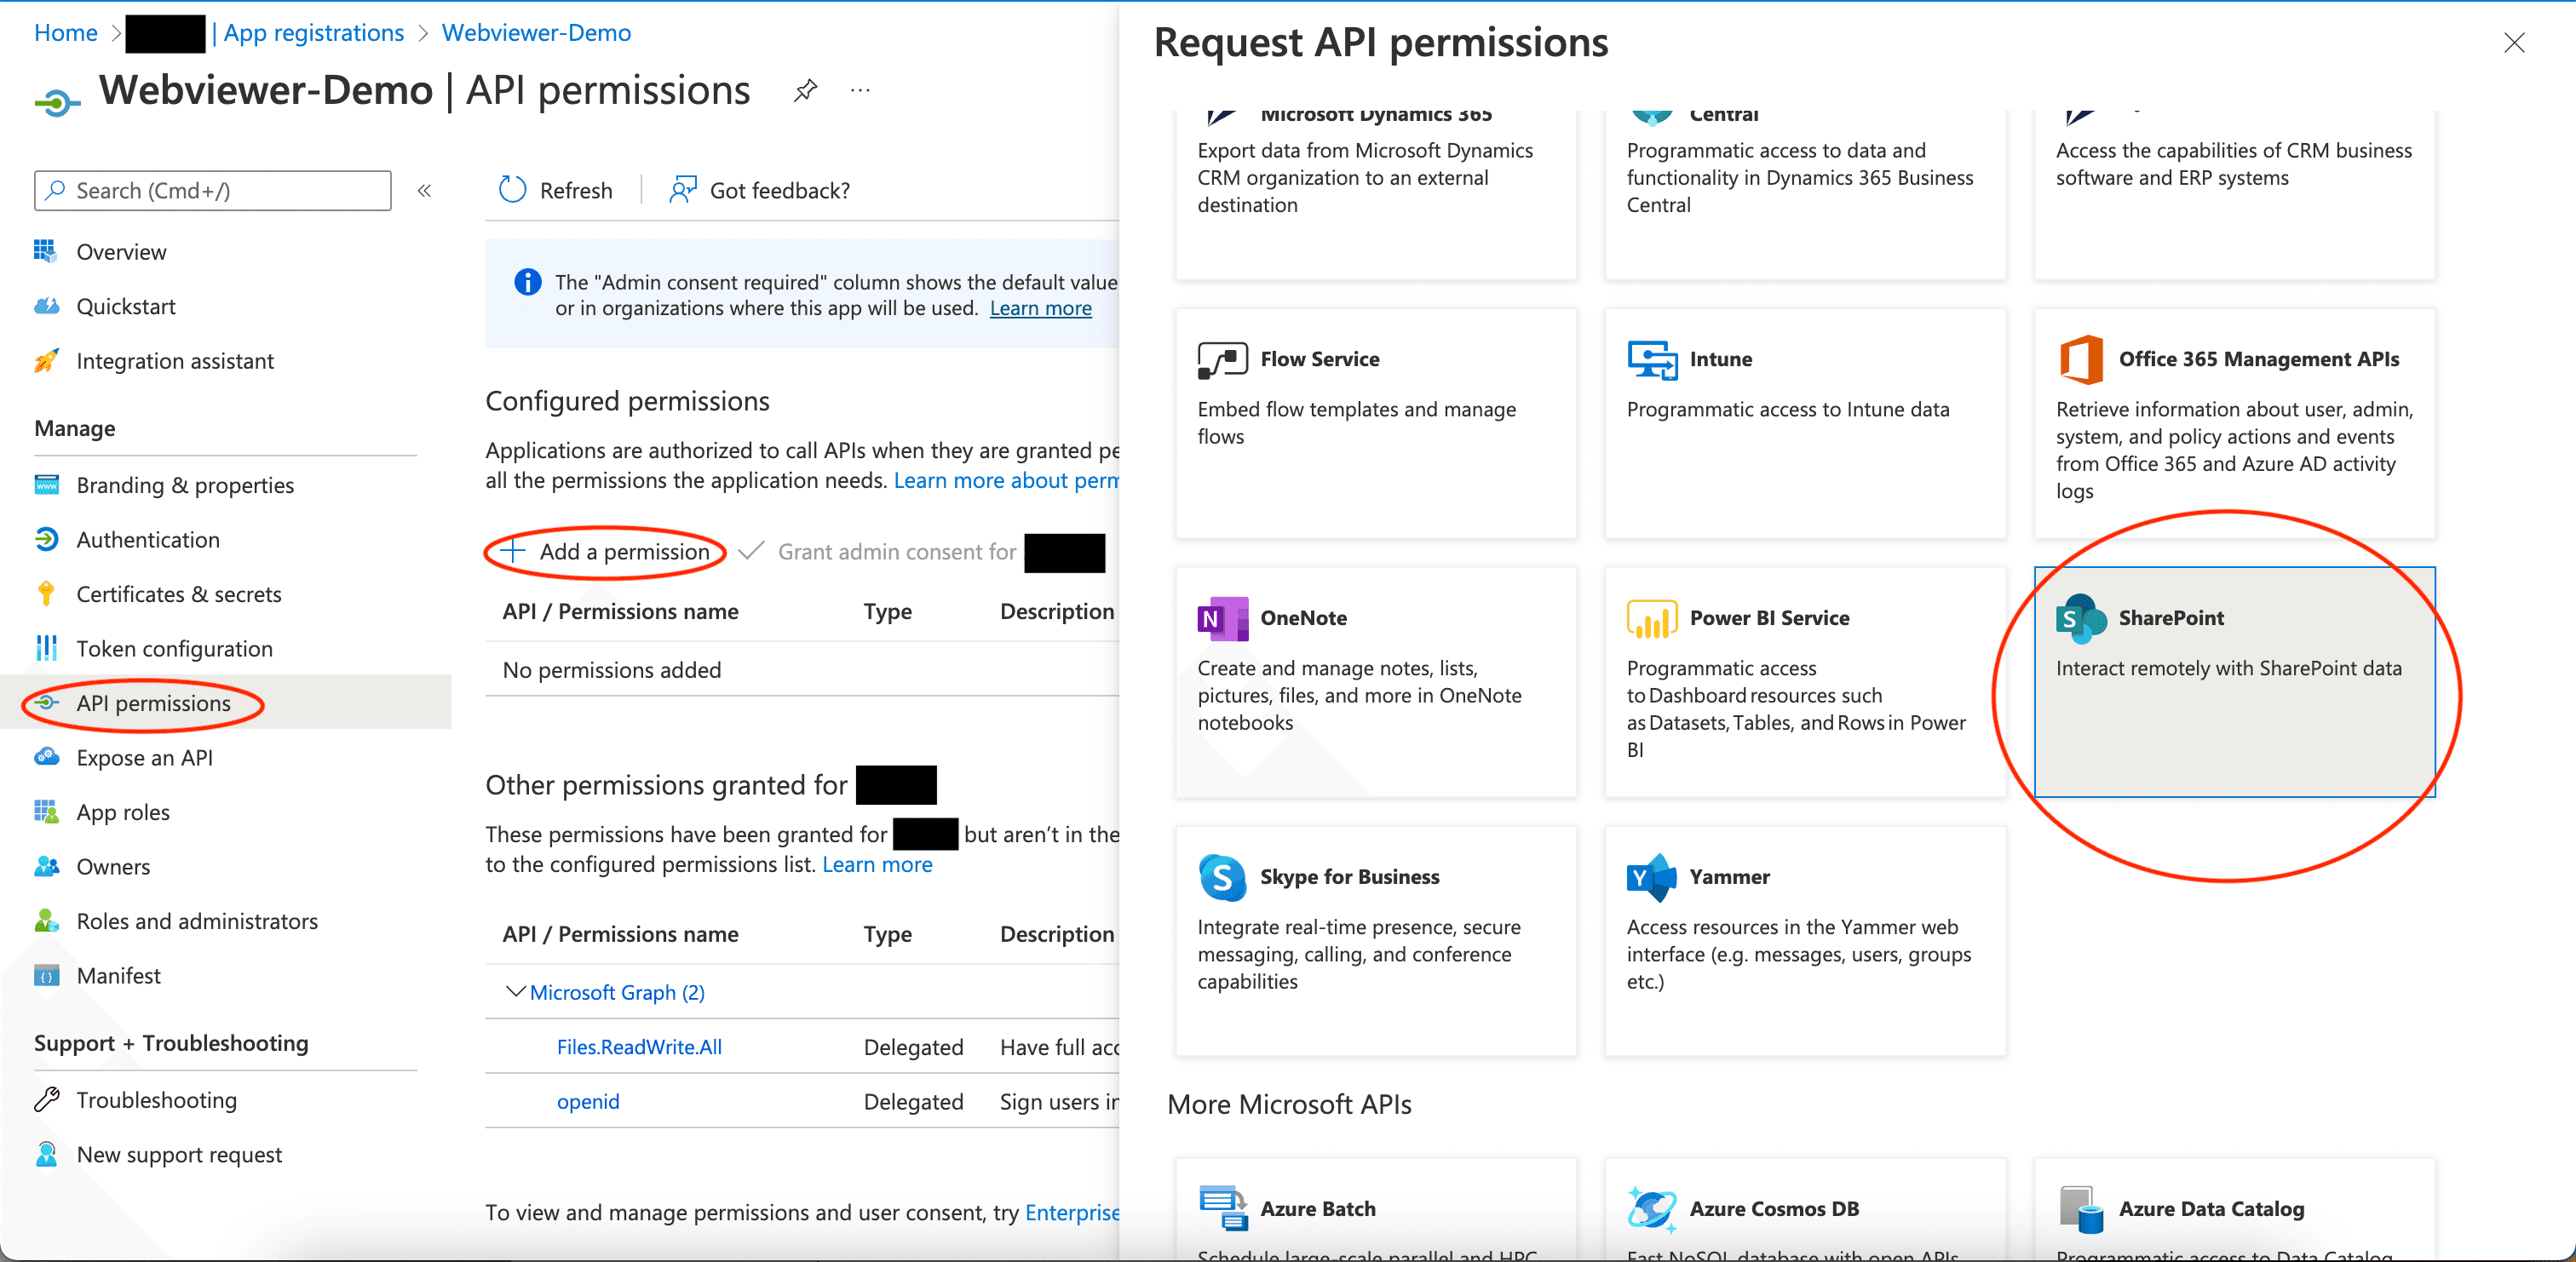
- Select API Permissions on the left panel and click Add a permission.
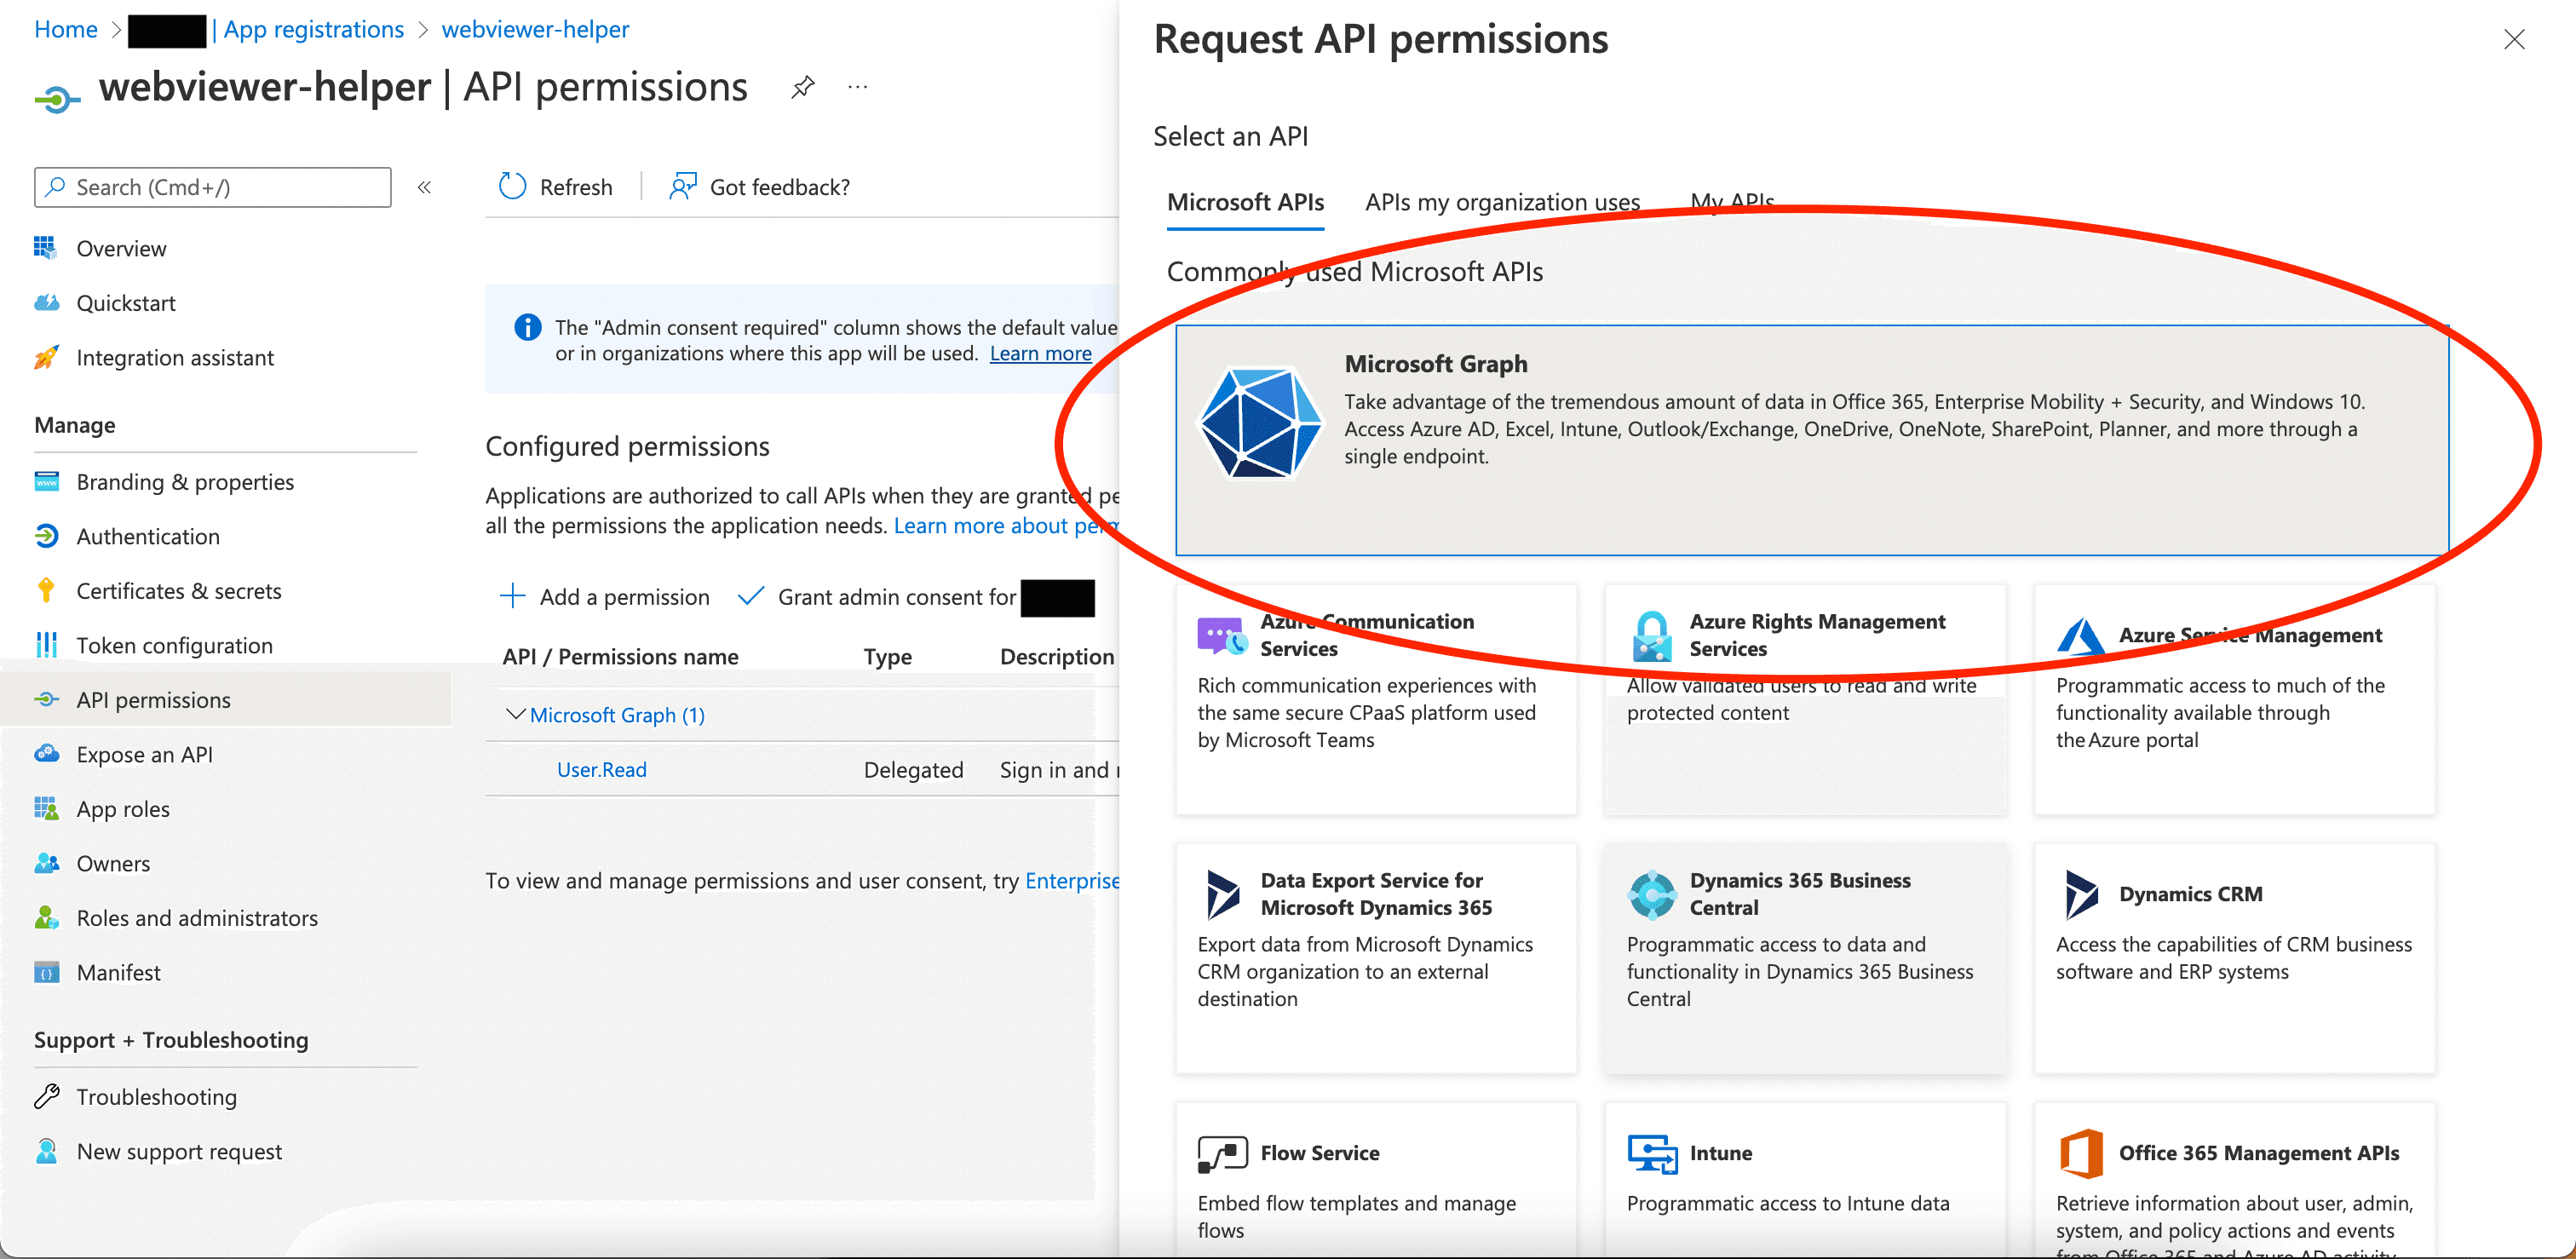
- Select Microsoft Graph and Delegated permissions.
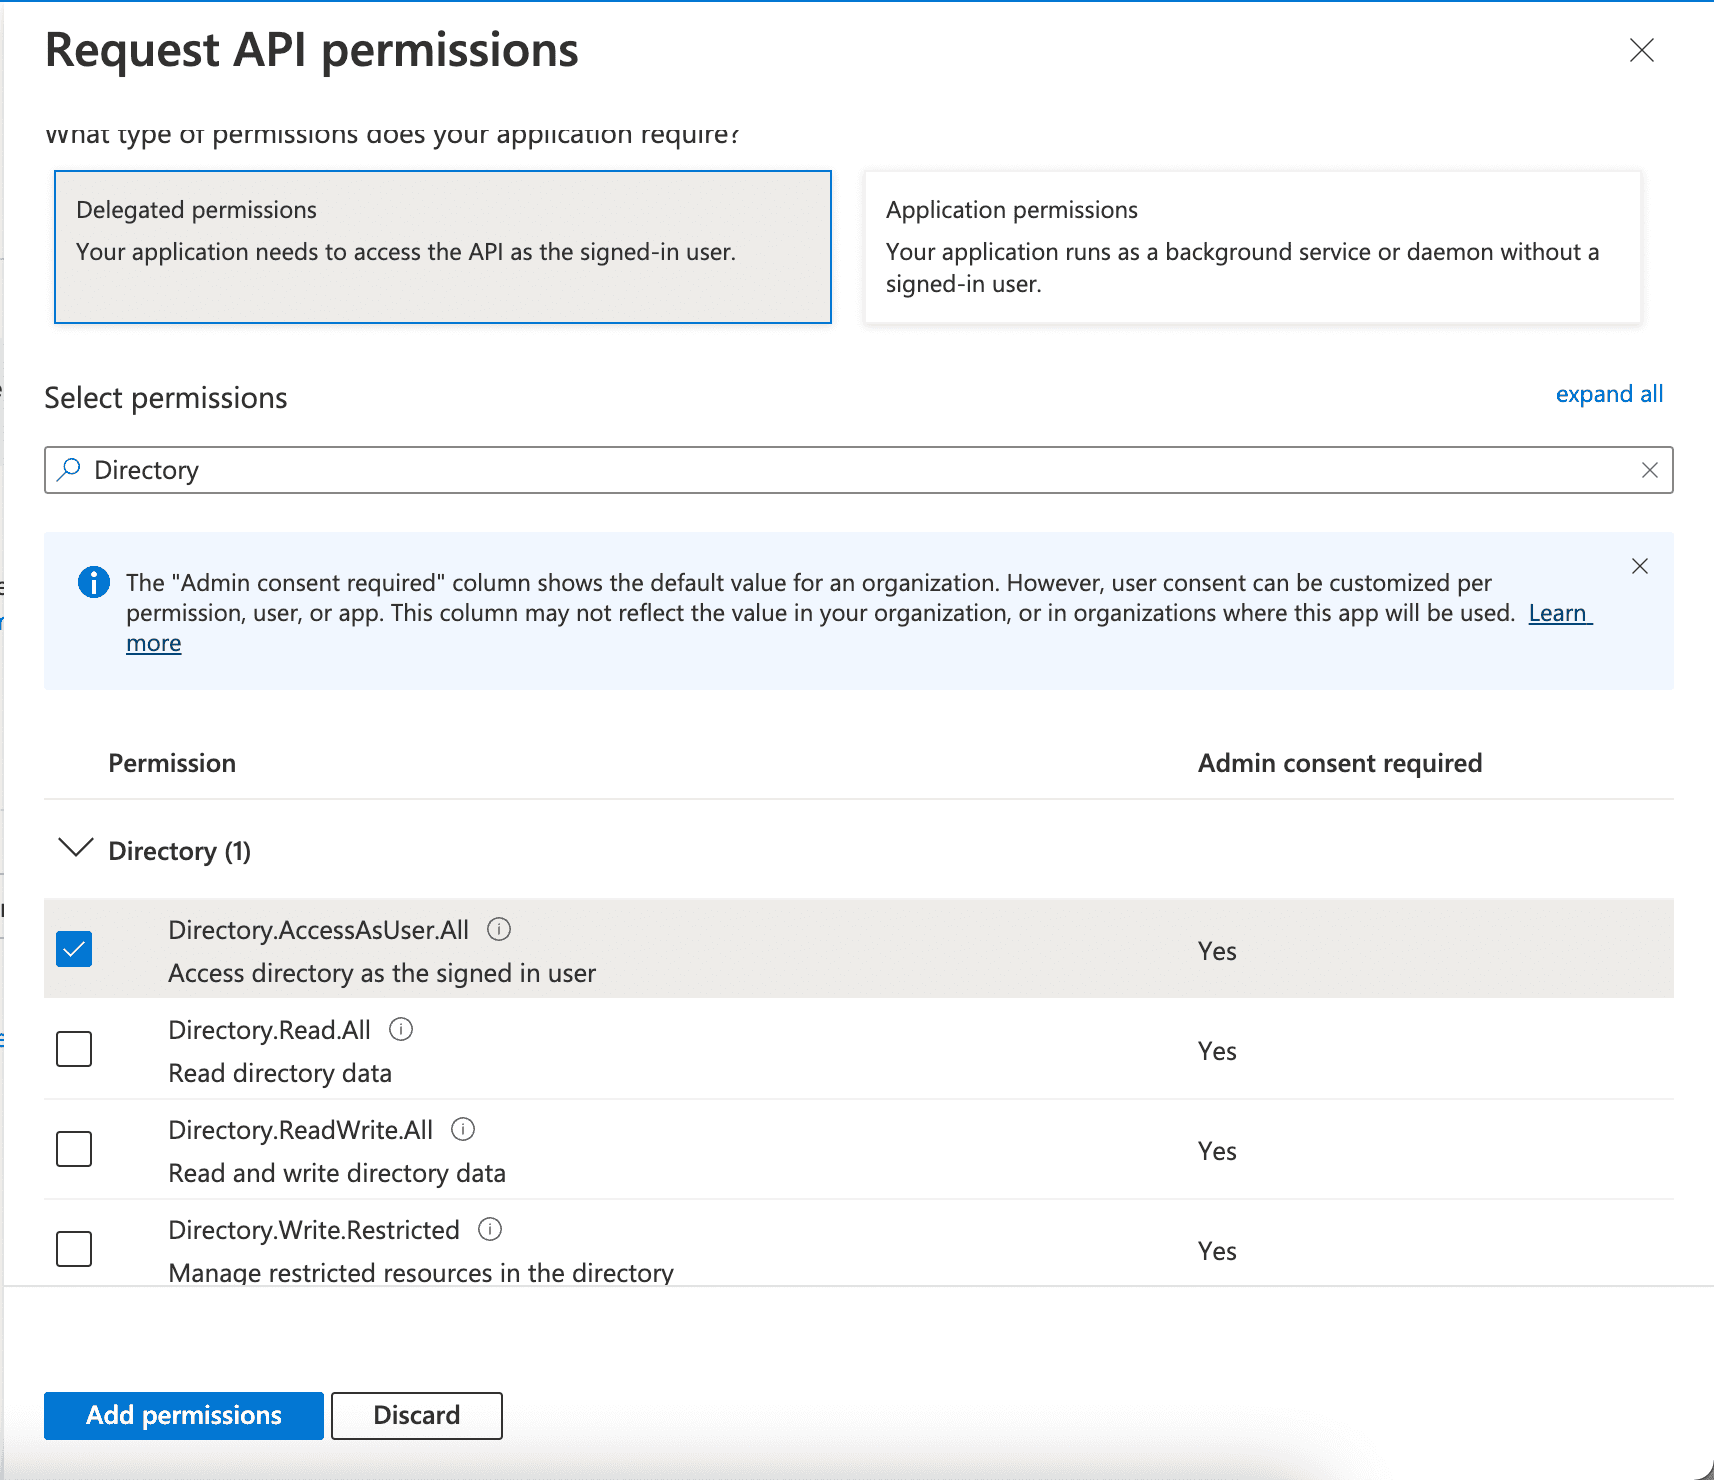
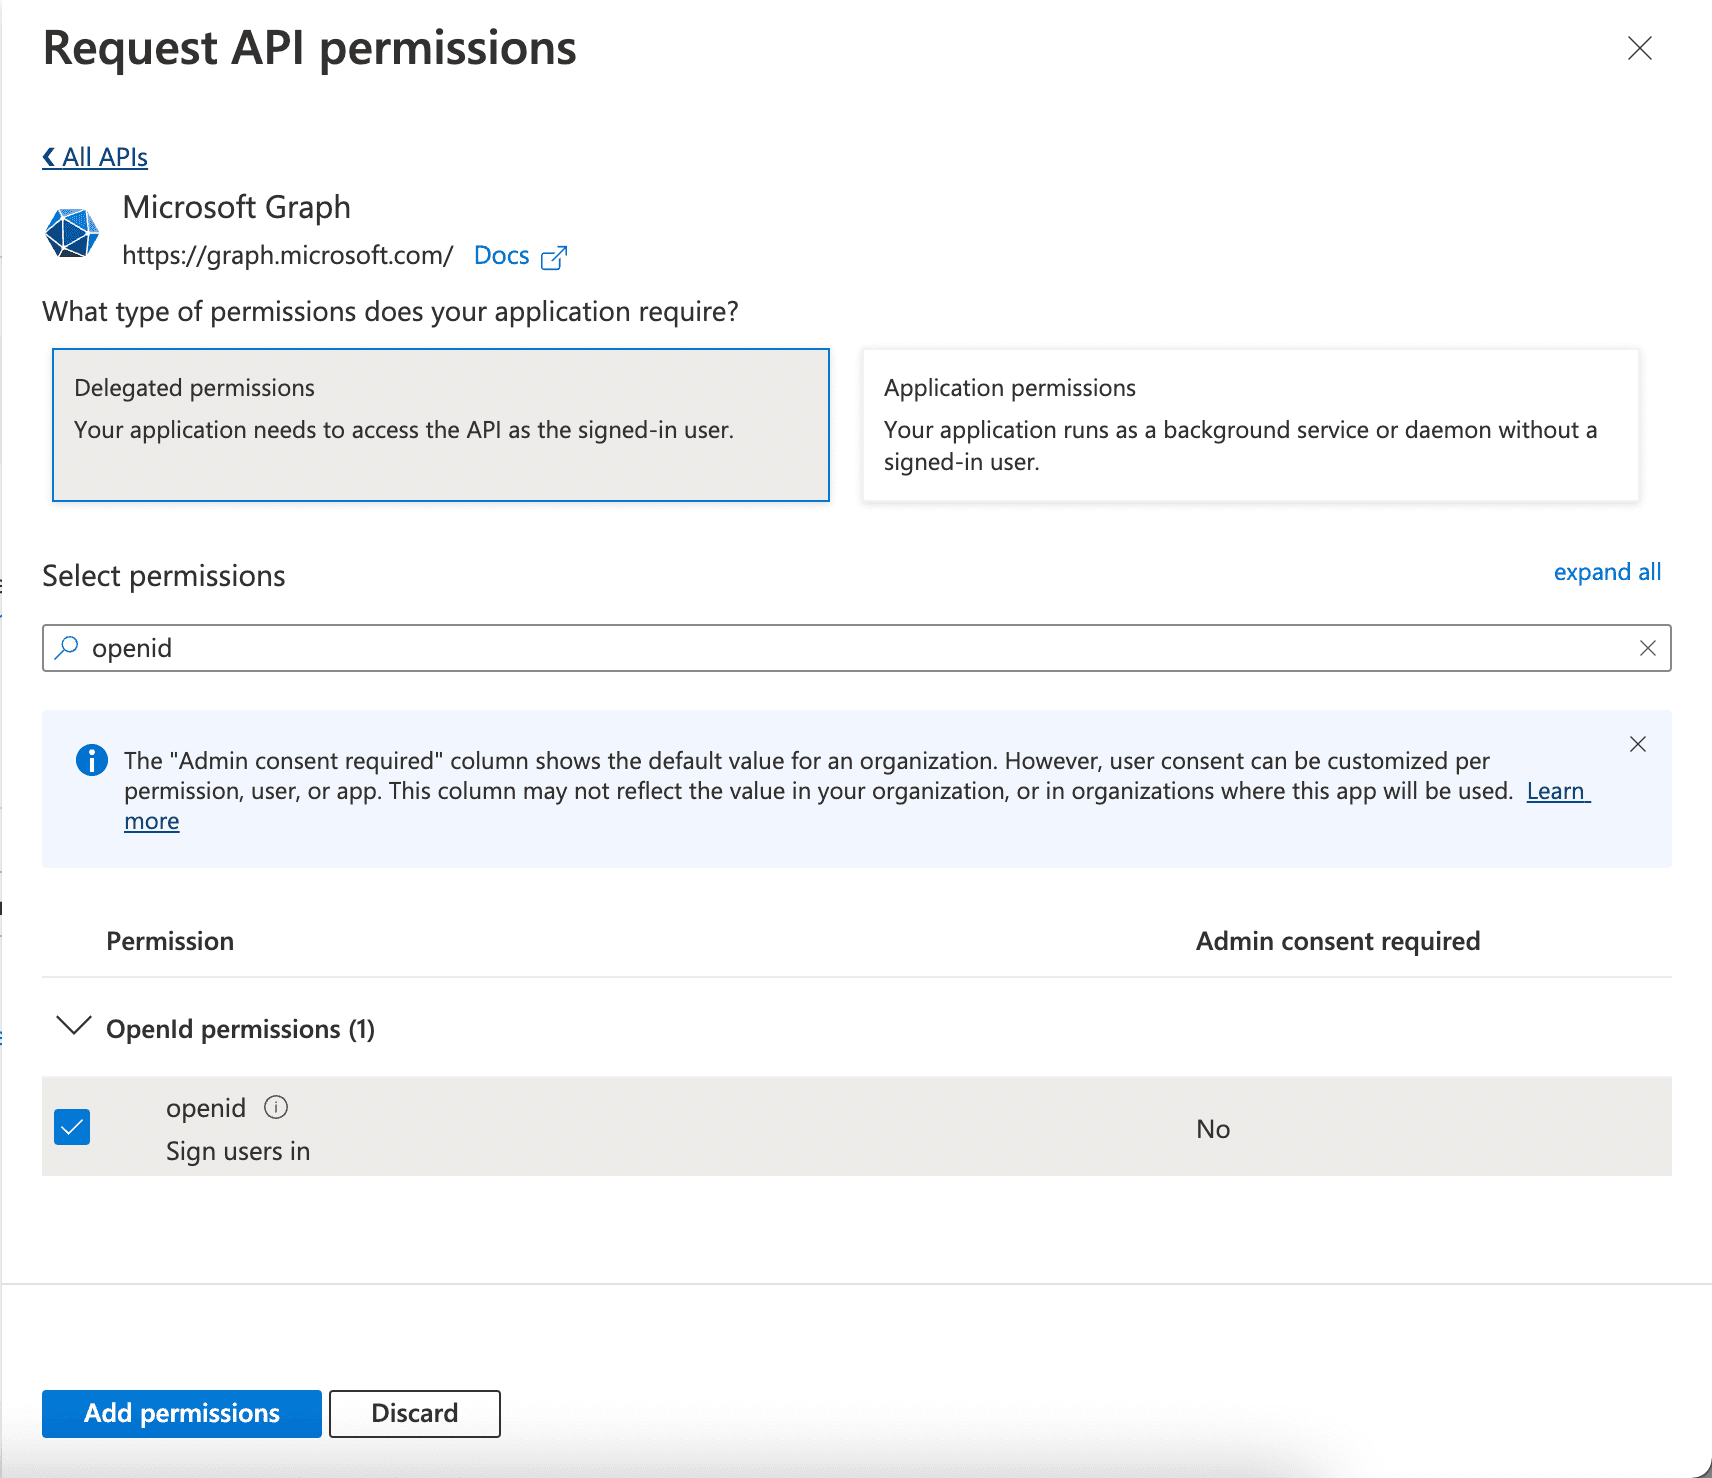
- Search for Directory and select Directory.AccessAsUser.All. Then search openid and select openid. Click Add Permissions after the permissions are selected.
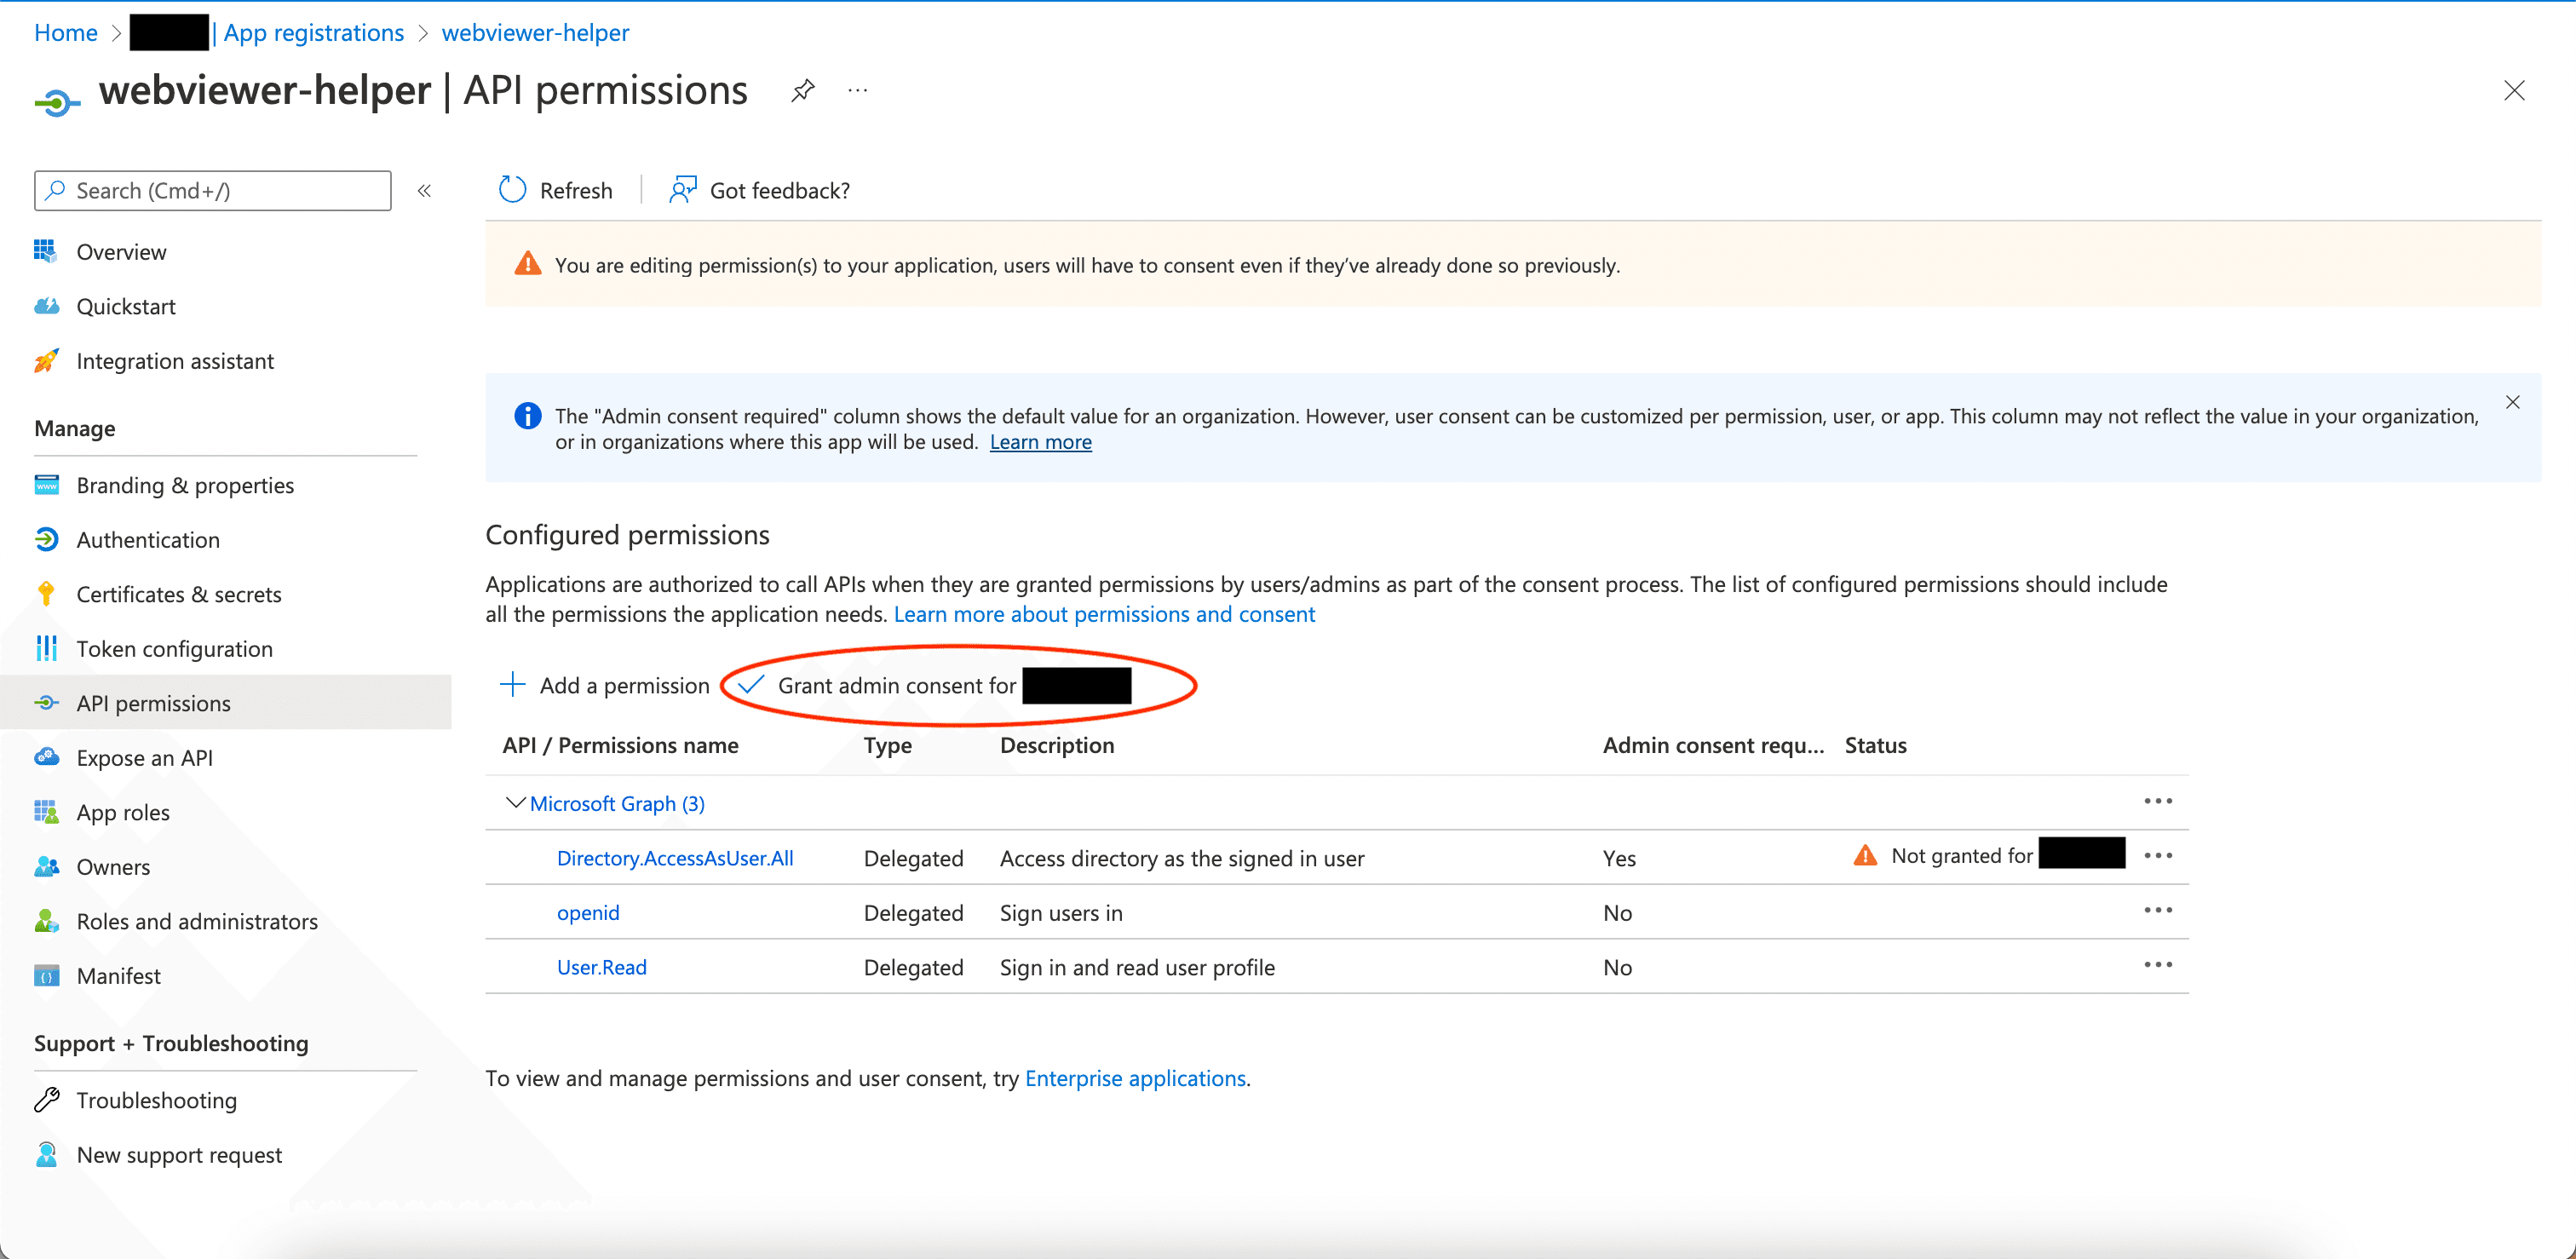
- Grant admin consent if needed.
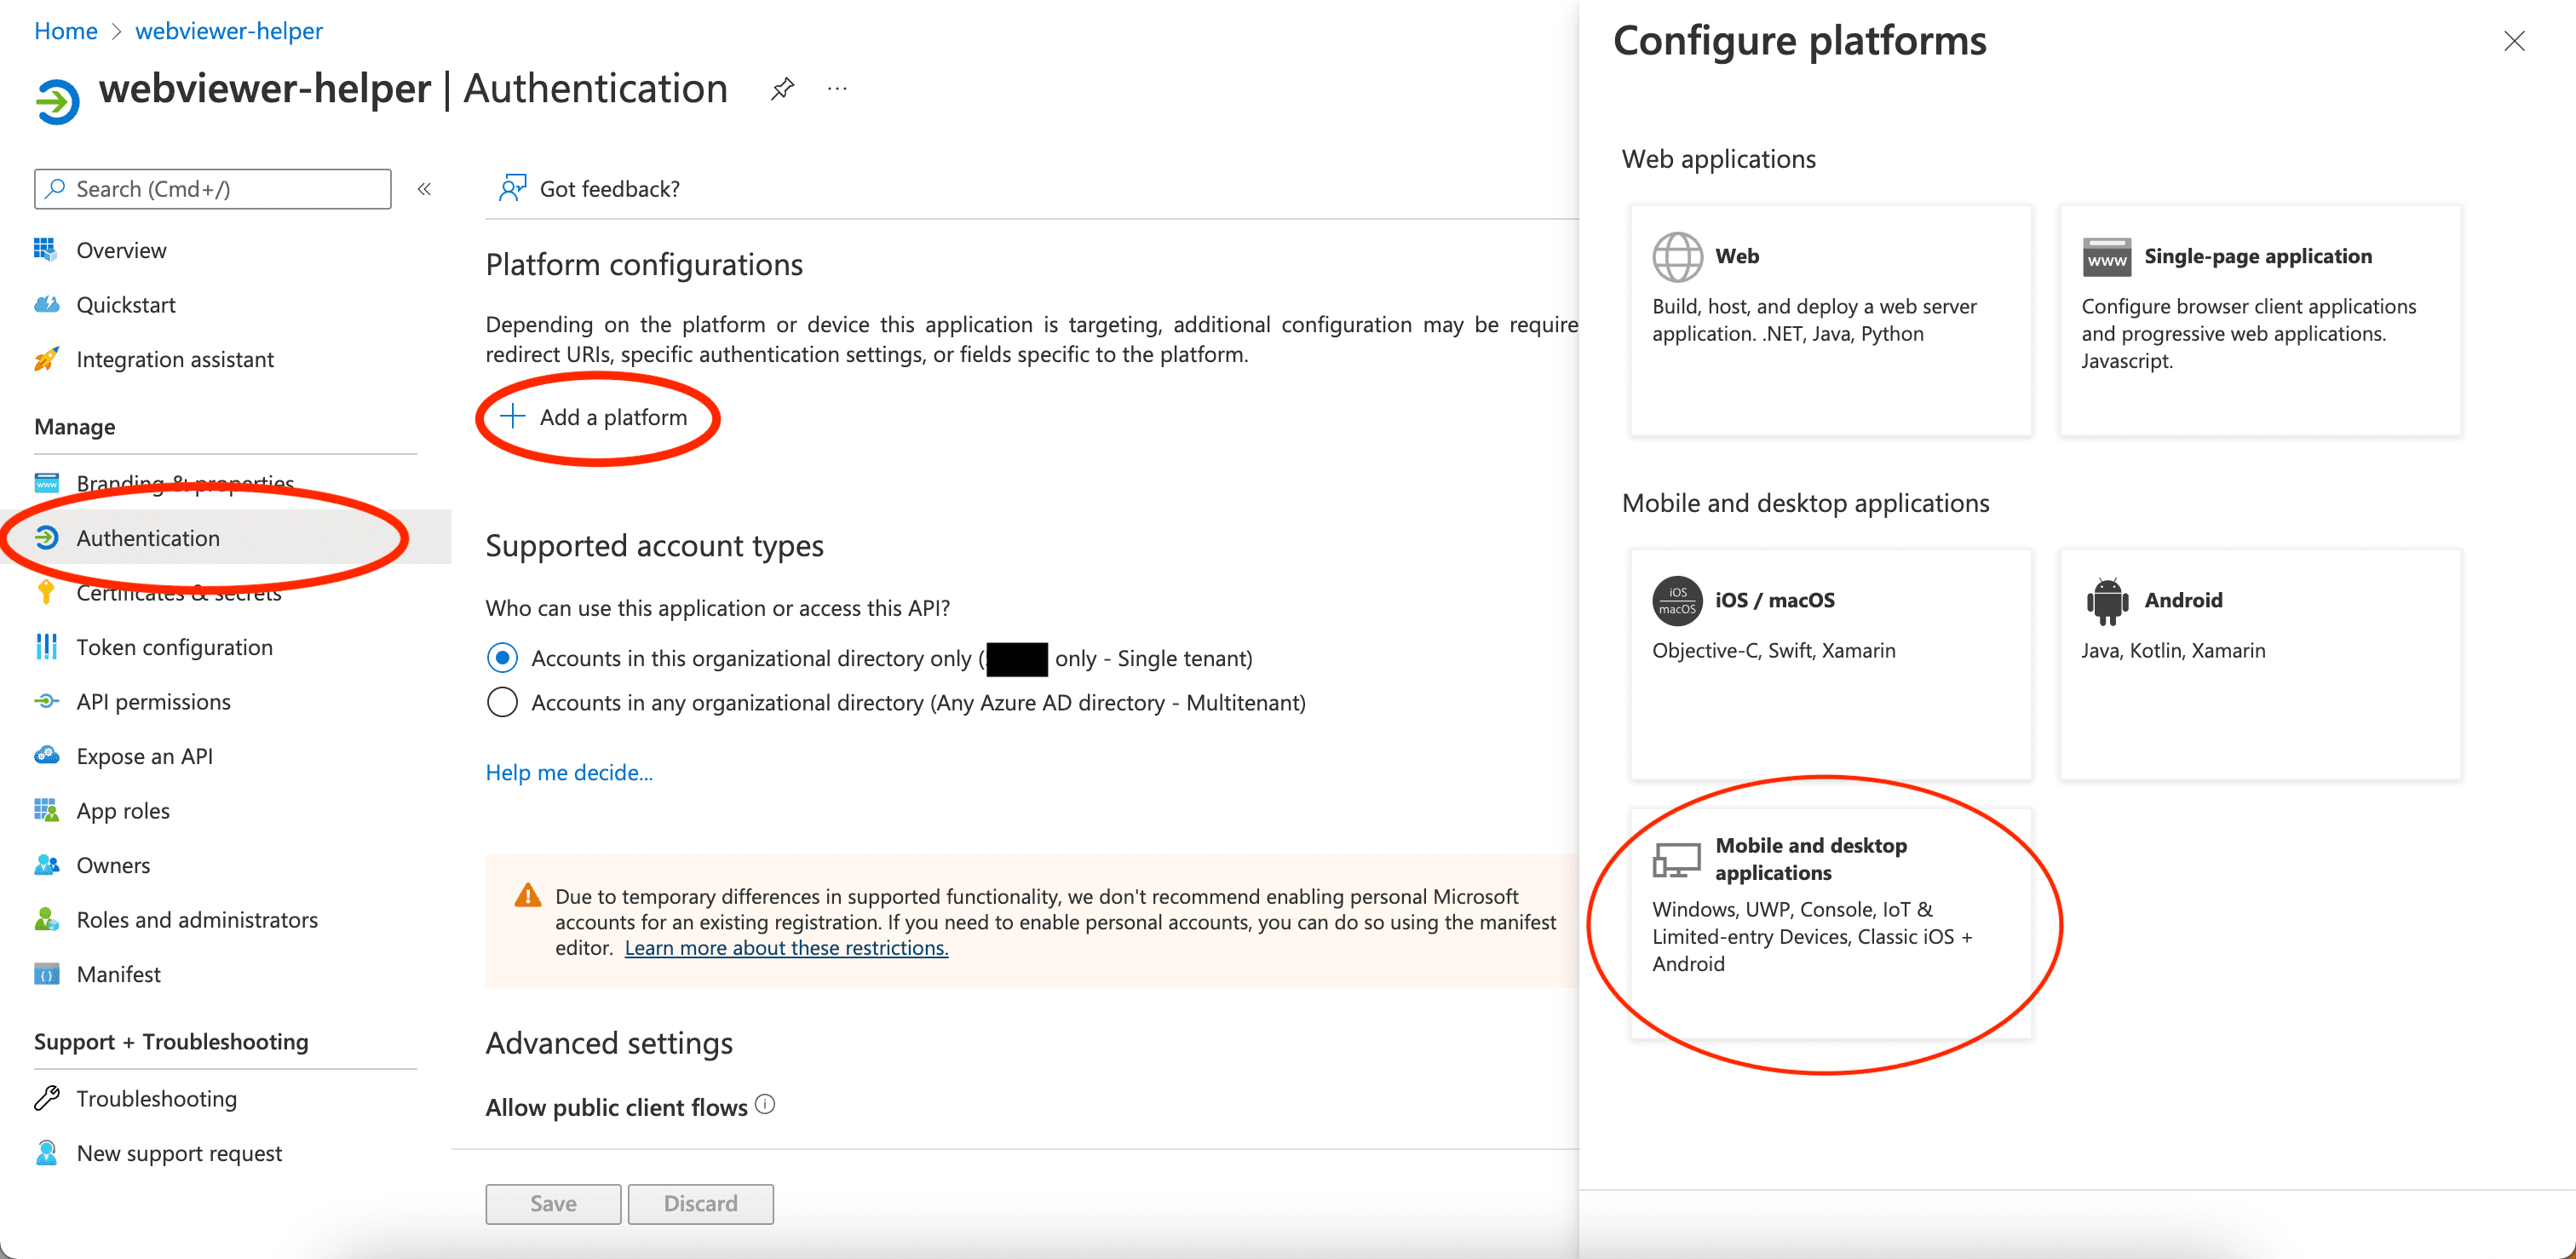
- Select Authentication on the left panel, click Add a platform and select Mobile and desktop applications.
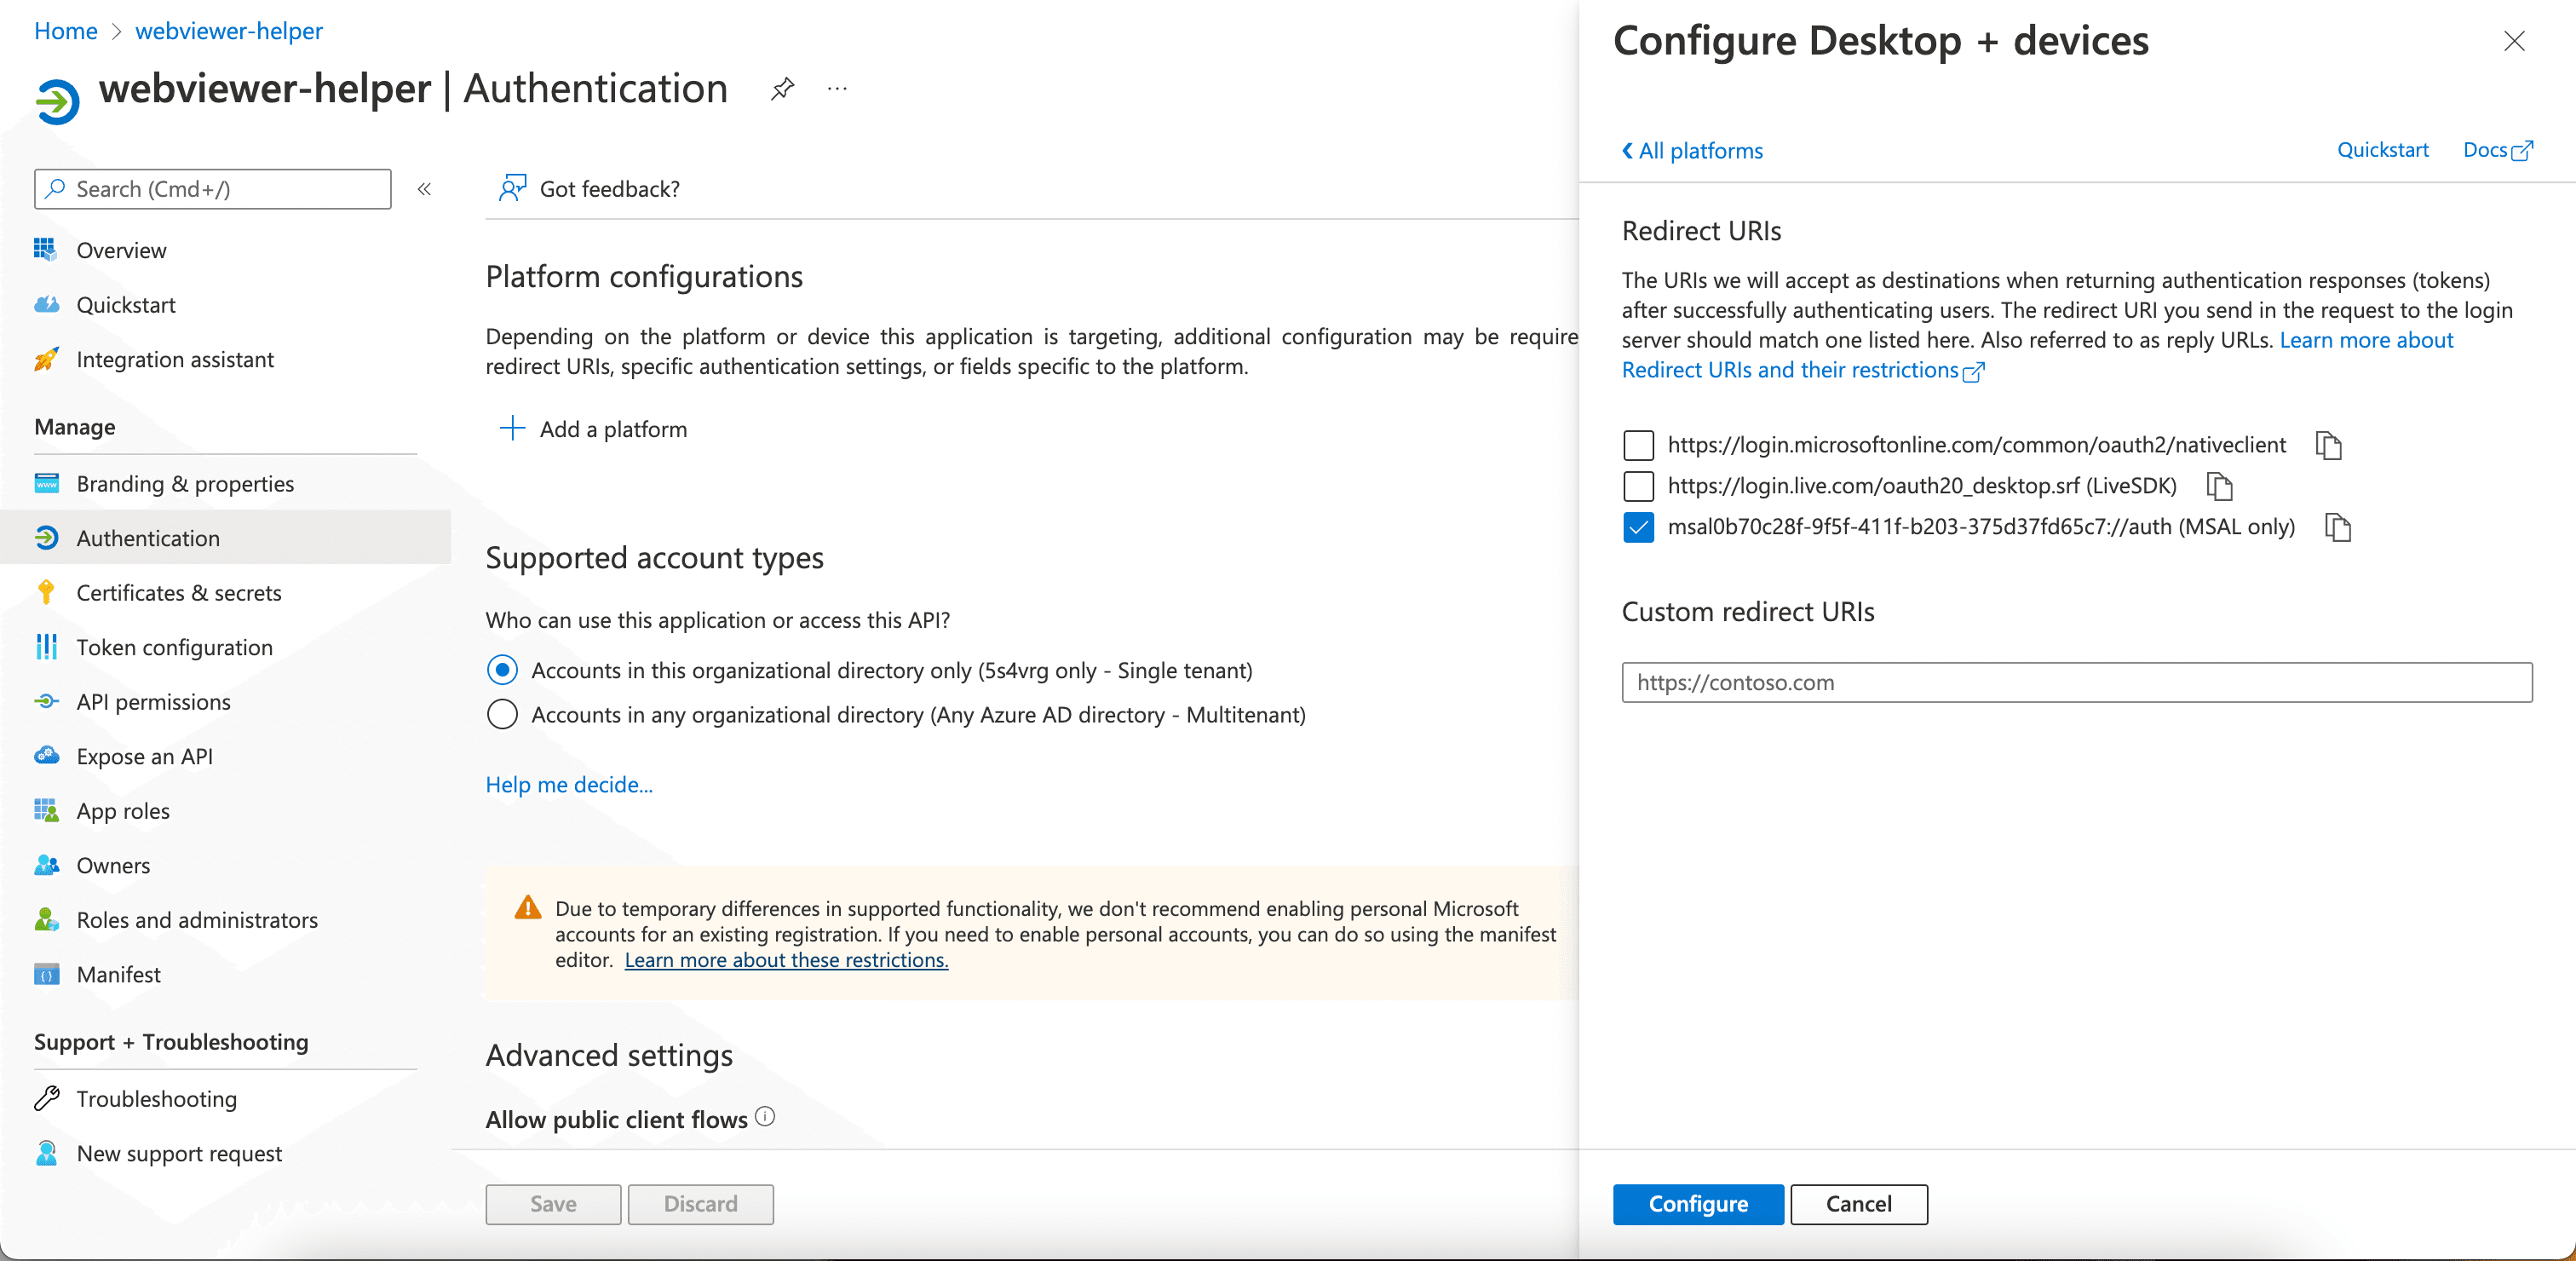
- Select the MSAL only for the Redirect URIs.
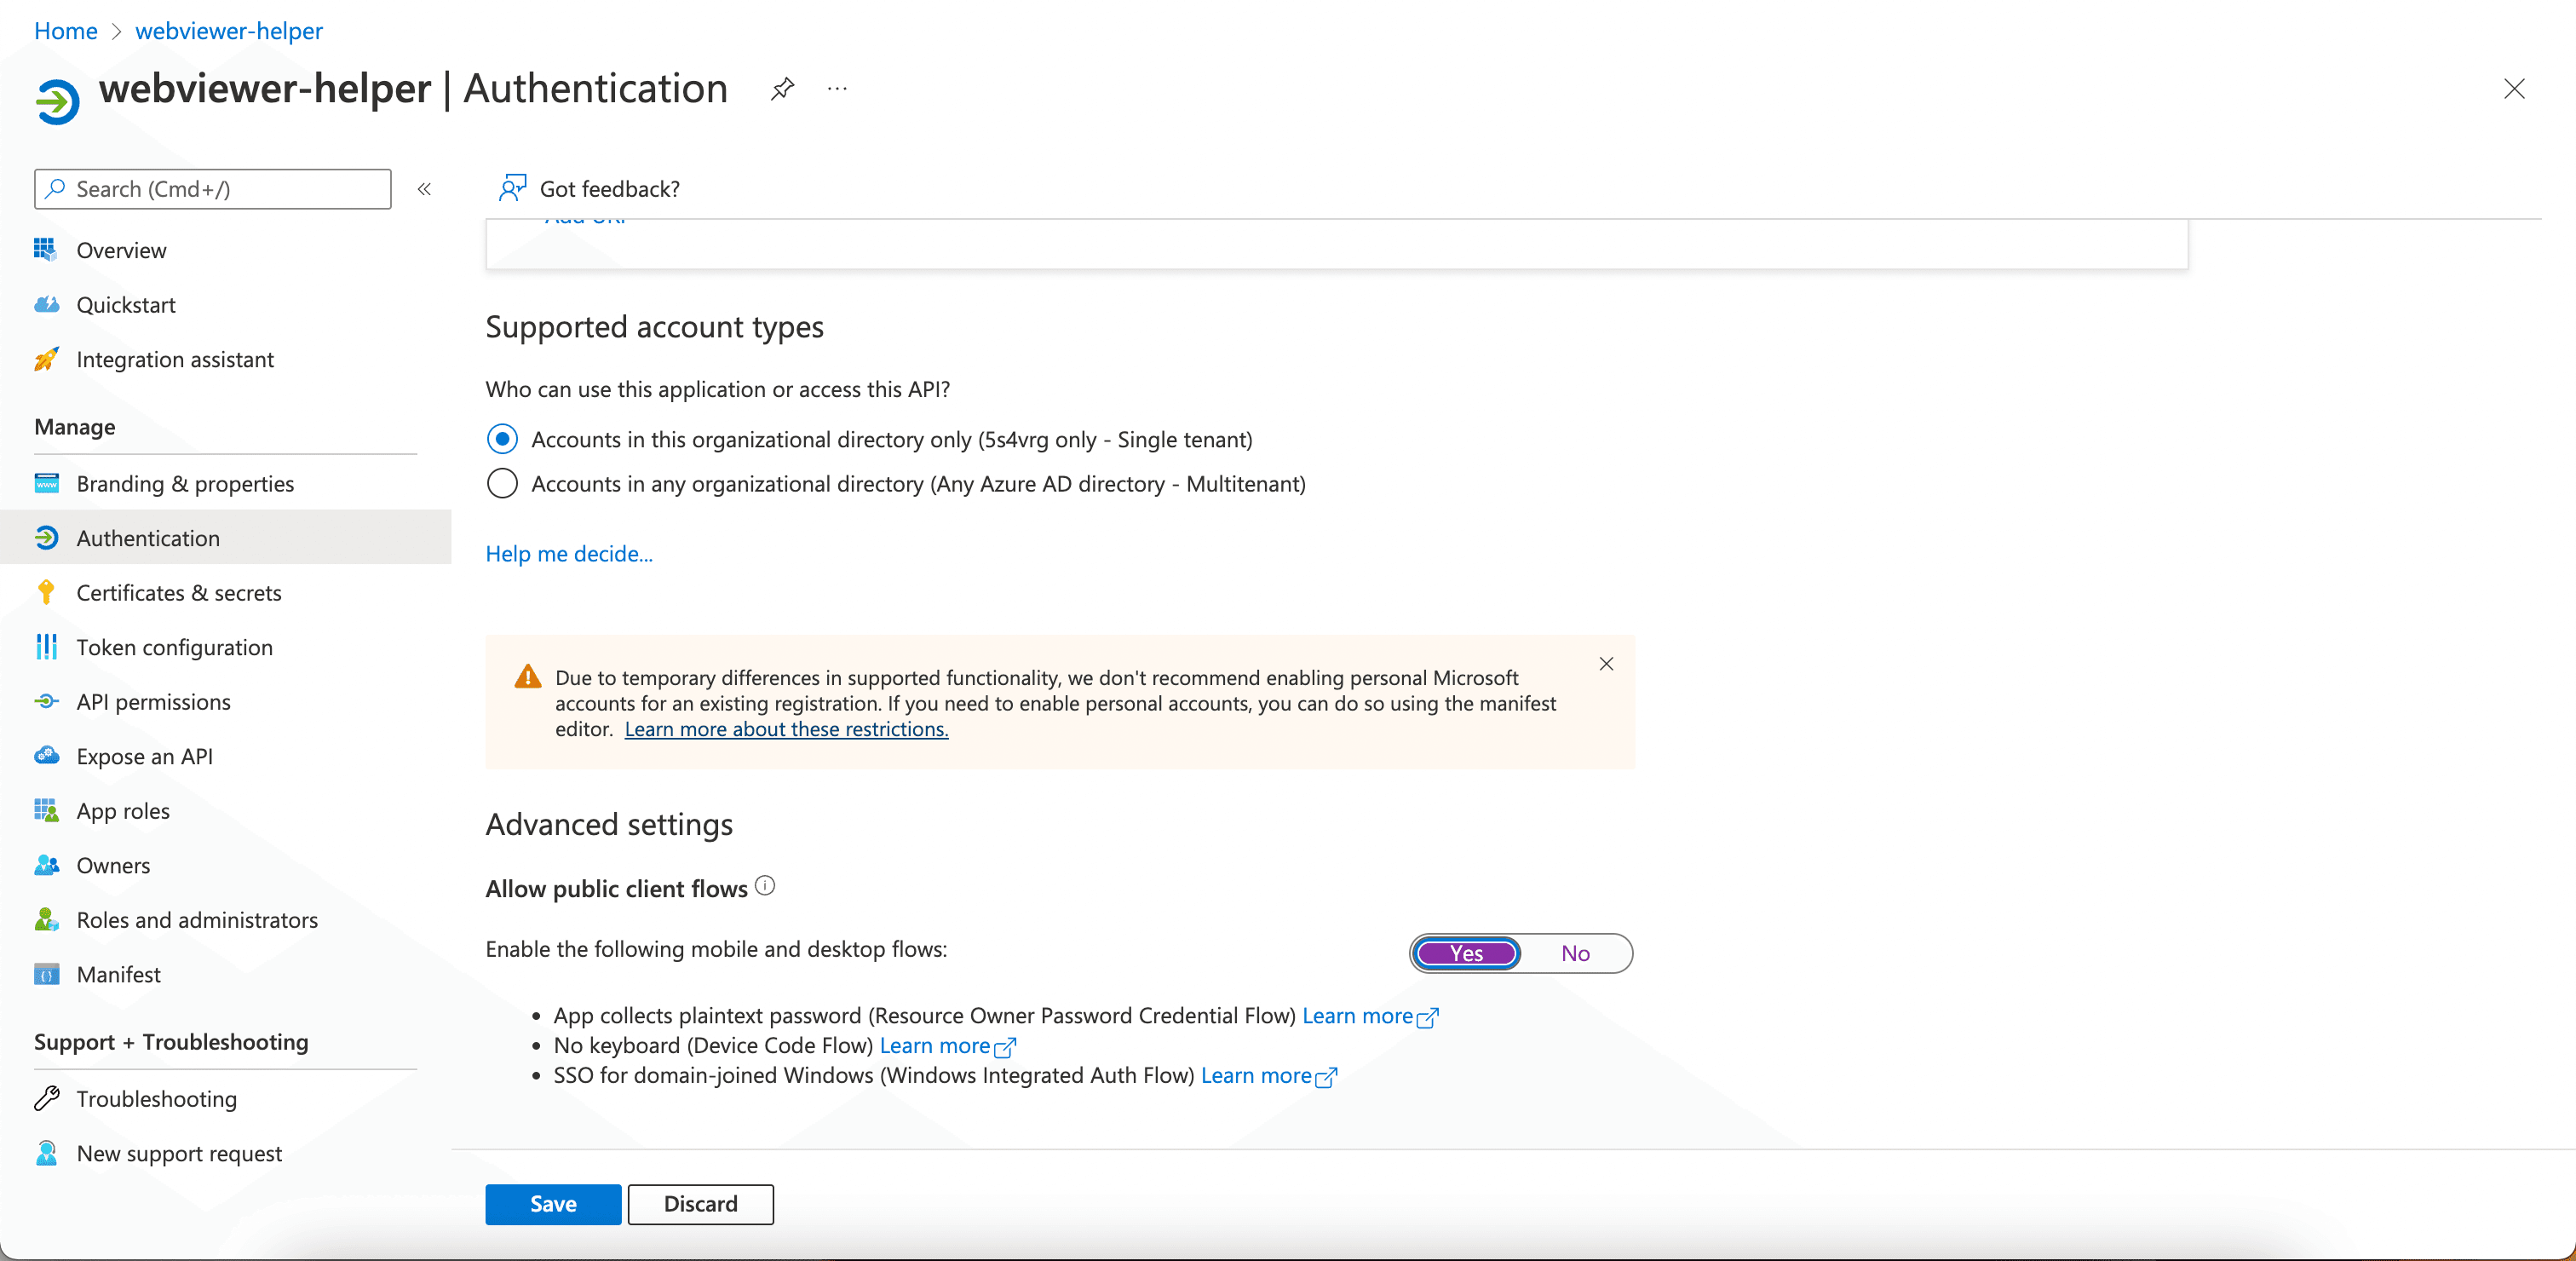
- Select Yes in Allow public client flows and click Save.
Project Setup
- Git clone from the repository: https://github.com/ApryseSDK/webviewer-filehandler
sh
- Run
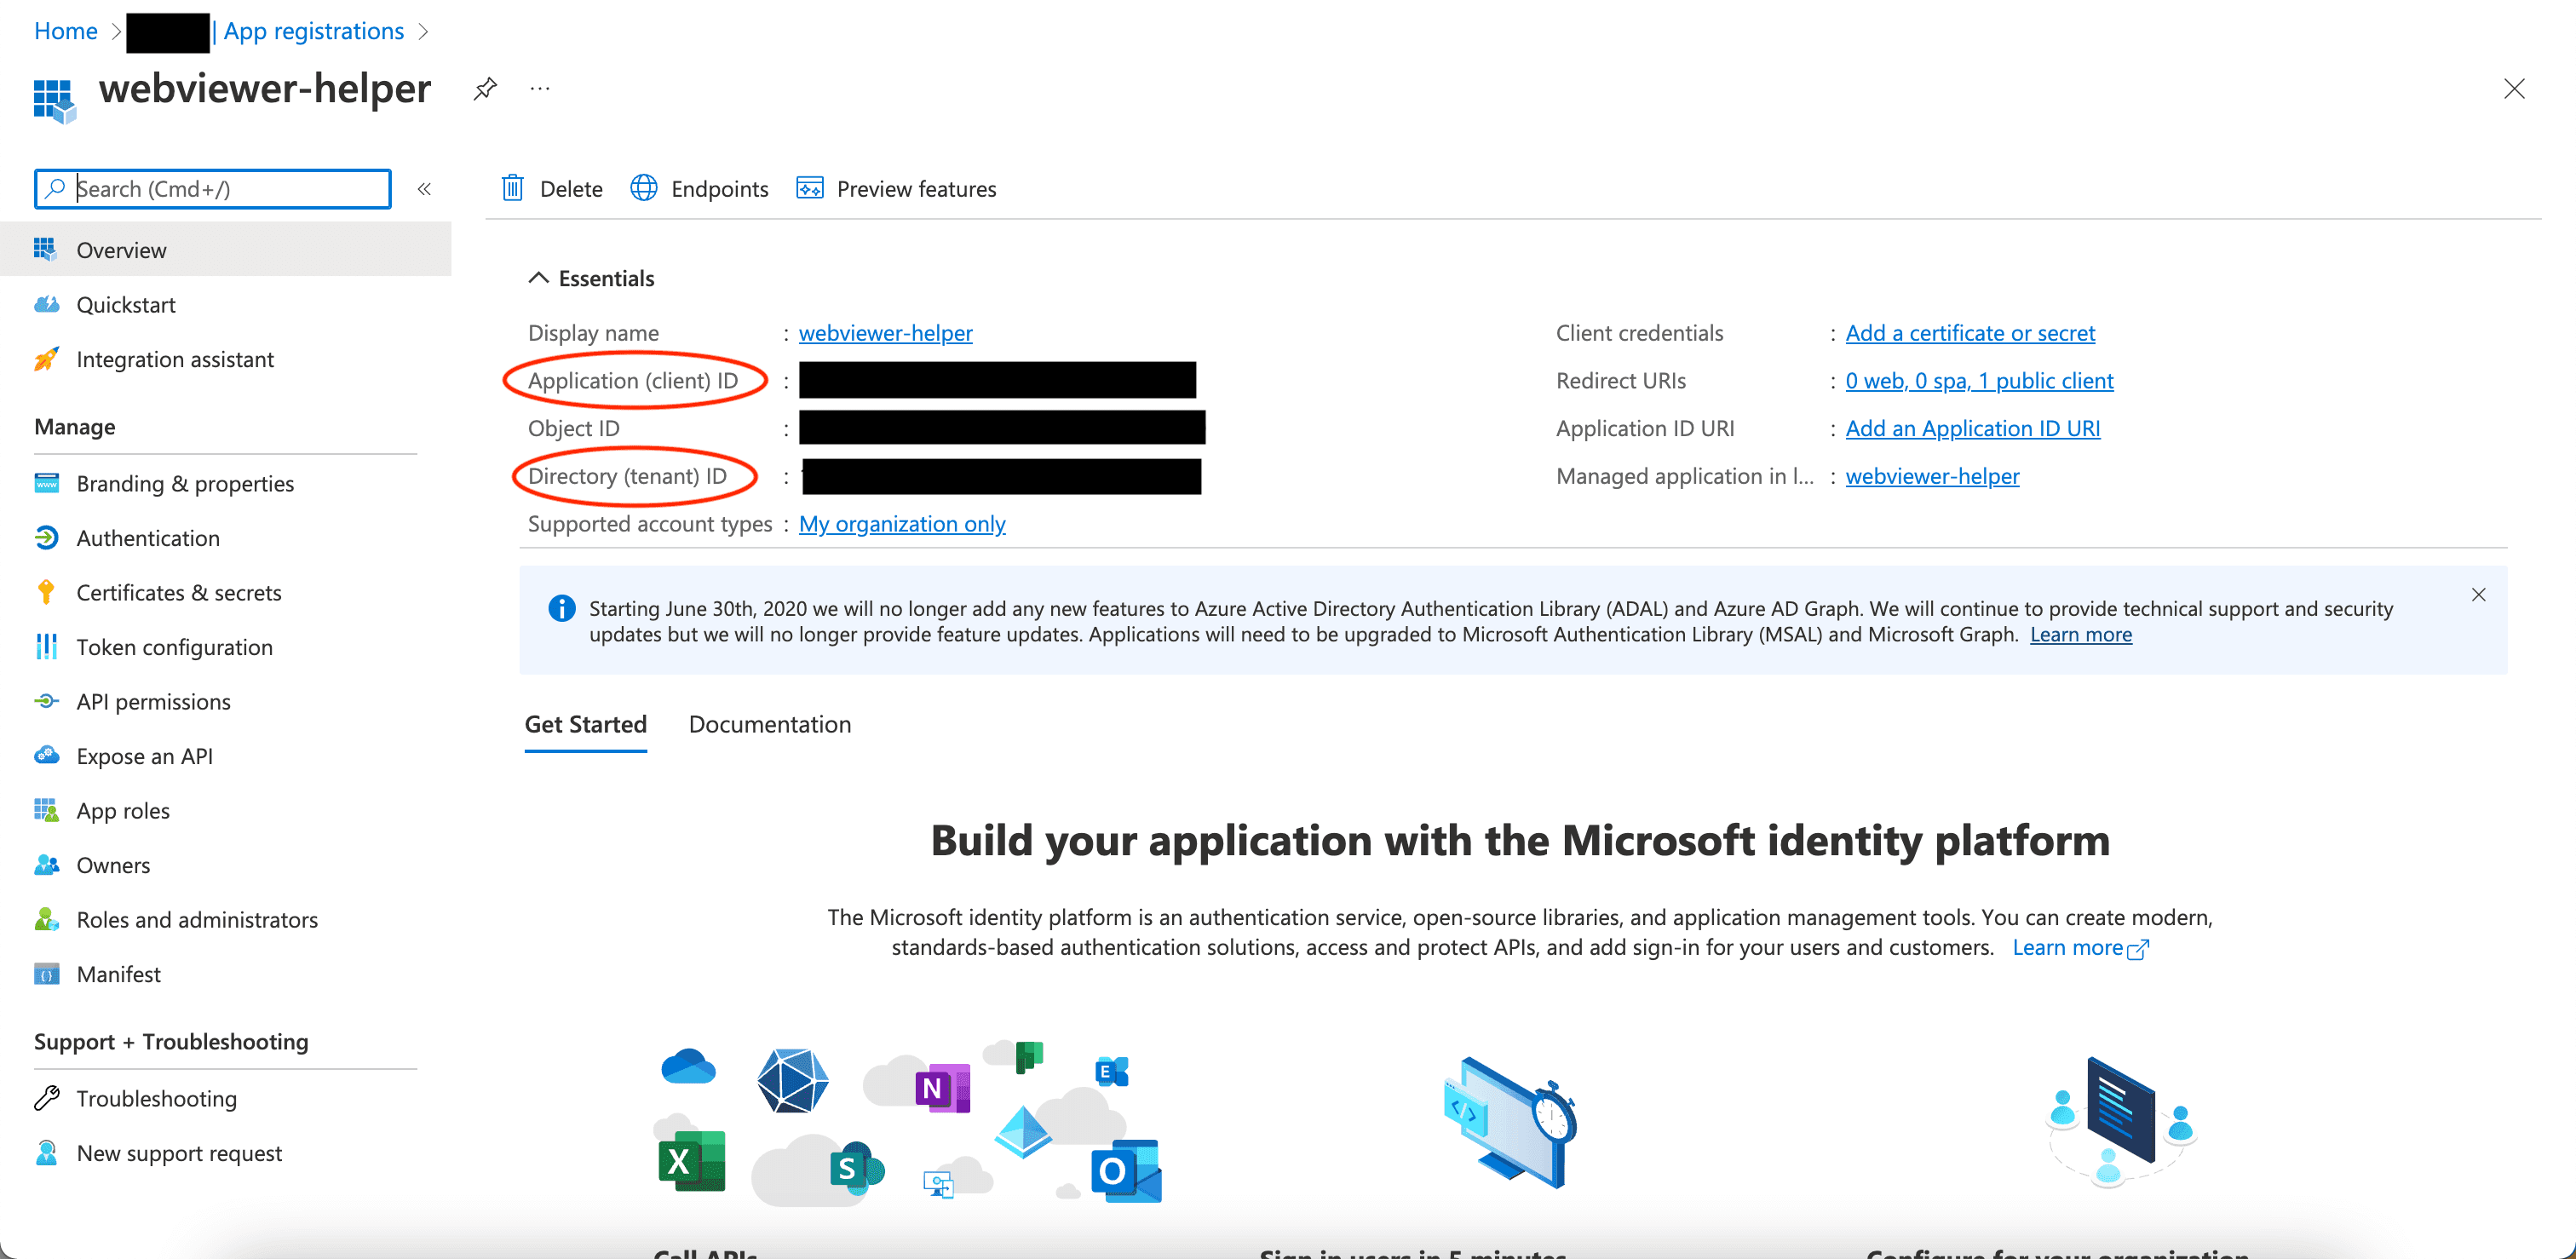
npm run setup:devto start setting up app registration for the Webviewer File handler demo. In the terminal, Enter the client id and tenant id of the helper app when prompted. You could access the client id and tenant id in the webviewer-app in Azure Active Directory.
sh
- The terminal should provide a link for you to enter verification code from Microsoft. Open the link in the browser and enter the given code.
- A
.envfile should be created in the project root folder when the app registration is done. It should contain the following parameter:
sh
- Run
npm run start:devto start the local server.
Resetting cache in SharePoint
It usually takes about 24 - 48 hours for the new file handler to be effective in Sharepoint. However, microsoft provides a API to refresh the cache. (Resetting the file handler cache)
In order to get the access token for resetting Sharepoint cache, we can start from getting the code. Before using the API, we need to enable it in the API permissions under the application we registered (In this case, it's "Webviewer Demo").
- Go to Azure Active Directory and select the application we registered.
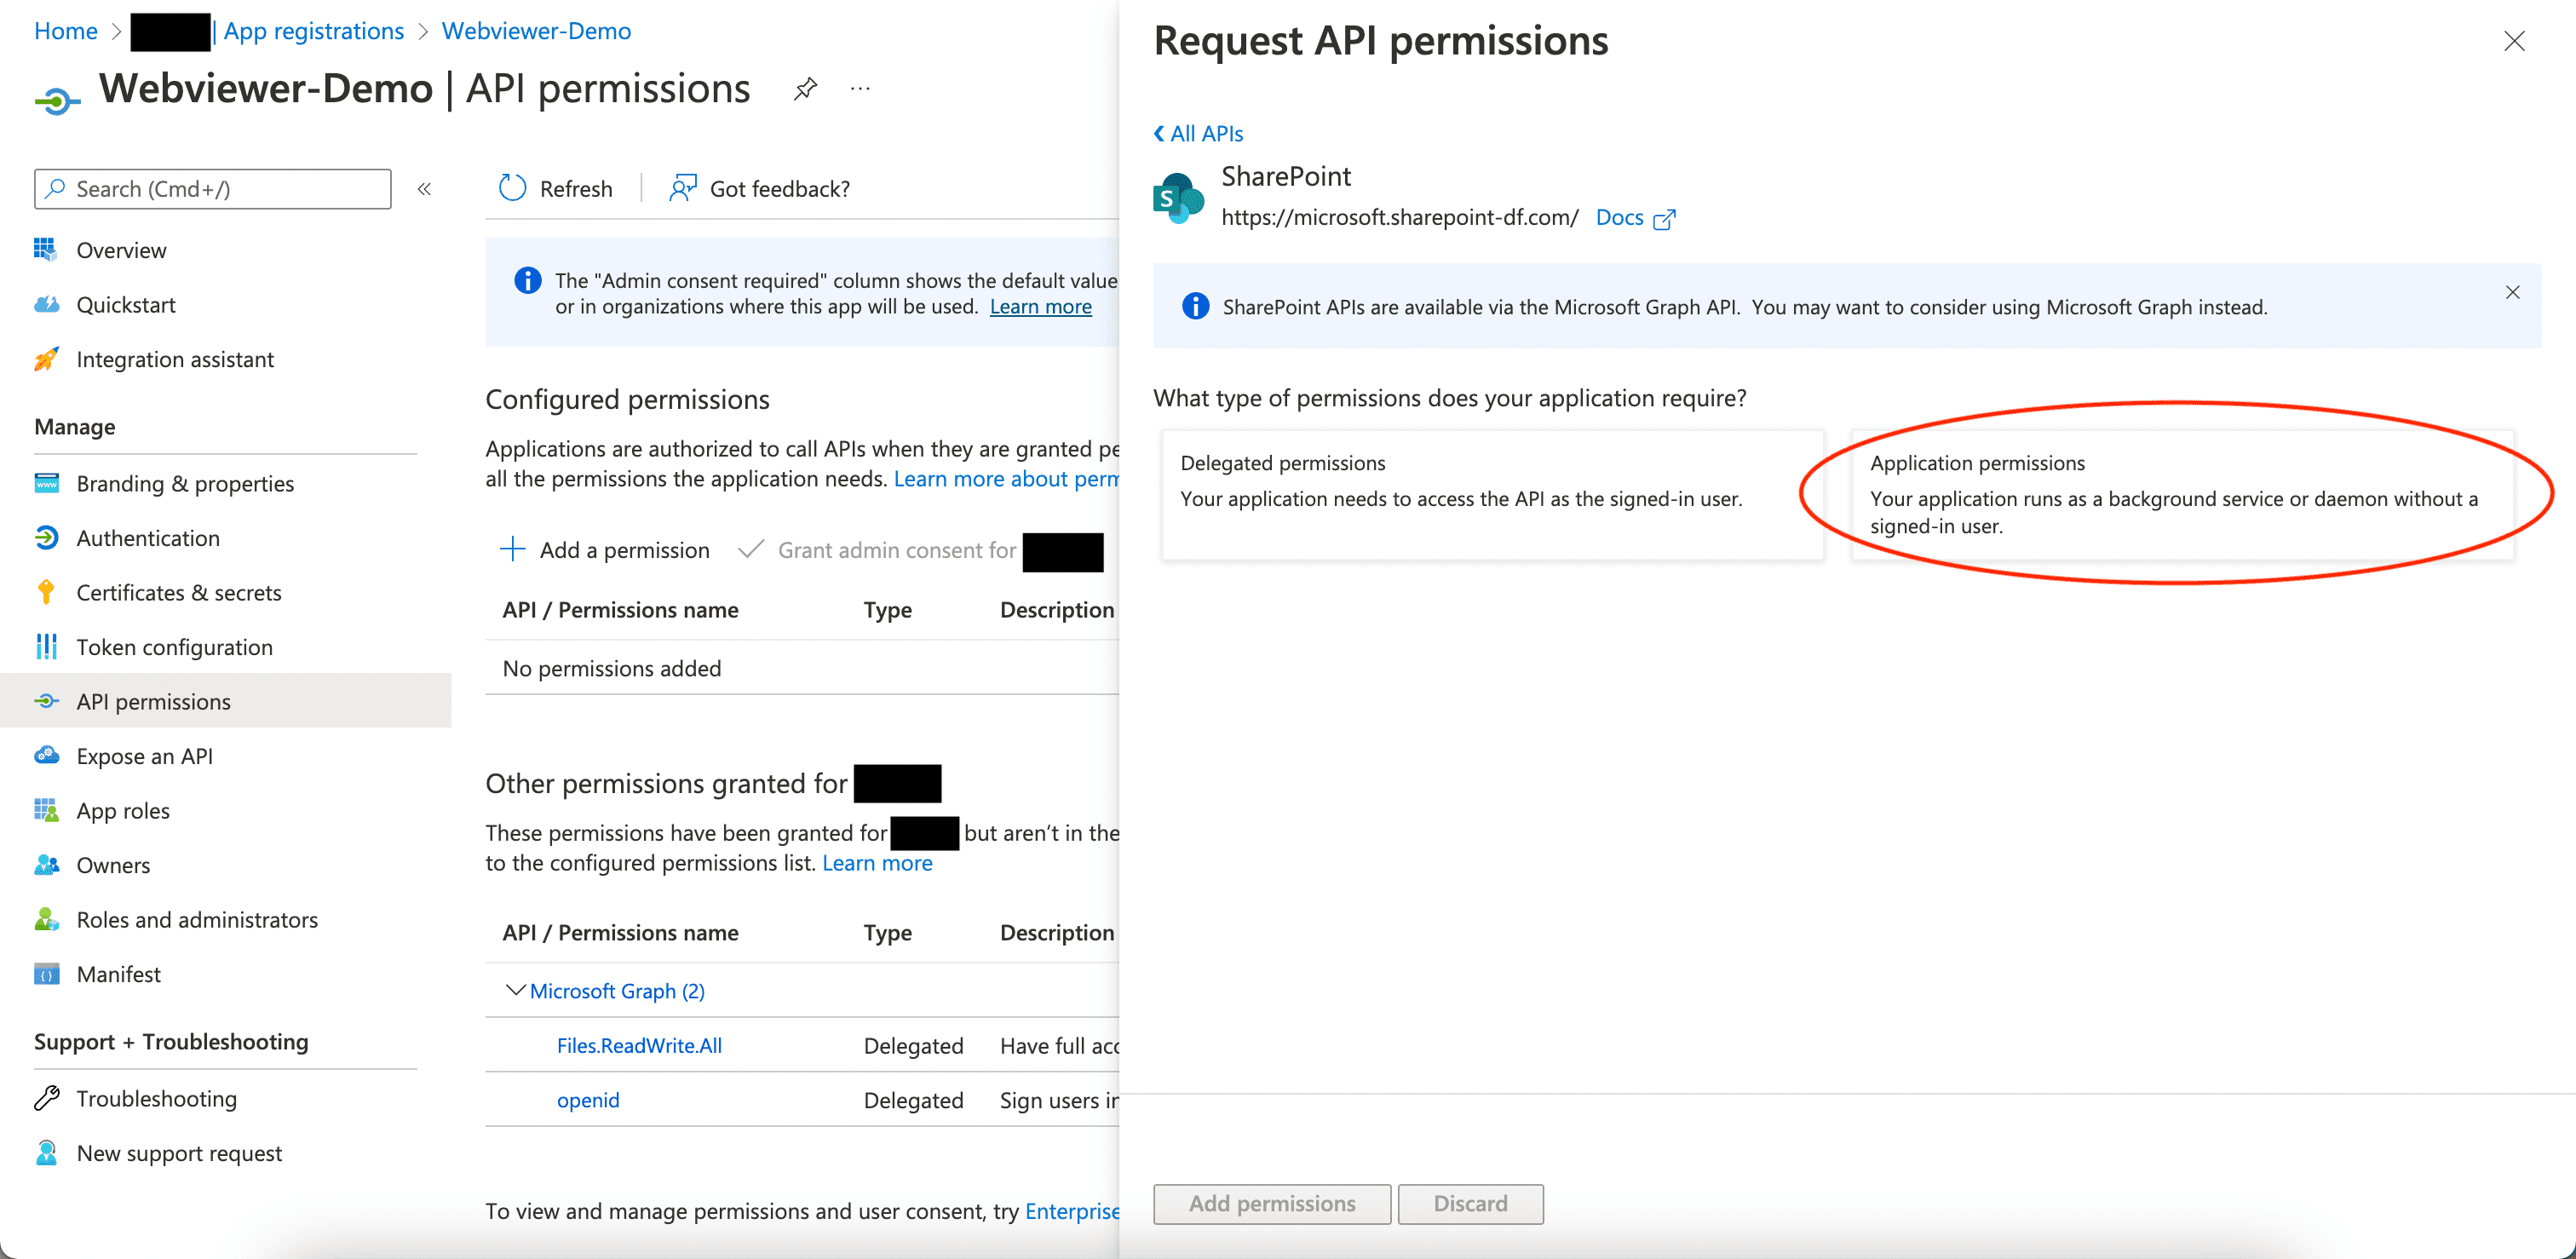
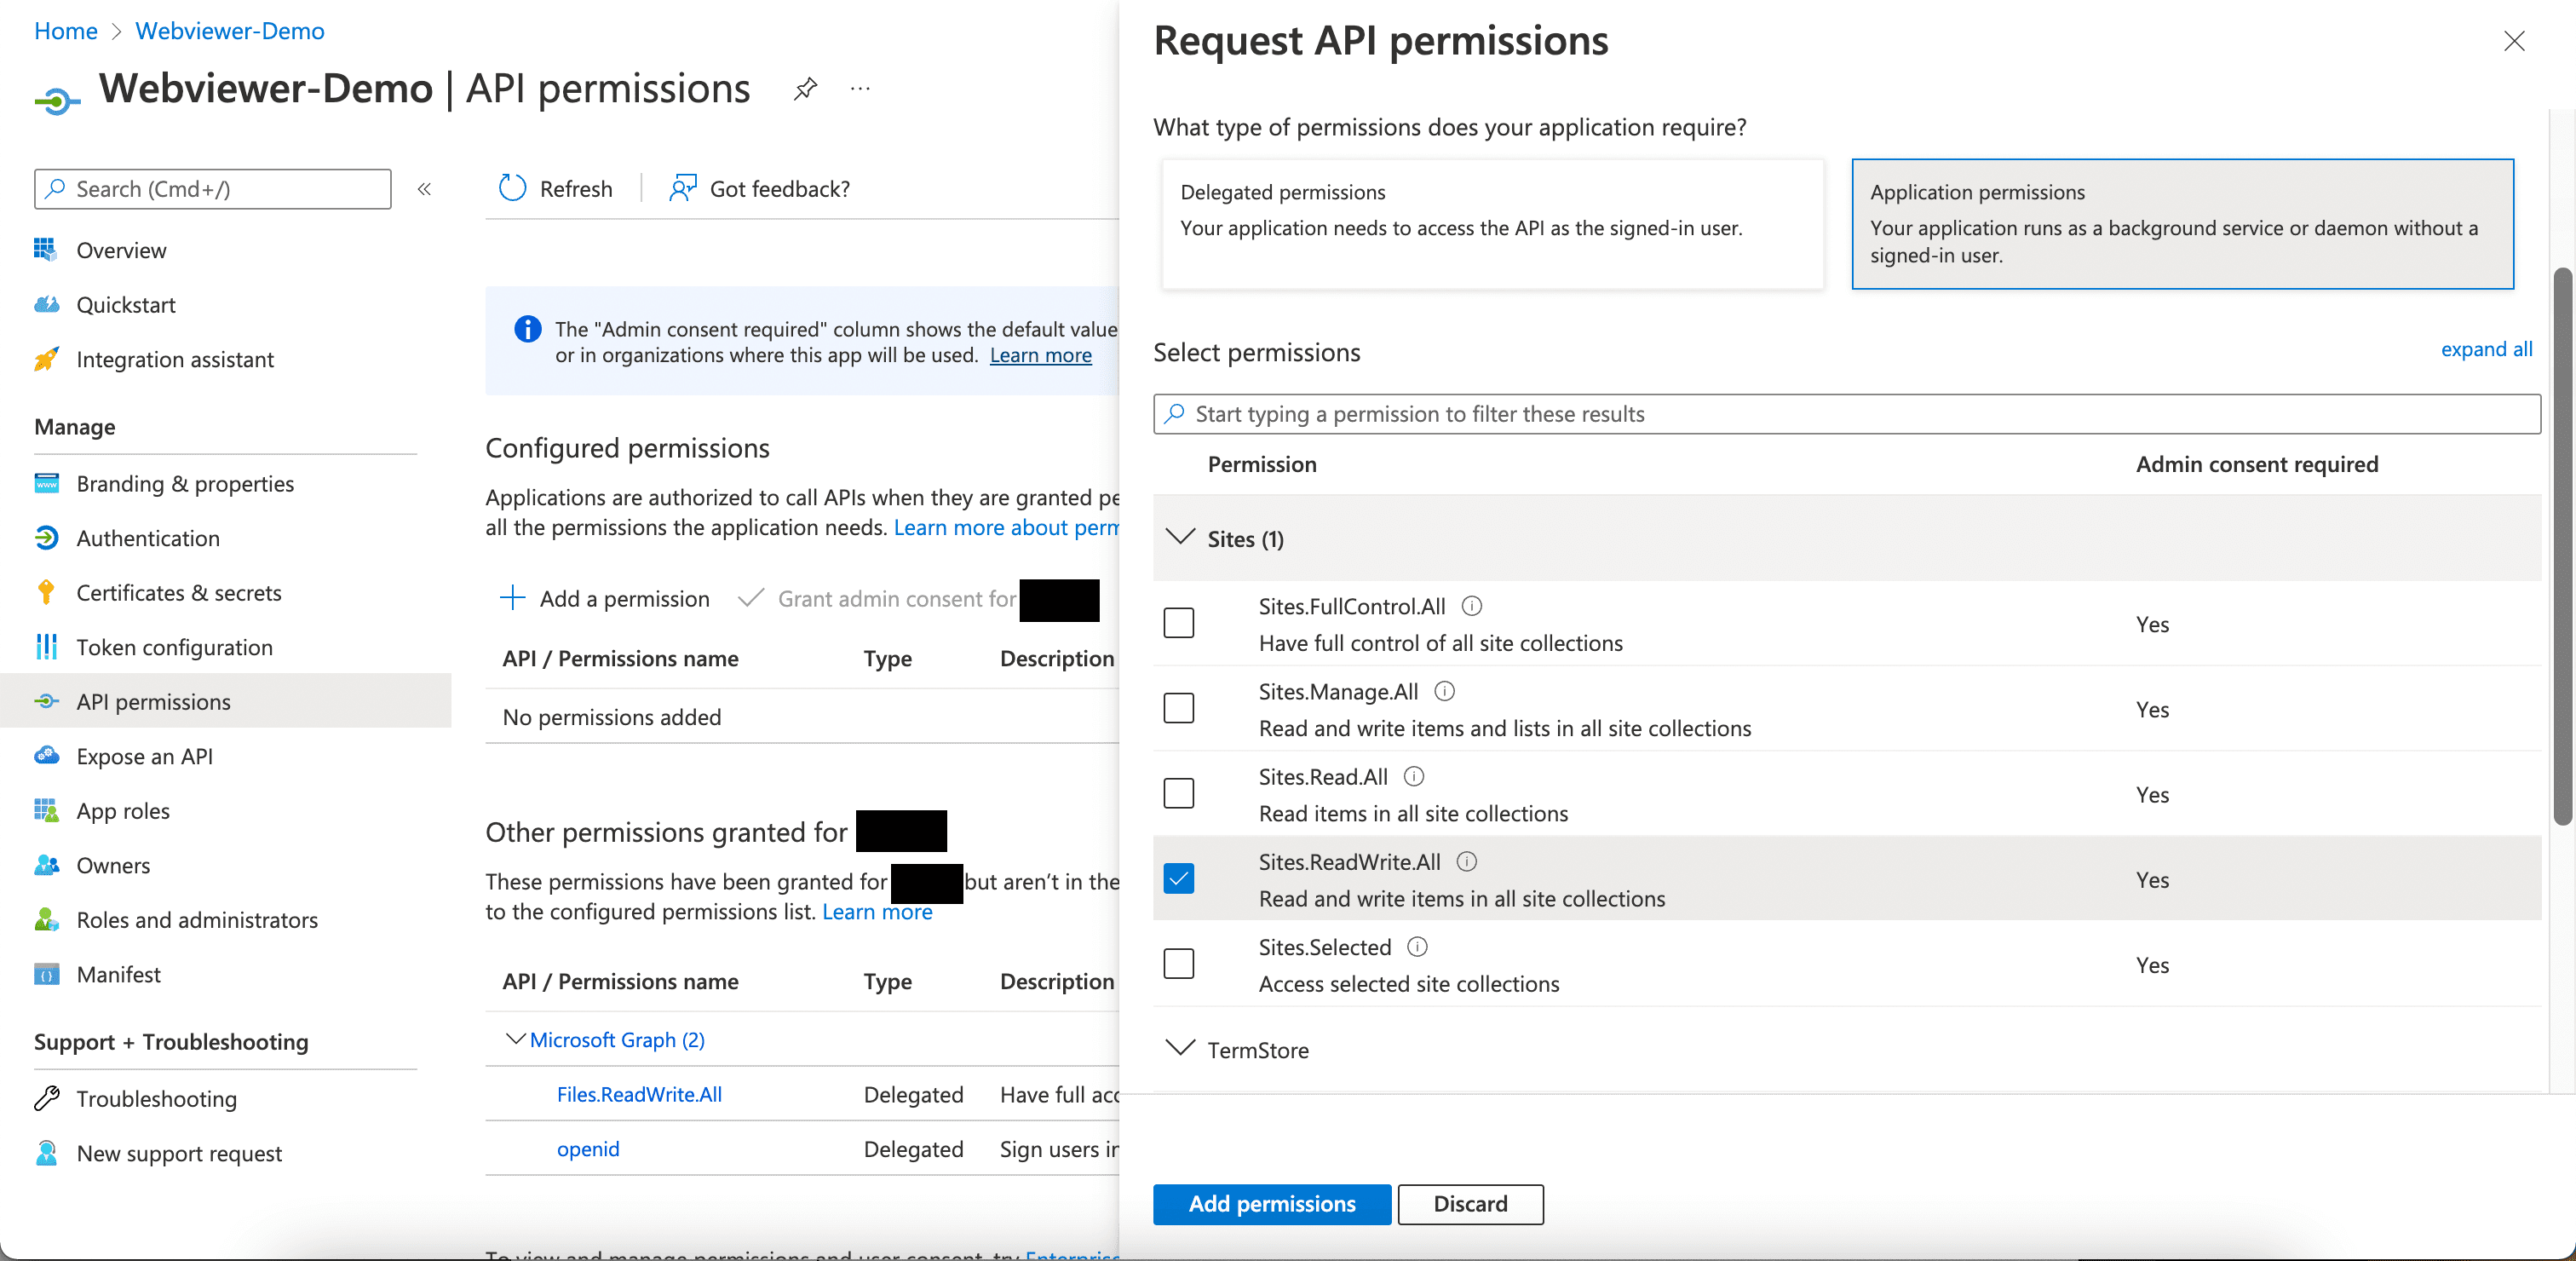
- Select API permissions on the left sidebar and click + Add a permission. In Request API permissions, select Sharepoint -> Application permissions -> Sites.ReadWrite.All, and add the permission.
- If necessary, grand admin consent for the permissions.
- Direct to
http://localhost:3000/app-reset-cache. You'll be requested to login twice with your microsoft account during the process. Once it's reset successfully, you will seeSuccessfully reset the cacheon the page.
Deployment in production
After the development, you may want to deploy your server and redirect the filehandler to the hosted server.
You can achieve this by change the Manifest in your application.
Change the logoutUrl with your new domain but with the same path. Change the url in the object of the array replyUrlsWithType.
Did you find this helpful?
Trial setup questions?
Ask experts on DiscordNeed other help?
Contact SupportPricing or product questions?
Contact Sales