Product:
Creating a custom PDF viewer tool in Android
The sample code for this guide can be found at our GitHub repository.
Overview
The tools package provides several base classes that can be extended to create and add custom tools to the viewer. Click here for a complete list of tools.
In this guide, we will create a custom rectangular cloudy annotation tool for either PDFViewCtrl or PdfViewCtrlTabHostFragment2. It is recommended to read the following articles before continuing this guide:
Step 1: Pick a base tool class to inherit
From this tool hiearchy list, find a base tool class to extend. For example, here are some of the more commonly used base tool classes:
Tool | Description |
|---|---|
Creates a text markup annotation. Derive from this class to create annotation on text. Override | |
Draws and creates a rectangle annotation. Derive from this class to draw rectangles, for example, checkbox form field. Override | |
Draws and creates an ellipse annotation. Derive from this class if draw ellipses. Override | |
Creates various shape annotations such as rectangle, ellipse, ink line and more . Use this class if none of the above works for you. Override |
For our custom rectangular cloudy annotation tool, we'll be creating a class called CustomTool that inherits from RectCreate.
Step 2: Override the base class methods
- In the
CustomToolclass, override thegetToolMode()method. This method must return a custom tool mode, which can be created by callingToolManager.ToolMode.addNewMode(int)and specifying the custom tool's annotation type. - Afterwards, override the feature specific methods and implement the desired custom behavior. Add
@Keepso the tool can work properly in release mode. For example here is a custom tool that handles creating rectangular cloudy annotations:
Step 3: Register the custom tool in ToolManager
All tools are controlled by an instance of ToolManager and it will need to know about the new custom tool before the tool can be used in the viewer.
- A
PdfViewCtrlTabHostFragment2contains an internal reference toToolManager. A custom tool can be added to this internalToolManagerby using theToolManagerBuilderclass. AToolManagerBuilderobject is passed to an instance ofViewerConfigand used to initialize the viewer with the custom tool. The following method can be called in an activity to add a custom tool to aPdfViewCtrlTabHostFragment2:
Option 1: Register using PdfViewCtrlTabHostFragment2
- Alternatively if
PDFViewCtrlis used and set up with aToolManager, you can simply add the custom tool directly toToolManagerby calling:
Option 2: Register using PDFViewCtrl
You can learn more about setting up PDFViewCtrl with ToolManager in the ToolManager customization guide .
Step 4: Use the custom tool
To use the custom tool, set it to an instance of ToolManager as follows:
Option 1: Using PdfViewCtrlTabHostFragment2
Option 2: Using PDFViewCtrl
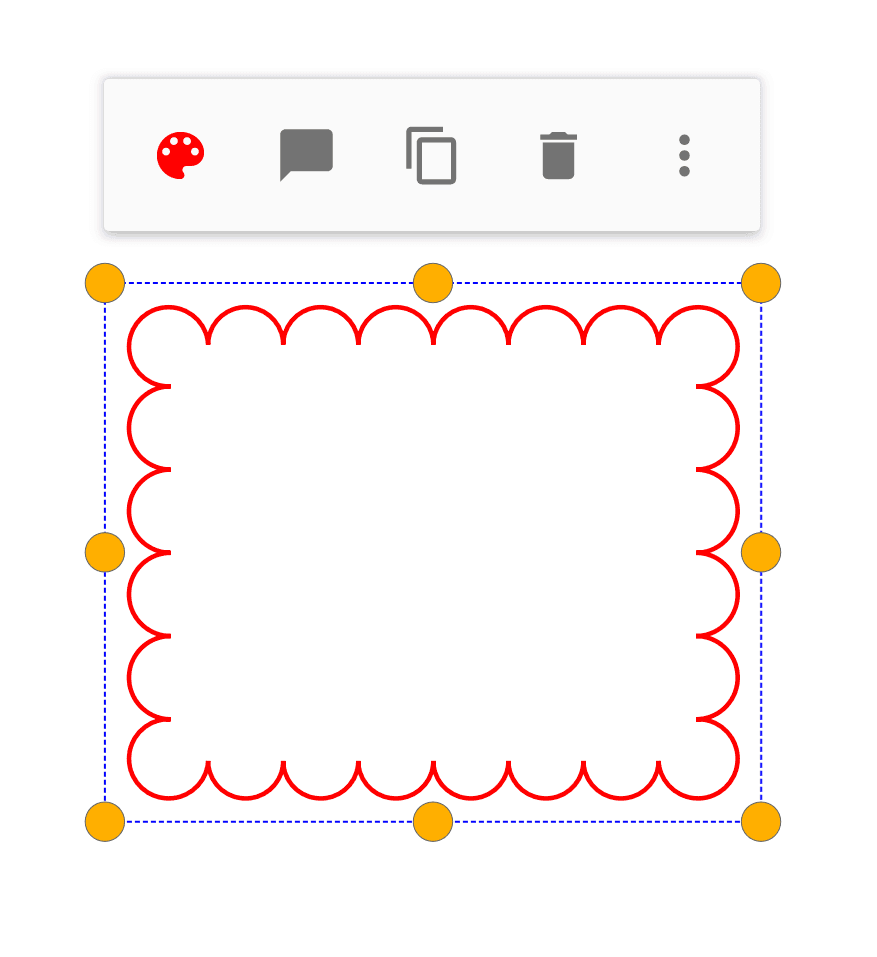
Now, when using the custom tool you will see the following:

Step 5: Switch to another tool during motion events
You will be able to switch tool modes within the same tool class in response to a motion event, such as onDown(MotionEvent), onDoubleTap(MotionEvent) and so on.
In gesture event functions, if one tool switches to another tool, that motion event will continue to be executed in the next tool (see tools overview for more information). So if the custom tool wants to switch to another tool during a motion event, you can set the next tool mode by calling Tool.safeSetNextToolMode(ToolMode).
For example, let's override onSingleTapConfirmed in CustomTool.java, and set the next tool to be TextHighlightCreate:
Now in response to a single tap while using your custom tool, it will switch to the TextHighlightCreate tool.
If you need to save the ToolMode and retrieve it at a later time, you can call toString() on the ToolMode object and retrieve the instance later by calling ToolMode.valueOf(String).
Did you find this helpful?
Trial setup questions?
Ask experts on DiscordNeed other help?
Contact SupportPricing or product questions?
Contact Sales