Product:
AnnotationManager
Annotation Types
Customize
Custom Annotations in WebViewer
Custom annotations are non-standard annotations typically defined by the user and beyond the PDF specification. As such, they are only fully supported in the viewer they are implemented in. WebViewer provides the ability to create custom annotations that can be tailored to your needs. The custom annotations can even be viewed in other viewers and loaded back into WebViewer as it's custom type.
Creating the custom annotation class
Creating a class of a custom annotation is the most straightforward way to start creating a custom annotation. By extending from the CustomAnnotation class, you automatically gain the benefits of preserving the annotation in other compliant viewers.
Just to emphasize, setting the elementName on the class prototype is ncessary for your custom annotation to be properly recognized.
sh
Defining how it renders
Next, let's define the draw function on the class so that the annotation knows how to render itself. The draw function takes a canvas context and is called whenever the annotation should be drawn.
JavaScript
Registering the custom annotation
Lastly, we want to register our annotation type so that the AnnotationManager recognizes our custom type when reading and outputting XFDF.
Creating a custom annotation from an existing annotation class
Sometimes, you may want to create a custom annotation class or extend from an existing class on the fly. WebViewer provides the createFromClass API to generate custom annotation classes from an existing anntoation class. This differs from extending existing annotations since the output is a custom annotation class that receives the same benefits from extending CustomAnnotation.
JavaScript (SDK v8.0+)
You can then use our setCustomDrawHandler or setCustomSerializeHandler APIs to change how the annotation class behaves.
JavaScript (SDK v8.0+)
This gets you completely different, custom annotation class that will behave similar to the original while being a custom annotation.
JavaScript (SDK v8.0+)
You will still need to register this annotation.
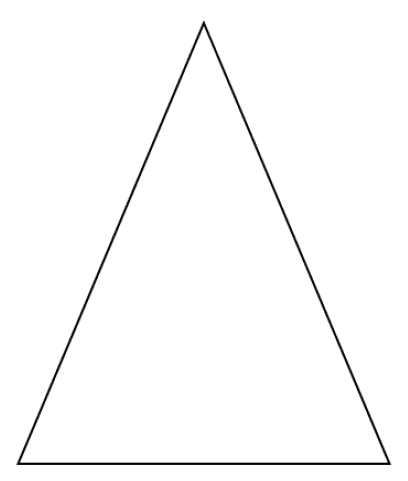
Stamp image settings
You might have noticed if you open this custom annotation in another viewer, the triangle edges are cut off and it may look lower res. This is because the custom annotation is saved as a stamp annotation and the edges of the triangle are rendered past the bounds of the annotation.
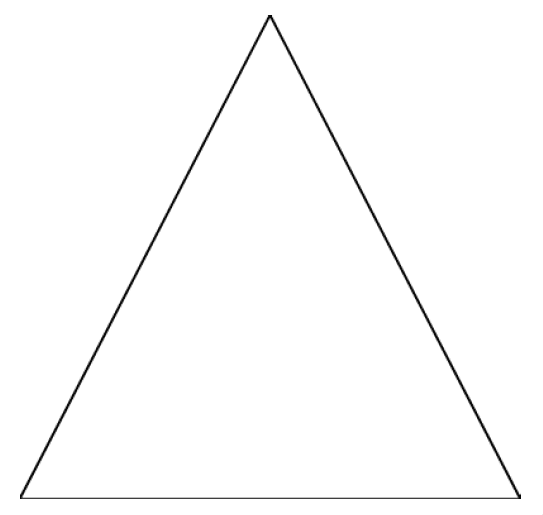
There are two static properties you can tweak to adjust this: OutputImagePadding and QualityScale.
JavaScript
Please note that adding too much padding may scale down the perceived image. These options will not affect your WebViewer as the custom render logic is available there.
Using Serialized Data
Using the annotation's custom data is useful for storing custom data. With CustomAnnotation, there is a SerializedData property that will automatically save the data attached to it. It is better to use this for primitive values rather than for complex objects.
JavaScript
Saving custom XFDF
There may be some cases where you would prefer the XFDF to reflect the actual type of the custom annotation and not a stamp. For example, if you are only saving the XFDF of the annotations as opposed to the document. In this case, you can switch the static SerializationType property on the CustomAnnotation class from STAMP to CUSTOM. Please note that this will affect annotations of the same type and the custom XFDF will be discarded when merging with the document. If you are downloading the document, be sure to switch it back to stamp temporarily.
JavaScript
Instead of a stamp in the XFDF:
XML
Your output XFDF should then look like this:
XML
Next steps
Read the full tutorial on how to create a custom triangle annotation or check out how to alter annotation rendering.
Did you find this helpful?
Trial setup questions?
Ask experts on DiscordNeed other help?
Contact SupportPricing or product questions?
Contact Sales